Glowing Vacuum Tube Photography
By Rob Robinette
Have comments or corrections? Email rob at: robinette at comcast dot net
I've been a photography buff for a long time so taking pictures of glowing tubes was inevitable. It took some trial and error to find camera settings that gave me what I wanted in terms of tube glow and picture clarity.
The photographs on this page are copyrighted by Rob Robinette but I grant permission to use these images in any way desired including commercial purposes as long as I am credited with the photo by "Photo by Rob Robinette" immediately before or after the image or by following print industry standards. The full size 4k jpg version of most of the photos below can be seen and downloaded by clicking on the picture. If you need the original full resolution 4592x3056 Sony .ARW raw file then email me at robinette at comcast dot net and I'll get it to you.
The blue glow seen in the photographs below is caused by the resistance of the glass tube surface so it is not an indicator of a "gassy tube" and should not be of concern--just enjoy their beauty. A gassy tube that is losing performance will cause a glow between the cathode and plates. It is caused by high speed electrons moving from the cathode to the plate striking an air molecule.
Here's my glowing tube photography technique:
You need a camera that can take long exposures. My Sony Alpha A350 digital SLR (single lens reflex) and A5000 point-and-shoot cameras can be set for up to 30 second exposures. Many cameras have a "bulb" setting where the shutter will stay open for as long as the shutter button is held down so that will work too but you will have to time the exposure manually. Most decent point-and-shoot compact cameras allow for long exposure. If you can't find your camera's operating manual to check for this capability you can always Google the model number (on the bottom of the camera) + "owners manual."
You must use a tripod for the long exposures required.
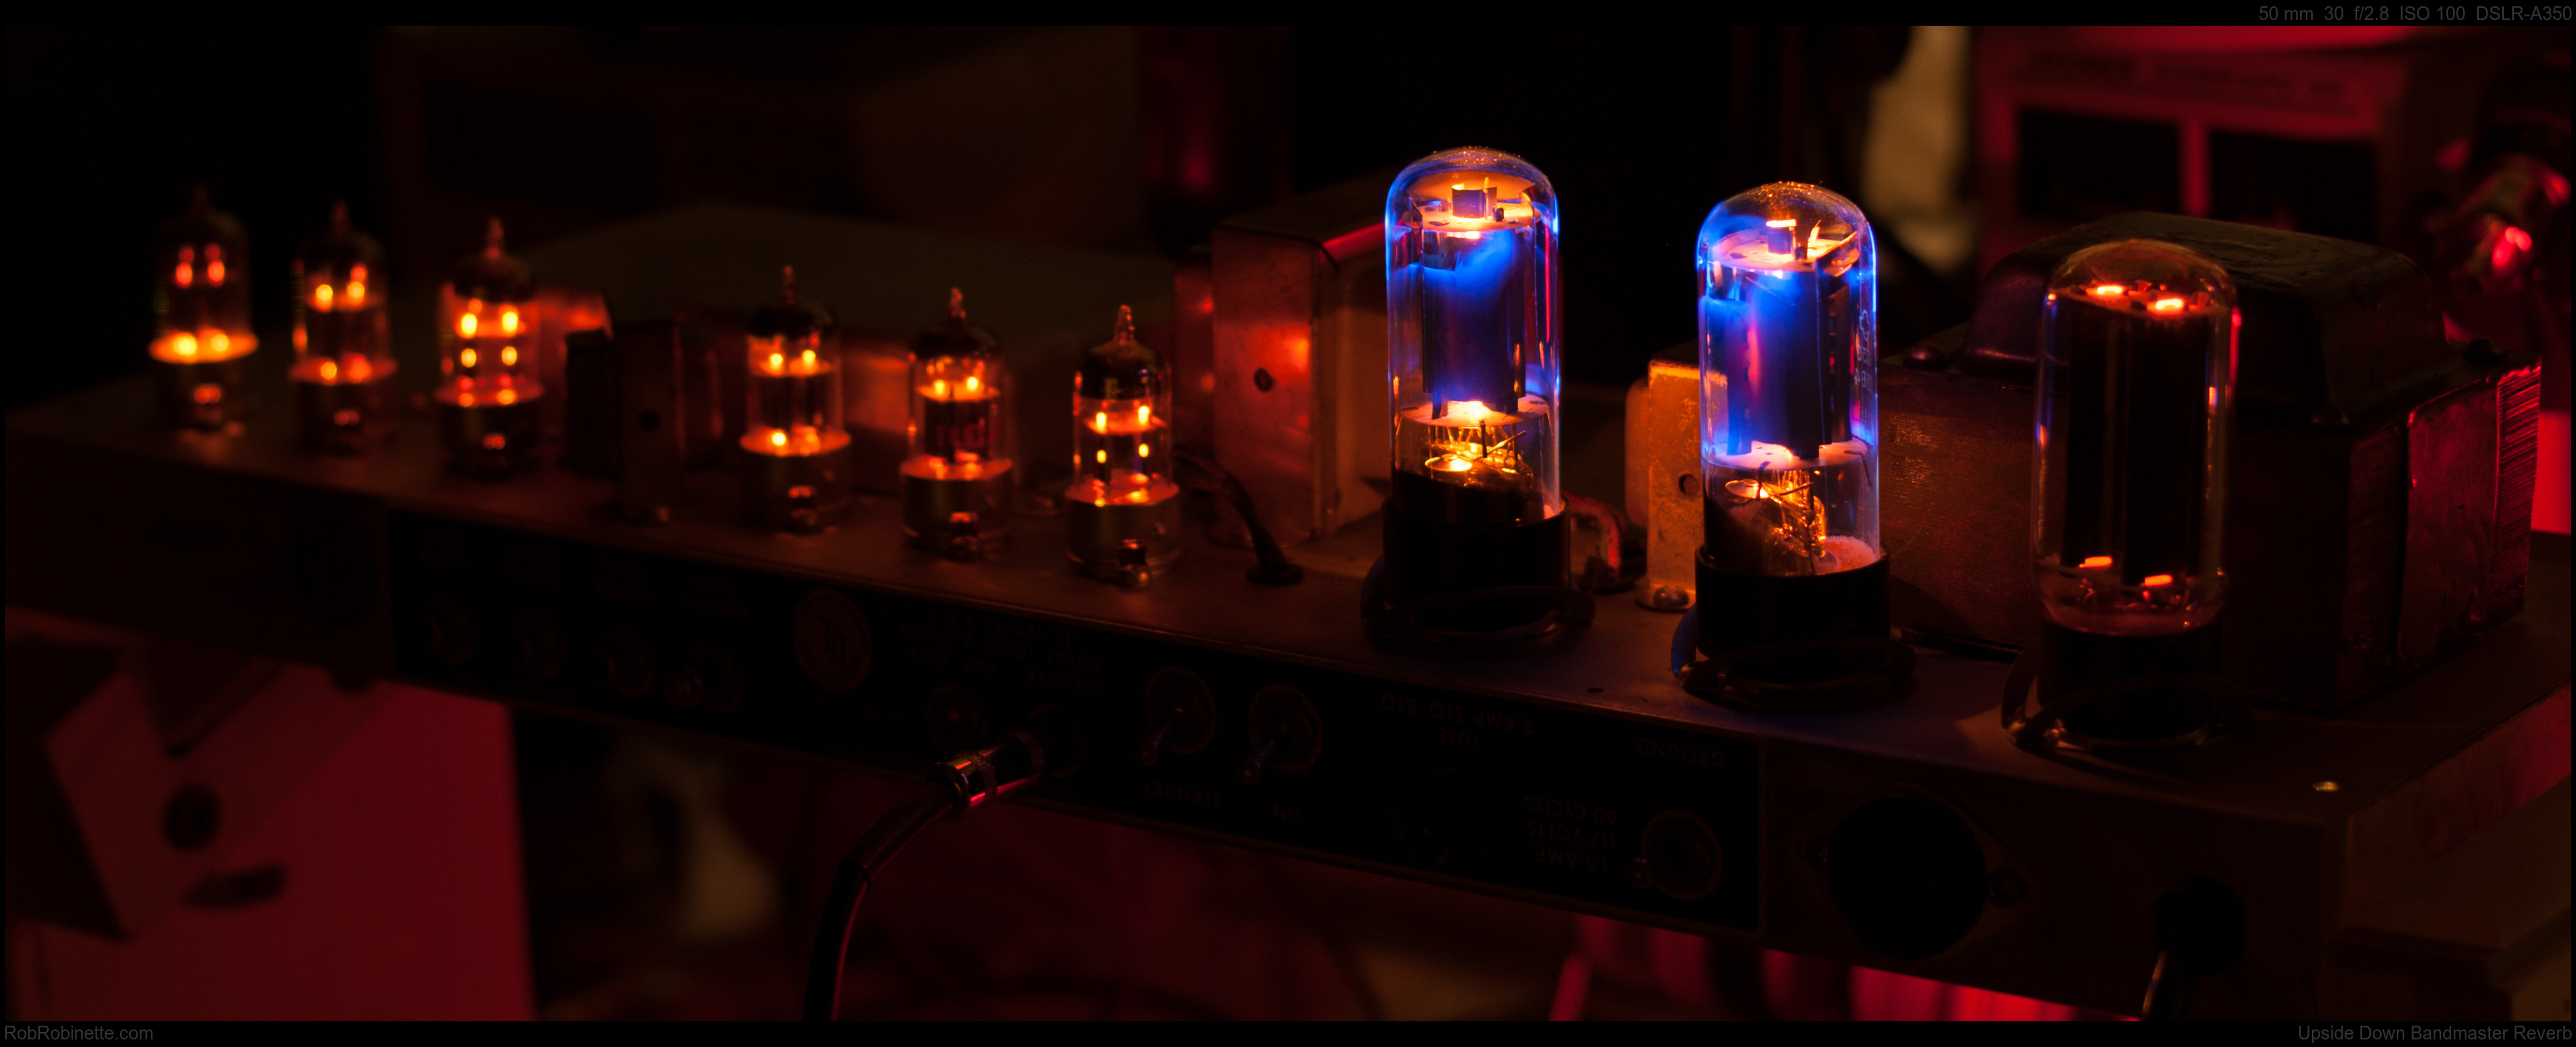
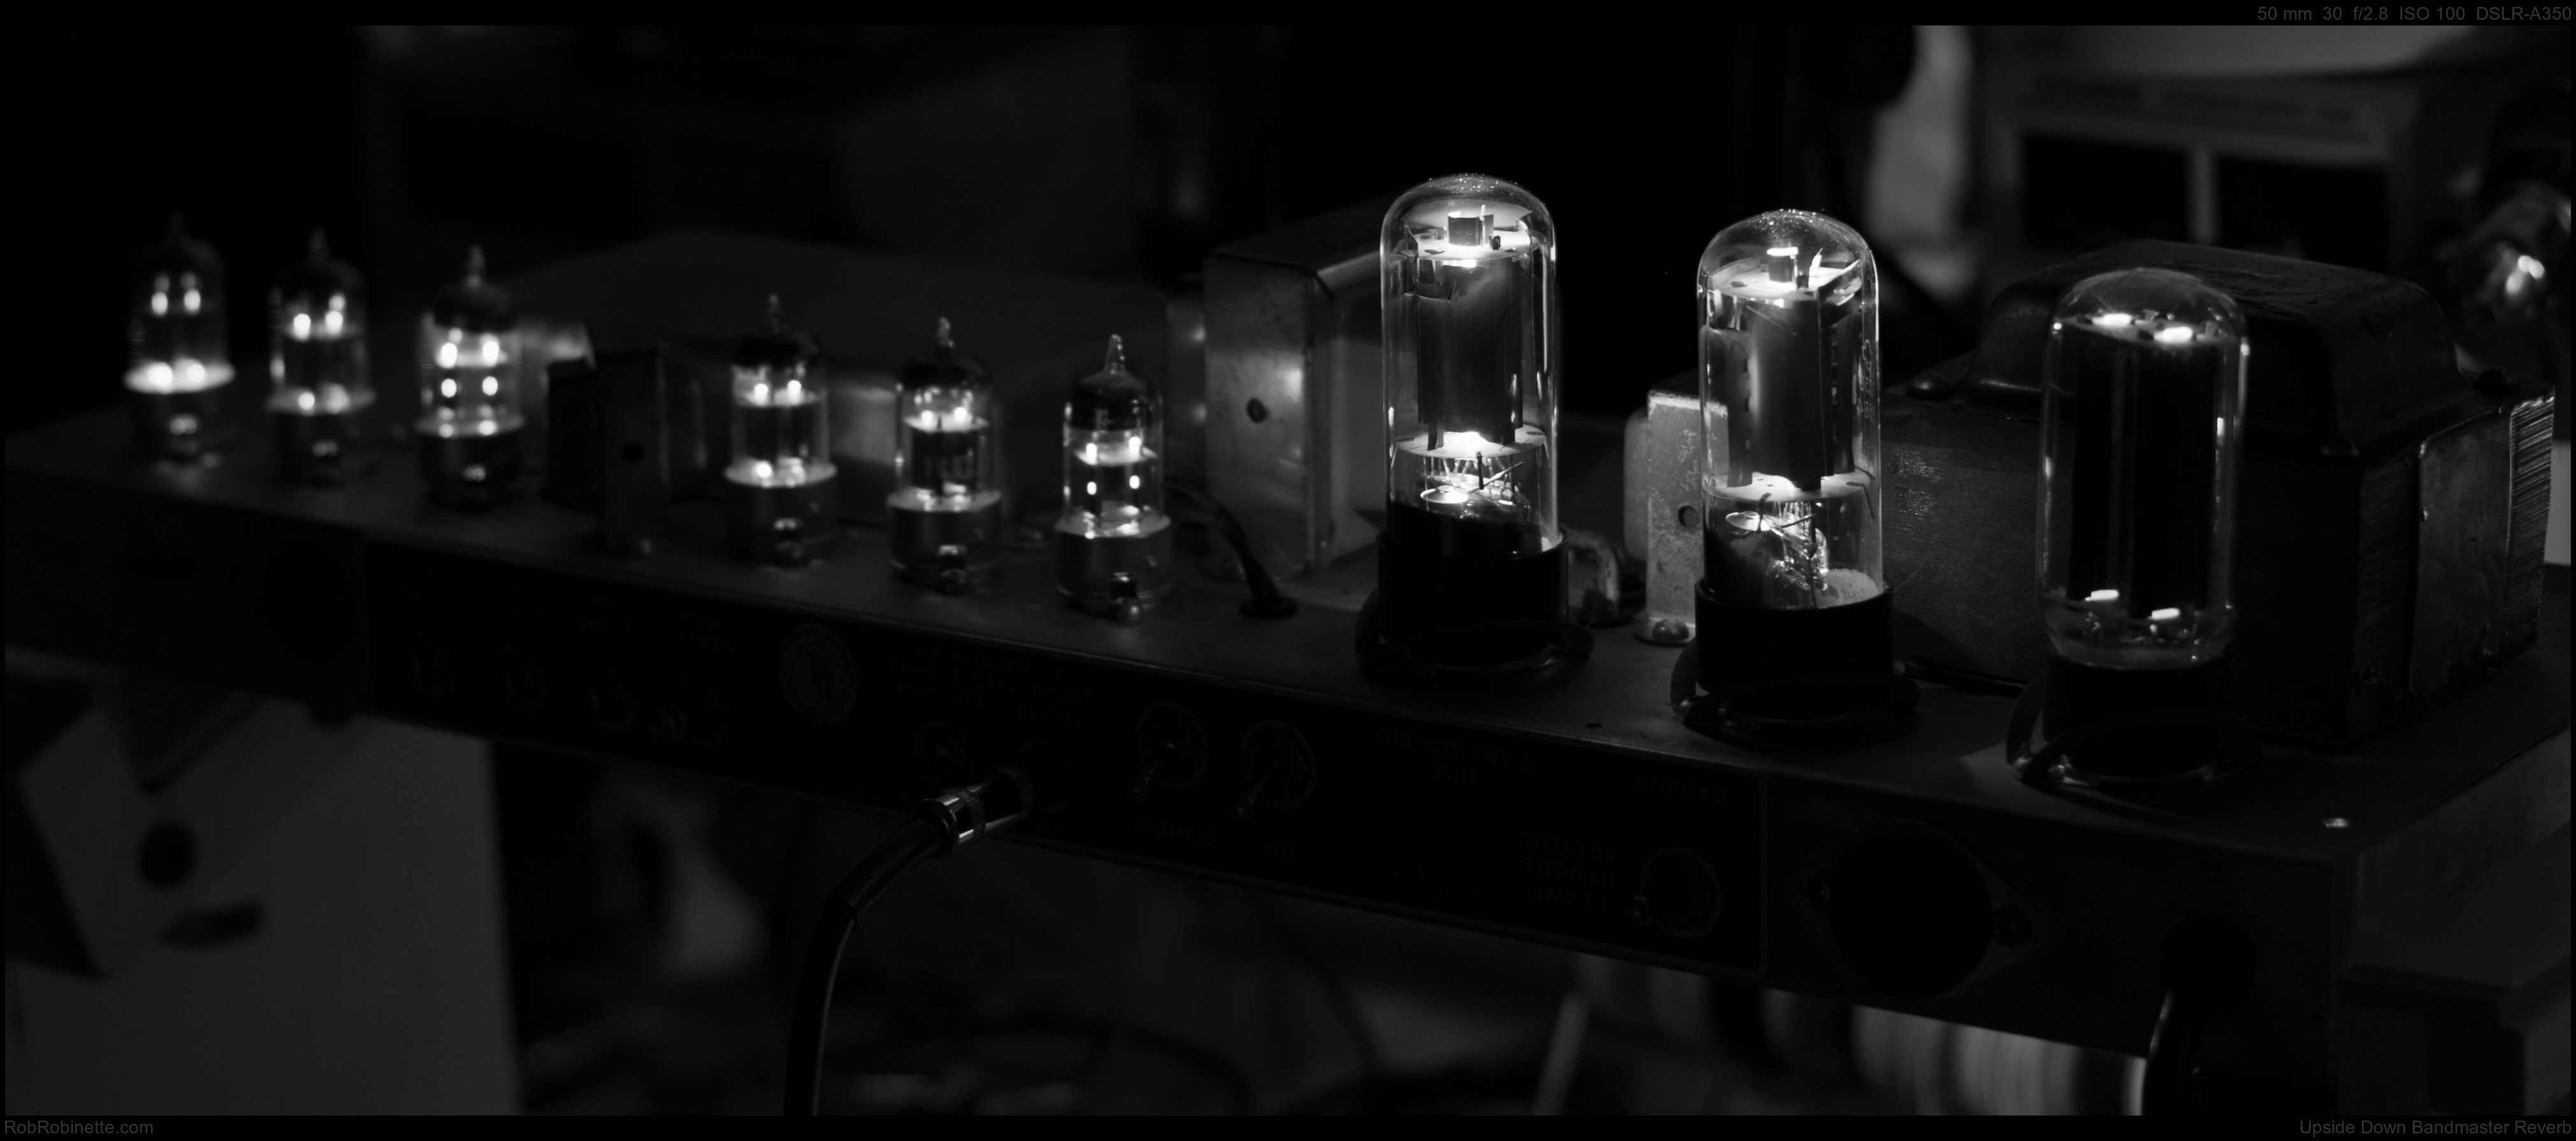
Upside Down Bandmaster Reverb

My Fender Bandmaster Reverb guitar amplifier sitting upside down in a service cradle. Photo was taken with a Sony A350 camera set for manual focus, manual mode, Minolta 50mm f/1.4 lens set at f/2.8, 30 second exposure and manual ISO set to 100. The amp's red pilot light located behind the power transformer at far right is casting a red glow that the power tube glass picks up for an interesting effect. I focused the camera on the left power tube but the preamp tubes to the left are out of focus due to the short field of focus of the large f/2.8 aperture opening. I could put more of the amp in focus by doubling the exposure to 60 seconds and decreasing the aperture opening one f-stop to f/4. The exposure and brightness of the image would remain the same but the smaller camera opening would render a sharper focus. Compare the mood evoked by the soft focus in this image compared to the "Bandmaster Reverb Lineup" picture below. In most of my photos the camera settings are shown in the photo border at top right. The full size 4k image is here. A 4k 16x9 version is here.
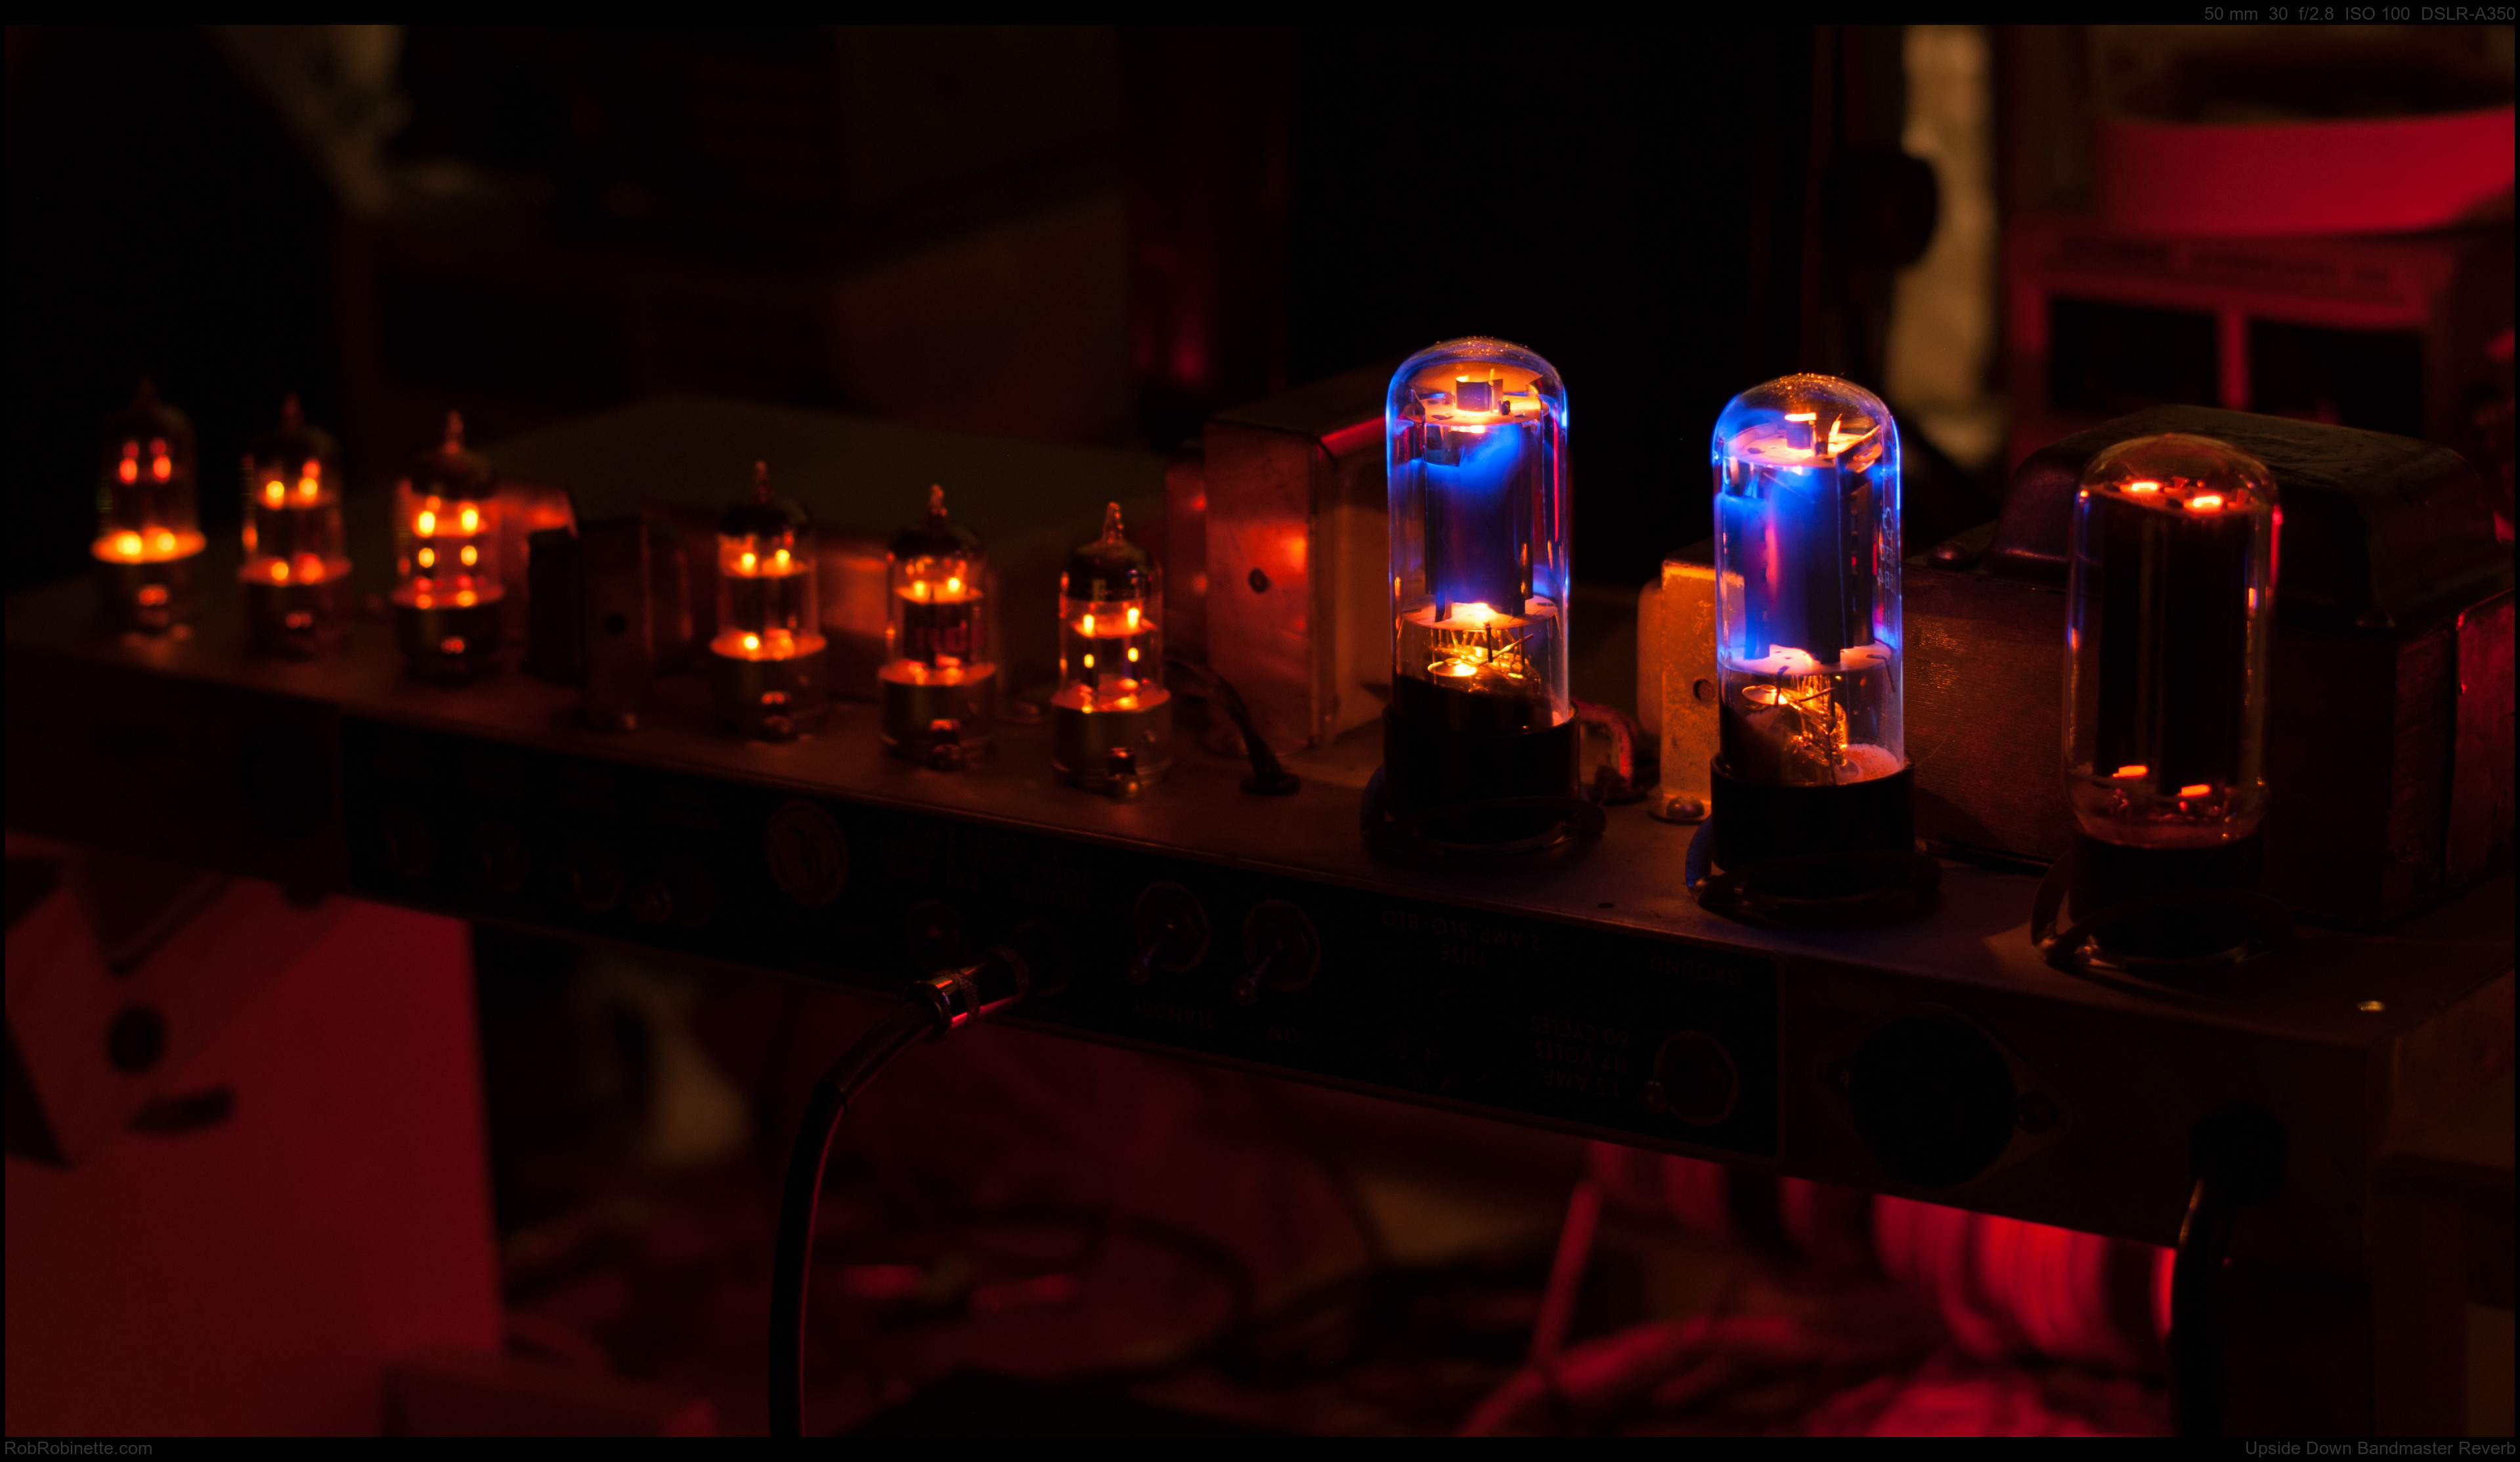
Bandmaster Reverb Lineup
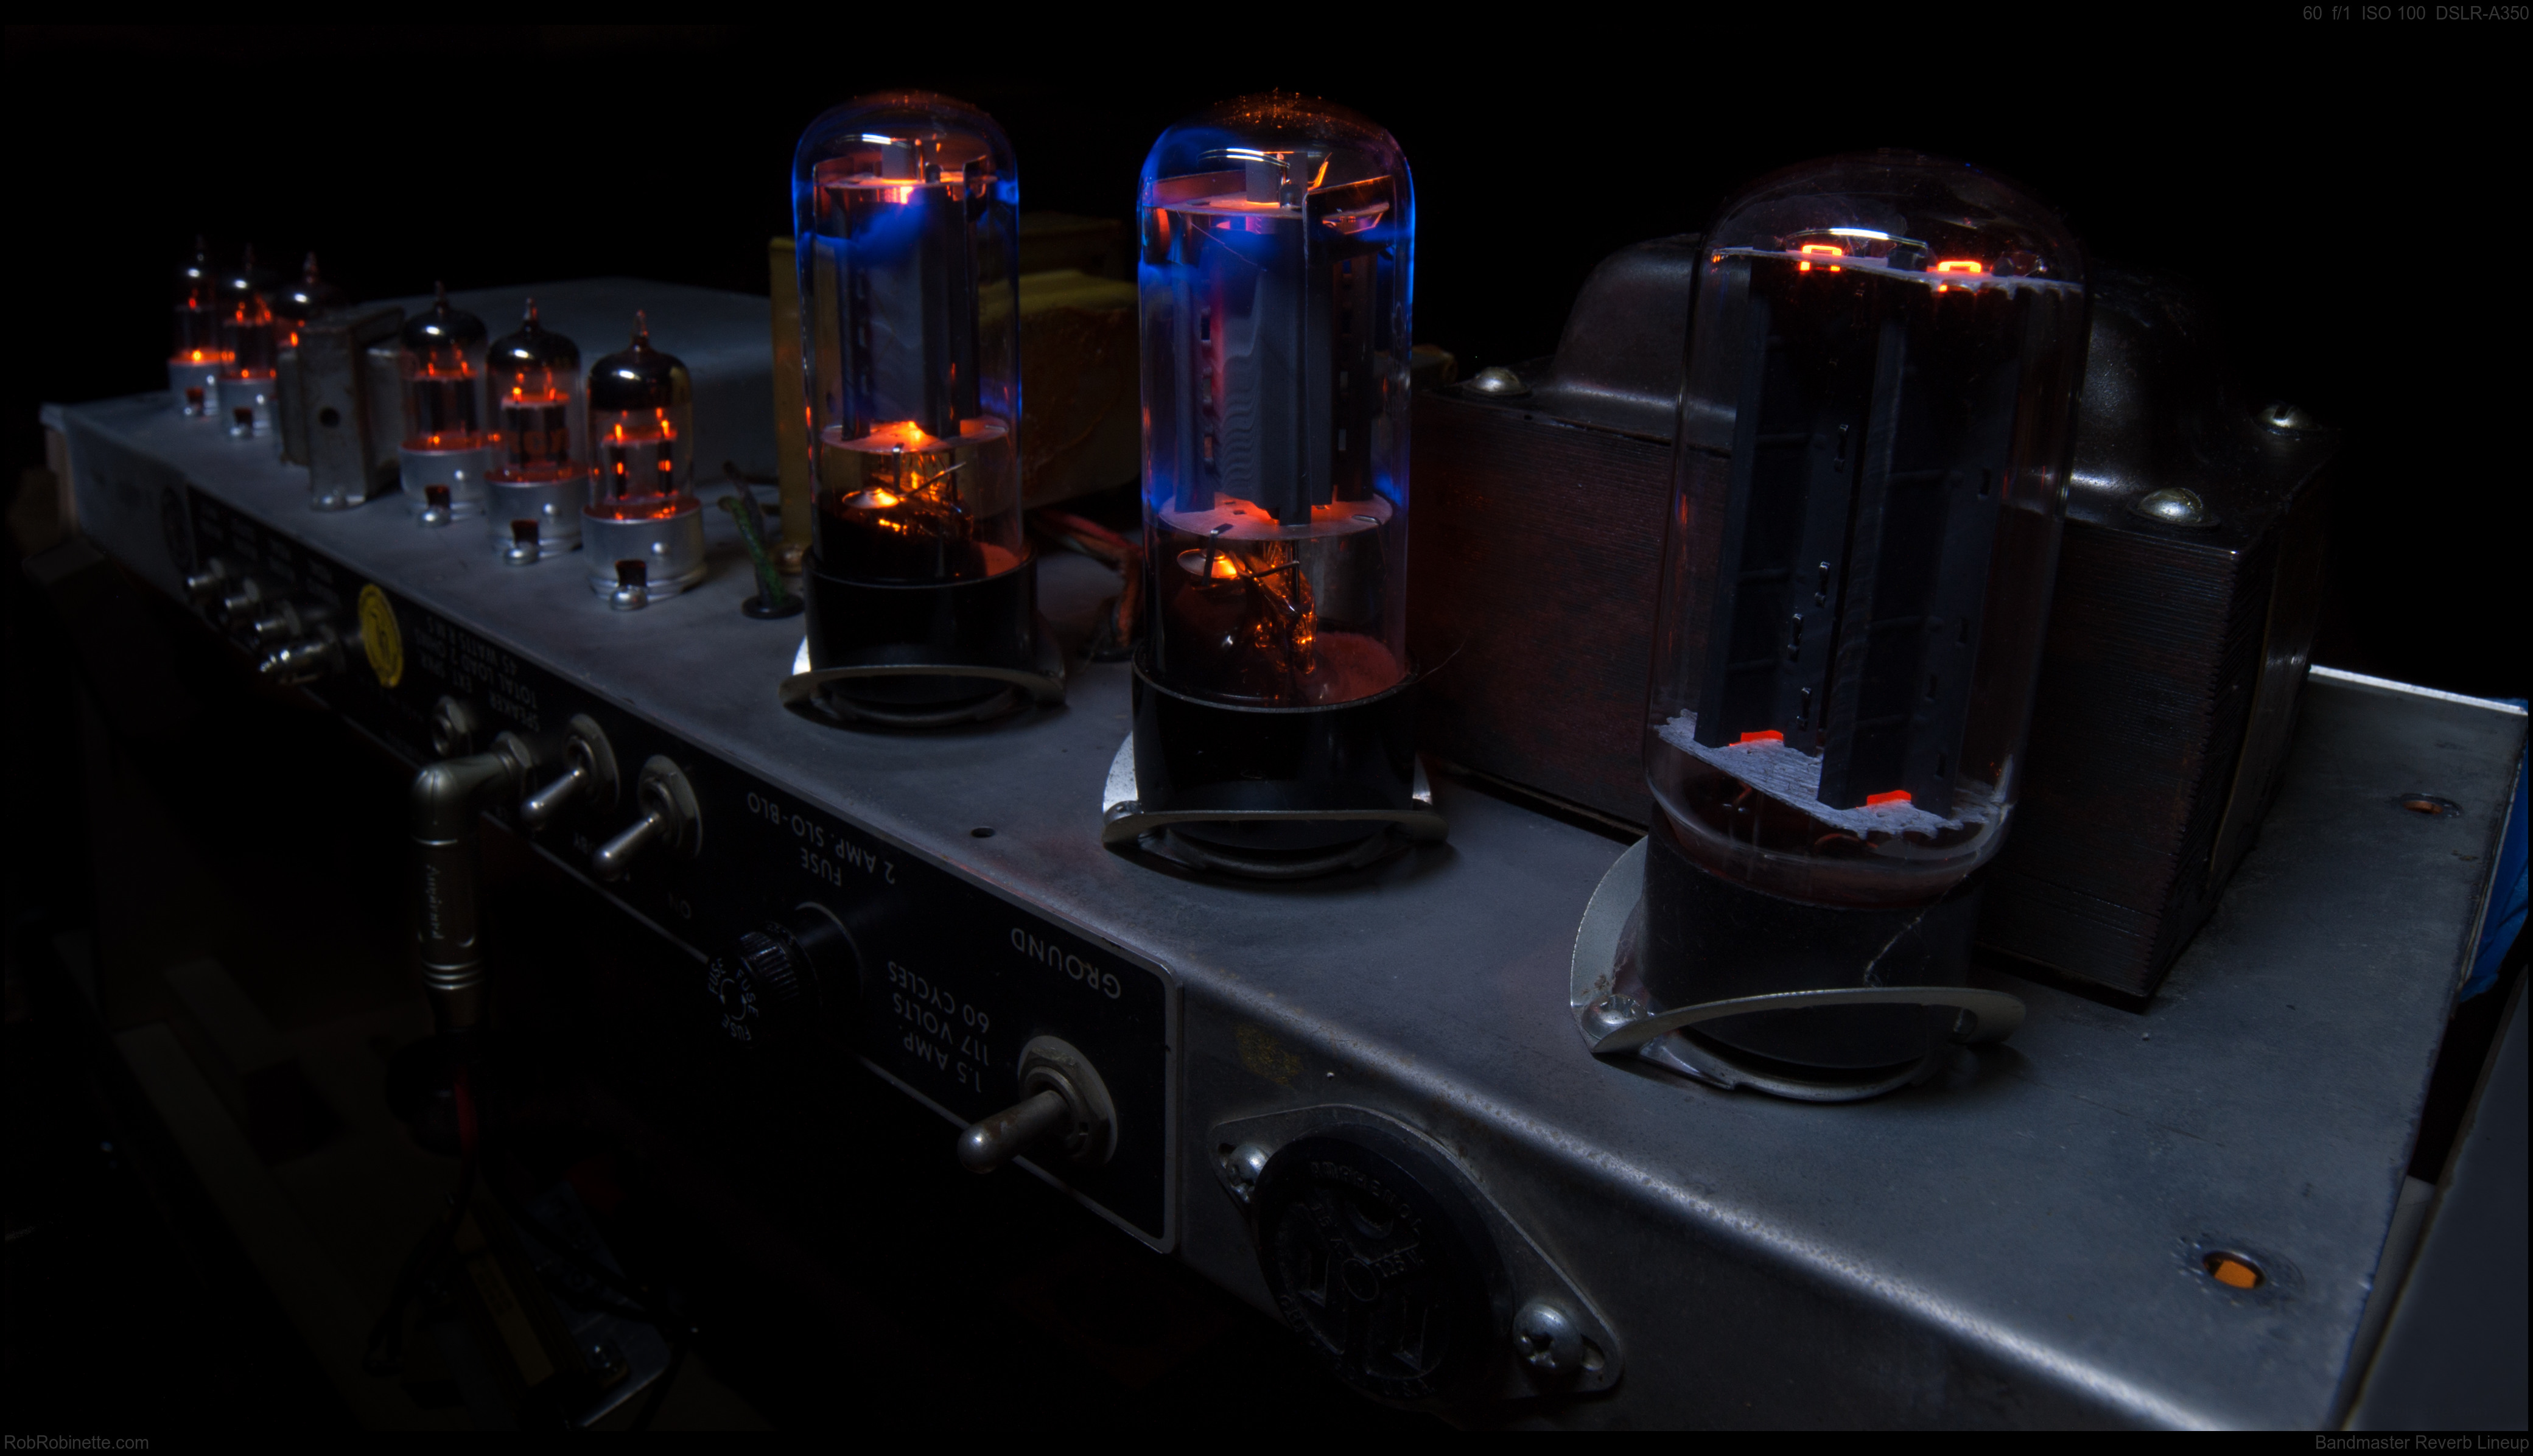
Notice the much deeper field of focus compared to the photo above. I used a 60 second exposure and a smaller camera aperture opening to expand the amount of the amp that is in sharp focus. I swept an LED flashlight beam across the amplifier to illuminate the chassis which kept the background dark. The bluish LED light gives the metal a cold feeling which contrasts with the warm glow of the tubes. The cold vibe from the bluish LED light could have been compensated for by adjusting Adobe Lightroom's color temperature slider toward yellow but I liked what the photograph had to say like this. I taped over the amp's red pilot light for this photo. Taken with a Sony A350 with manual focus Rokinon 14mm f/2.8 lens set to f/16, 60 seconds and ISO 100. The full size 4k image is here.
A rather ordinary Minolta Maxxum 50mm f/1.4 prime lens is my go-to lens for tube and amplifier photography. My A350 camera has an APS-C, non-full frame sensor so the 50mm lens shoots like a 75mm. For close up tube macro shots I use a Rokinon 14mm f/2.8 lens. You don't need a fast lens for long exposure photography and it is also much more difficult to precisely focus a fast lens at low f-stop settings. The standard lens on most point-and-shoot cameras will be perfectly adequate. If you do want to get a lens specifically for this work I suggest a 35 to 50mm fully manual lens with an aperture adjustment ring. Most auto focus lenses lose their aperture control when a macro extension tube is placed between the lens and camera body. A manual lens with an aperture ring will give you full control even when using macro extensions tubes.
The camera's manual mode is the best way to take glowing tube pics. In manual mode you have complete control of the camera's shutter speed and aperture opening. Manual mode is usually selected on your camera's mode knob designated by an "M." My Sony A5000 point-and-shoot camera has a manual mode that has to be selected in its camera settings menu. The menu also offers manual focus, focus zoom and focus peaking, jpg or RAW format and it can do Bulb and 30 second exposures. If your camera doesn't have a full manual mode it is possible to use aperture or speed priority mode (A & S on the mode dial) but you'll need to adjust the exposure compensation setting to get the exposure correct.
Shoot photos in RAW format rather than jpg if your camera supports it. RAW images' exposure can be widely adjusted during post processing to help fine tune your pics. The down side to RAW format is their size. They are several times larger than jpg files. After post processing I export the RAW image as a 90% quality, 72dpi jpg file for web use. For images that will be printed I export at 300dpi (dots per inch).
I like to use 30 and 60 second exposures with an ISO speed of 100 for the clearest, most grain free pictures possible. Most modern cameras run the ISO in "Auto" mode but they can be manually set to 100.
I typically use a 30 second exposure and vary the camera's aperture (f-stop) setting to get the correct exposure. This and the focus are the only camera settings I change during most tube pic sessions unless I want to expand the field of focus with a longer 60 second exposure and smaller aperture. The Upside Down Bandmaster Reverb picture above was made using f-stop f/2.8. To make the glowing tubes really stand out in Tubes In a Row farther down I closed the aperture to f/10.
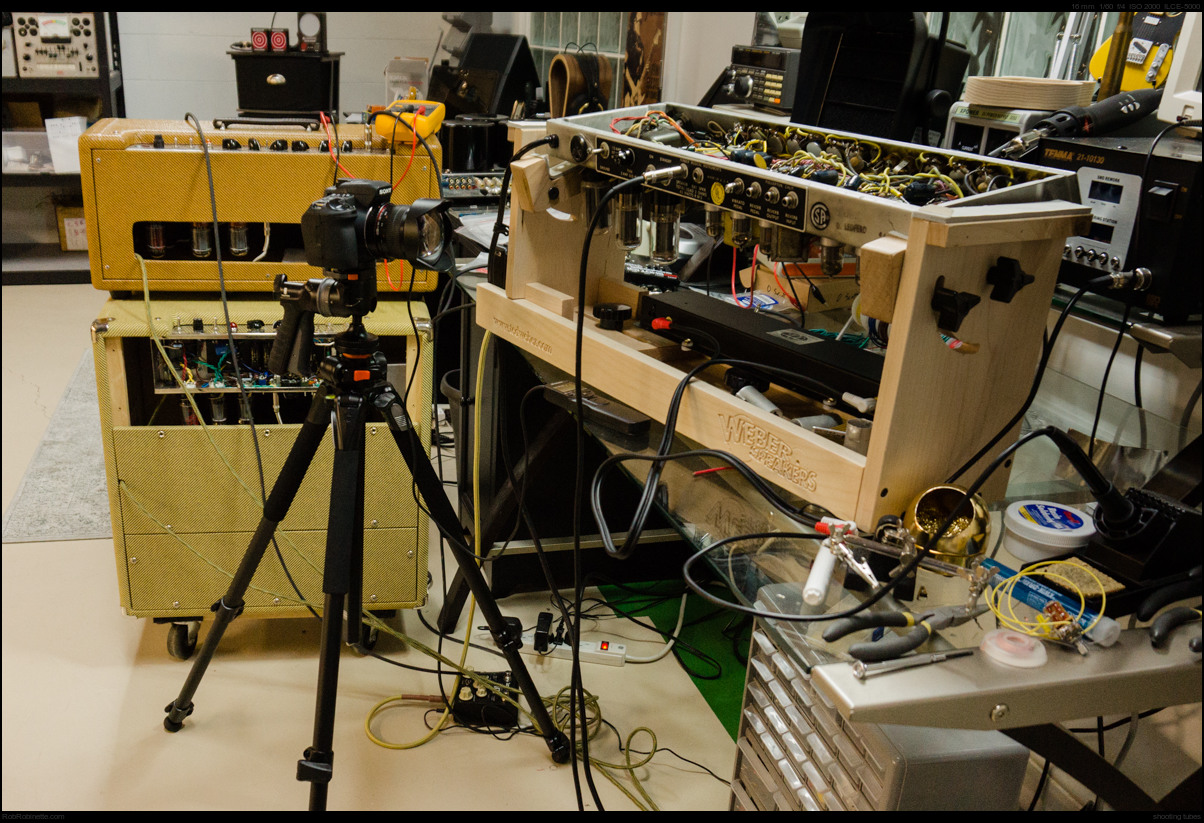
Sony A350 digital SLR (single lens reflex) camera with Rikonon 14mm f2.8 lens on a quality tripod and 1972 Fender silverface Bandmaster Reverb guitar amplifier on the chassis stand. Remote shutter control is on the bench in front of the chassis stand. This Bandmaster Reverb is very photogenic. This scene was lit by harsh white fluorescent lights so I adjusted the color temperature in Adobe Lightroom to warm up the picture. A Fender 5F6A Bassman amp head sits upon a Fender 5E3 Deluxe amplifier to the left. This photo was taken with a Sony A5000 point-and-shoot camera with it's standard 16-50mm f/3.5-5.6 zoom lens, 1/60 of a second, f/4, ISO 2000 (Auto mode and Auto ISO).
Clean your tubes with glass cleaner for the clearest shots but be careful, Windex can take the markings off your precious NOS (new old stock) tubes. Wait for the tubes to cool down before cleaning them. Spray the glass cleaner on a paper towel or cloth, don't spray it directly on the tubes.
I purposely biased my Russian 6N3C power tubes very hot to intensify their blue ion glow and add a touch of red plating for my photo sessions but if pushed too far a burning out power tube can damage amp components including an expensive transformer.
Don't forget to connect a speaker or dummy load to a tube amplifier before powering it up. You can damage them if they are run with no load.
The room must be the right level of dark. If it's blackout dark you won't see the non-glowing parts of the tube. You have to balance the room light to balance the detail between glowing and non-glowing parts of the tube and amp. Experiment with the light level. You can also turn the room light on for just a second during the exposure, just flash them on and then back off, to lighten the image and make the amp chassis more visible. I sometimes use an LED flashlight to light the chassis but keep the rest of the room dark. A quick flash of light from a flashlight from directly above can give an interesting effect.
It isn't absolutely mandatory but I use a remote shutter cable because the physical act of pushing the shutter button can cause the camera and tripod to shake and cause blur. The higher the quality of your tripod the less of a problem this is.
You can get different looks by looking up, down or into the tubes. I found with the 6N3C Russian military power tubes in my Bandmaster Reverb they look best when lining up the lens view with the center of the tube so the upper and lower mica wafer disc supports are brightly lit by the glowing cathodes. Move the camera too high and the upper wafer support will "disappear" and make for a less interesting picture. I also noticed the lower side of the lower support wafer wasn't illuminated at all so pictures taken from below the level of that wafer looked boring.
Focus is critical for a good looking tube pic so I use manual focus with the lights up so I can see focus detail better. I focus on the fine structure inside the tubes. Most cameras' auto focus will focus on the tube's glass so the inside will be slightly blurry. A camera's auto focus will usually freak out when you turn the lights out so use manual focus or focus lock if you can. If your auto focus camera has a focus lock feature you can focus with the lights up, lock the focus, then turn the lights out. I actually wear a head mounted magnifier to view the camera screen to help find an accurate focus.
You can also measure the distance from your subject to the camera to obtain precise focus. Most camera lenses have a distance scale on the focusing ring. Match the distance on the scale to the distance to your subject. SLR cameras actually have a reference mark on the camera body to show exactly where the film or sensor is located for precise measurement. Measure from the point on the amp you want most focused to the camera body, not the lens.
Sometimes it's easier to get that last bit of perfect focus by moving the camera and tripod or by using a focusing rail to precisely position the camera for macro work (thanks to Ed S for the tip on the focusing rail). You can also tweak the camera focus a little and take another set of pictures to help capture the sharpest focus (this is called focus bracketing). Many newer cameras offer a zoom focus so you can see more focus detail on the camera's display. Some offer "Focus Peaking" which shows a colored edge on the subject when the focus is best. Use these tools to help get the sharpest focus possible.
The longer the exposure you use the smaller you can go on the aperture opening which adds to the depth of field (in focus depth). This will make your focus less critical and put more of the amplifier in focus. You can double the exposure time and go up one full f-stop to increase the depth of field but keep the exposure the same (larger f-stop number = smaller aperture). For example, instead of using 30 seconds at f/8 you can use 60 seconds at f/11 (one f-stop smaller aperture opening) for the same exposure level but a sharper focus. This comes in handy when trying to get all 9 tubes in an amplifier in sharp focus. For exposures longer than 30 seconds I have to use the "Bulb" shutter setting and use the remote shutter control to time my exposures with the Sony A350 camera.
Use post processing to tweak your pics for the best look. I absolutely love Adobe Lightroom ($143 Amazon) for 90% of my post processing. Play with Lightroom's exposure, highlights, whites, blacks and shadow sliders to make the picture look best. When finished be sure and see how the photo looks in black and white by sliding Lightroom's saturation slider full left.
Pumping Ions
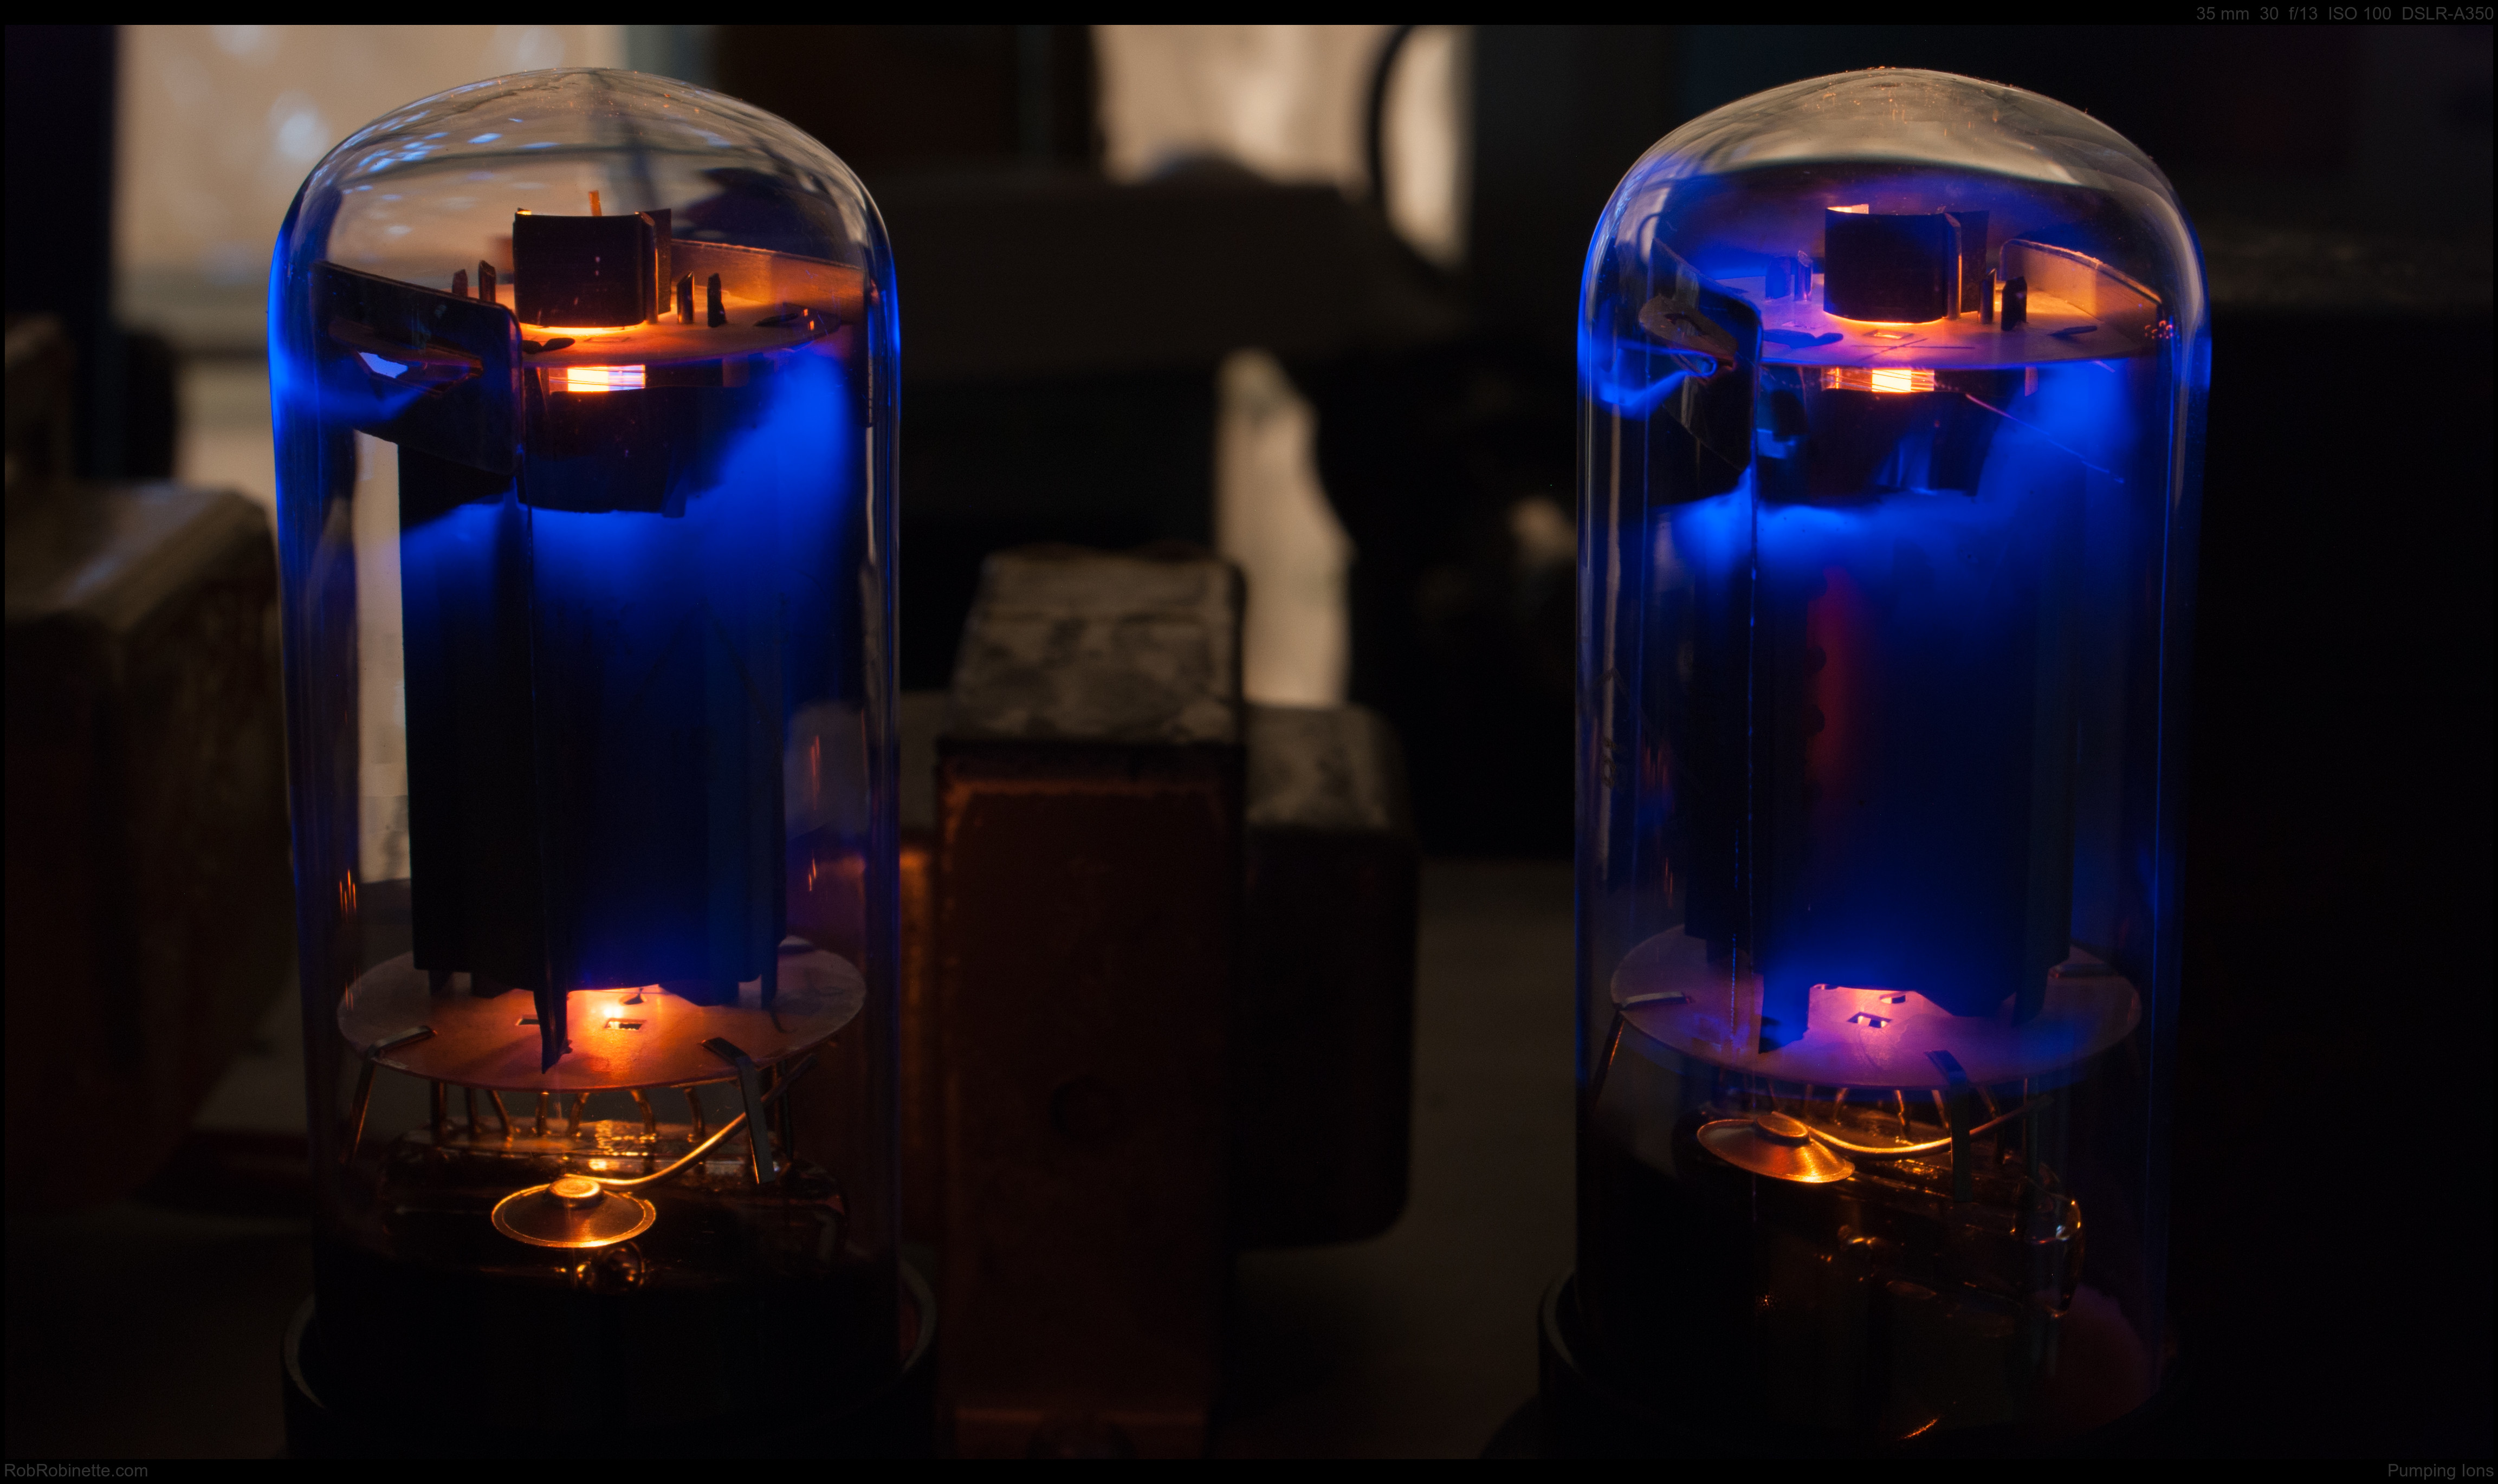
Check out the plasma swirl on the right tube's upper left side. The beautiful blue glow is caused by the tube glass resistance level and is not an indication of a bad tube. Click the image to see the full resolution photo.
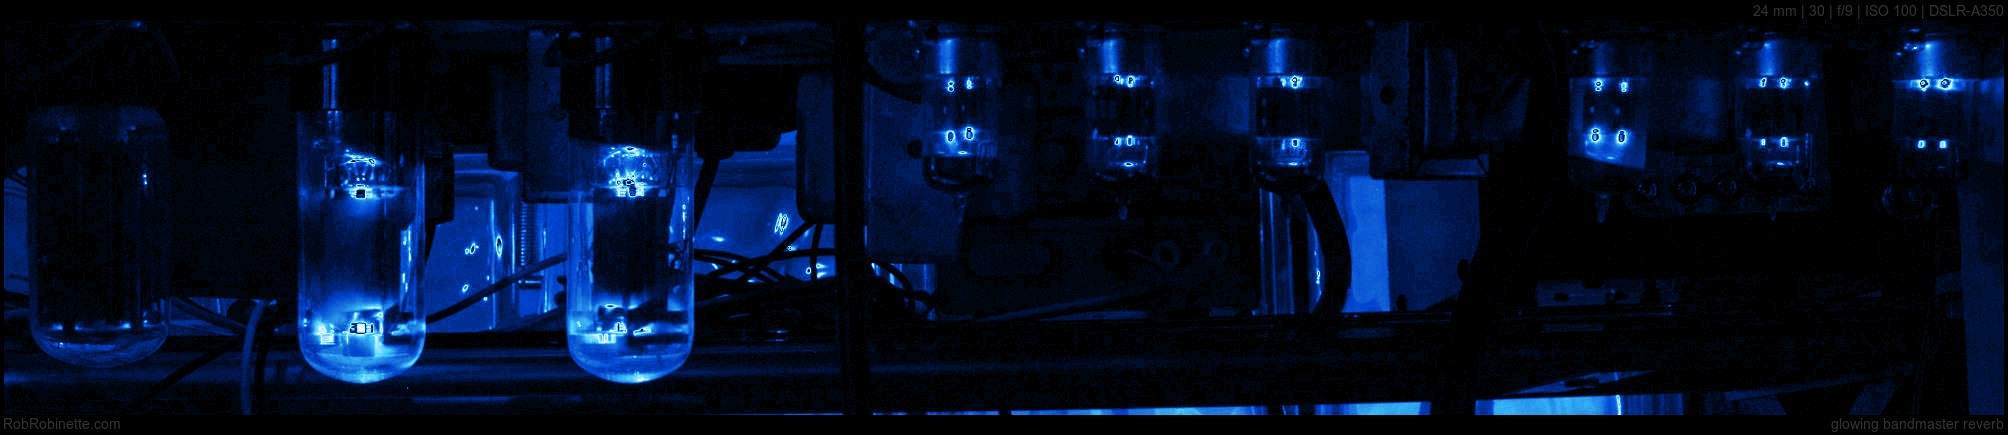
Tubes In a Row
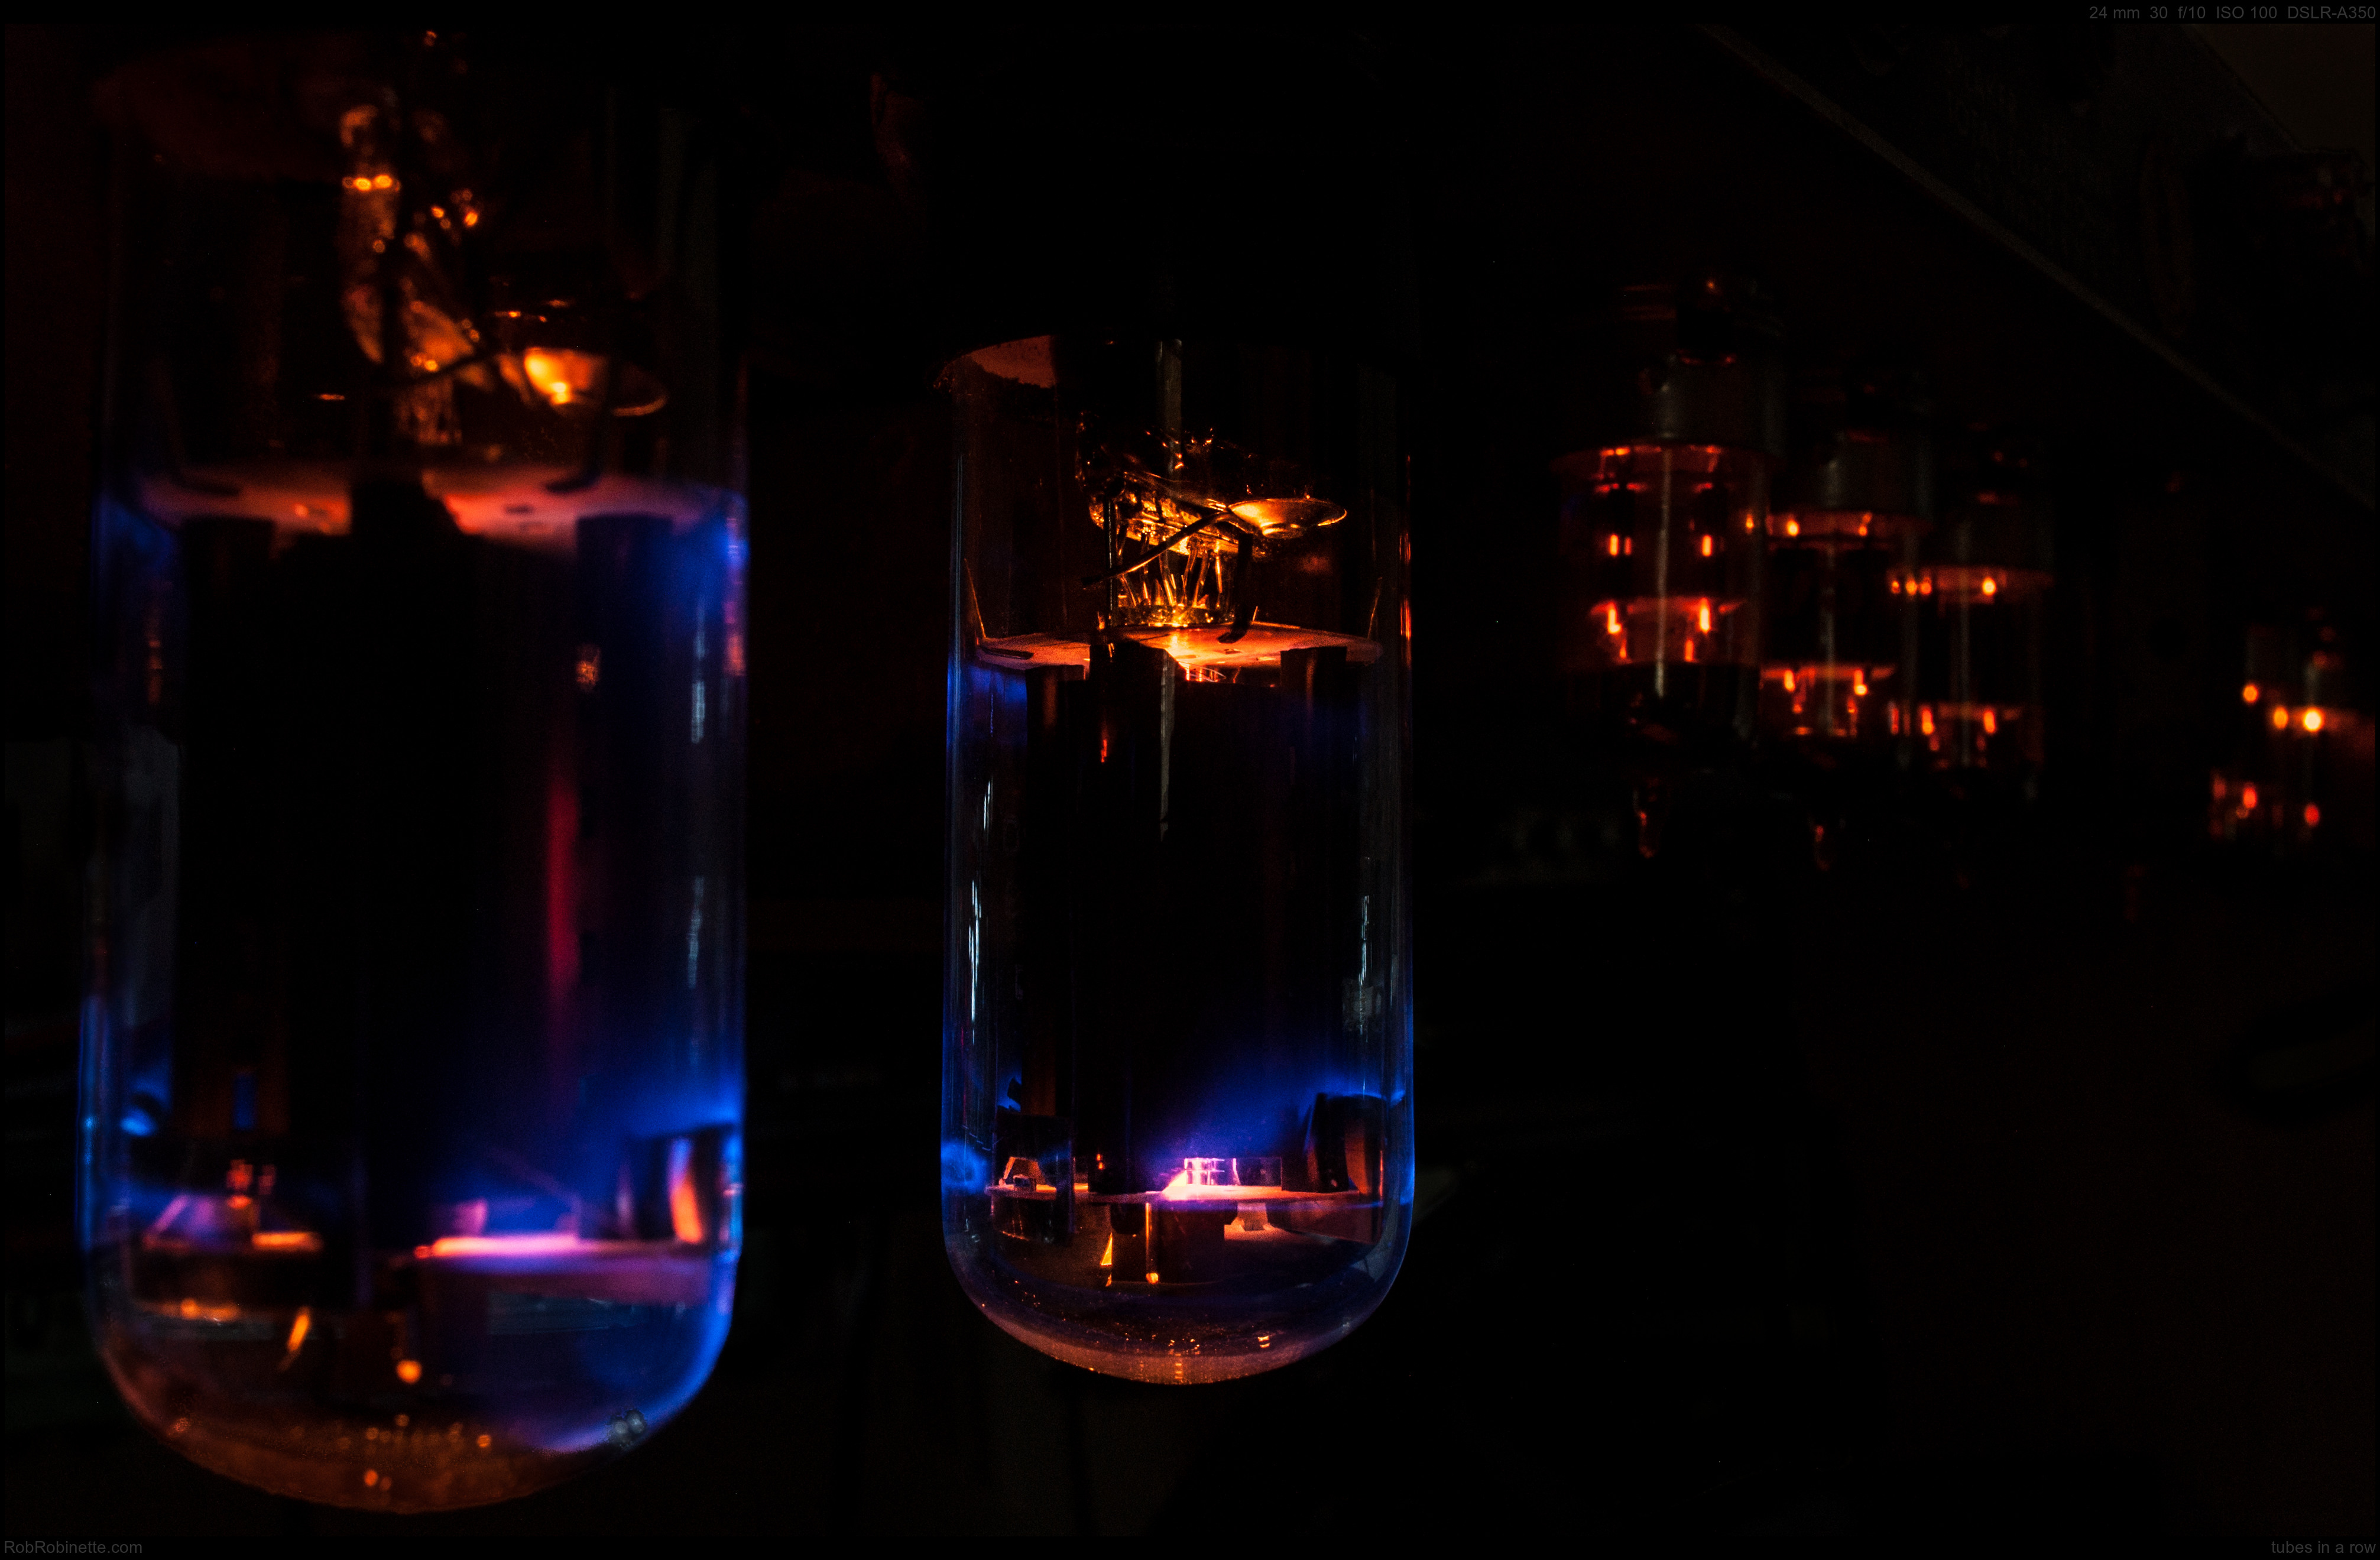
This is another shot of the Bandmaster Reverb with a Sigma 24mm f/2.8 lens at 30 seconds f/10 ISO 100. I focused on the second 6N3C power tube's internal structure. Even at f/10 the field of focus is short enough to blur all the other tubes which adds to the photo's character. I kept direct light off the amplifier during this exposure to minimize glass glare. The full size 4k image is here.
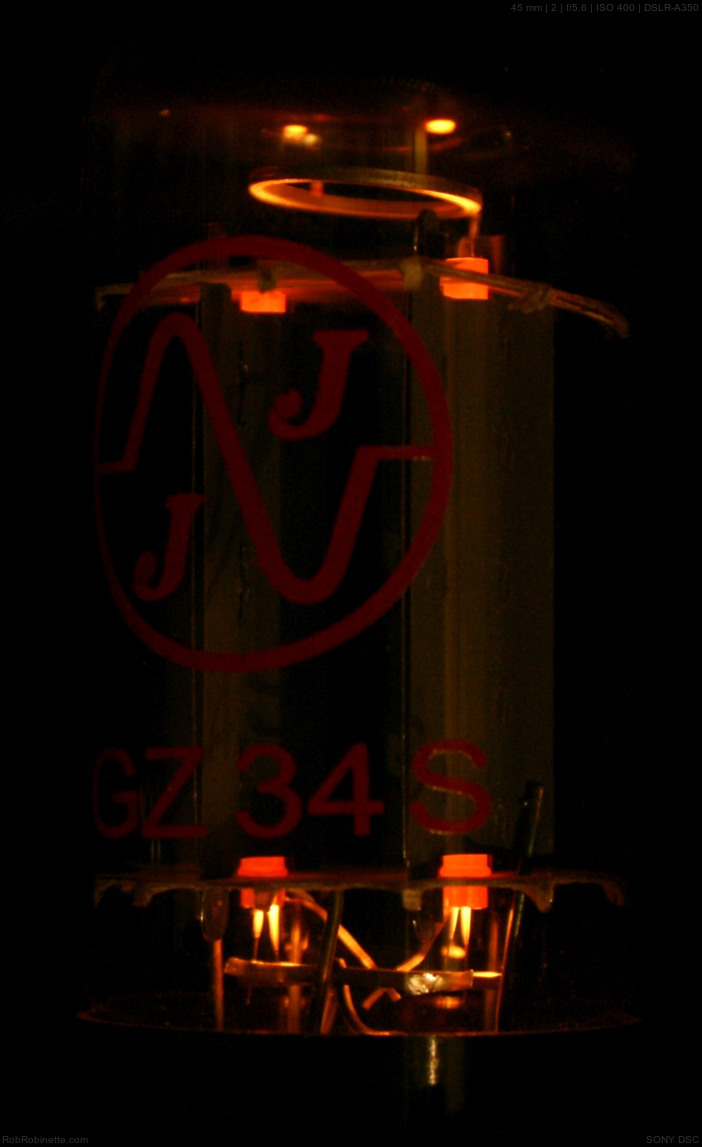
Soviet
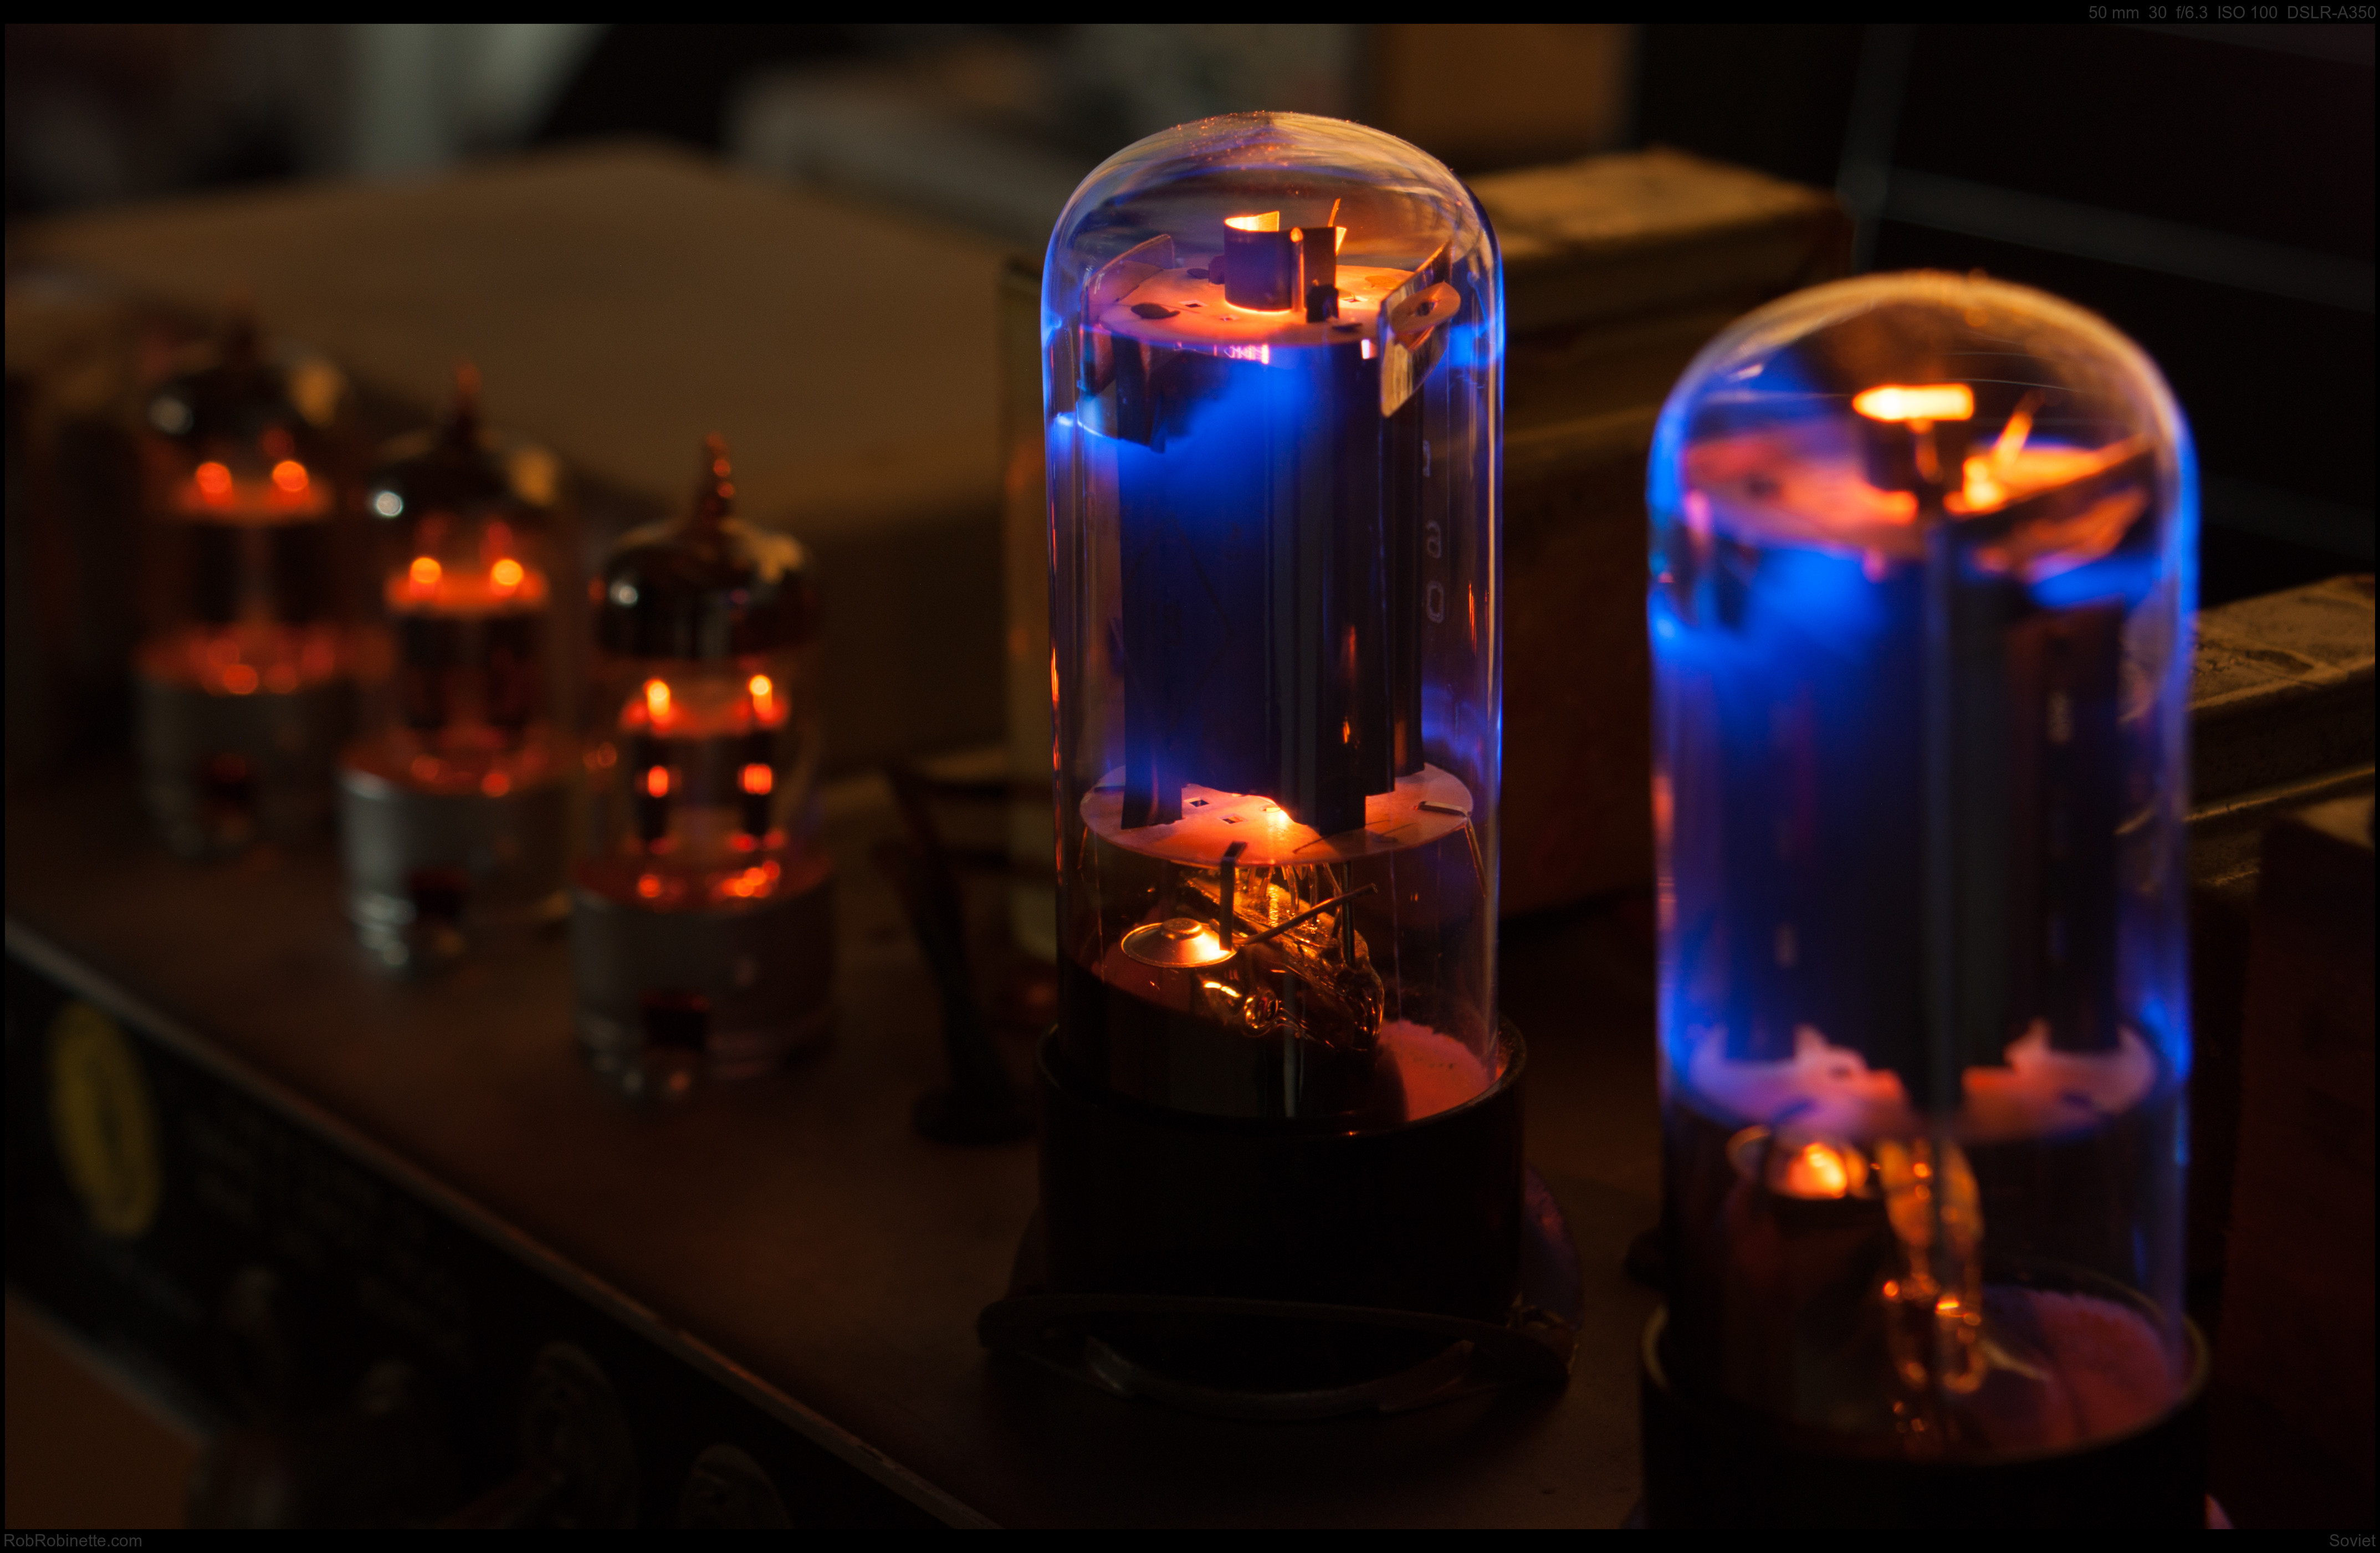
Sony A350 with Minolta 50mm f/1.4 lens at f/6.3, 30 second exposure, ISO 100. Click the image to see the full resolution photo.
Beauties
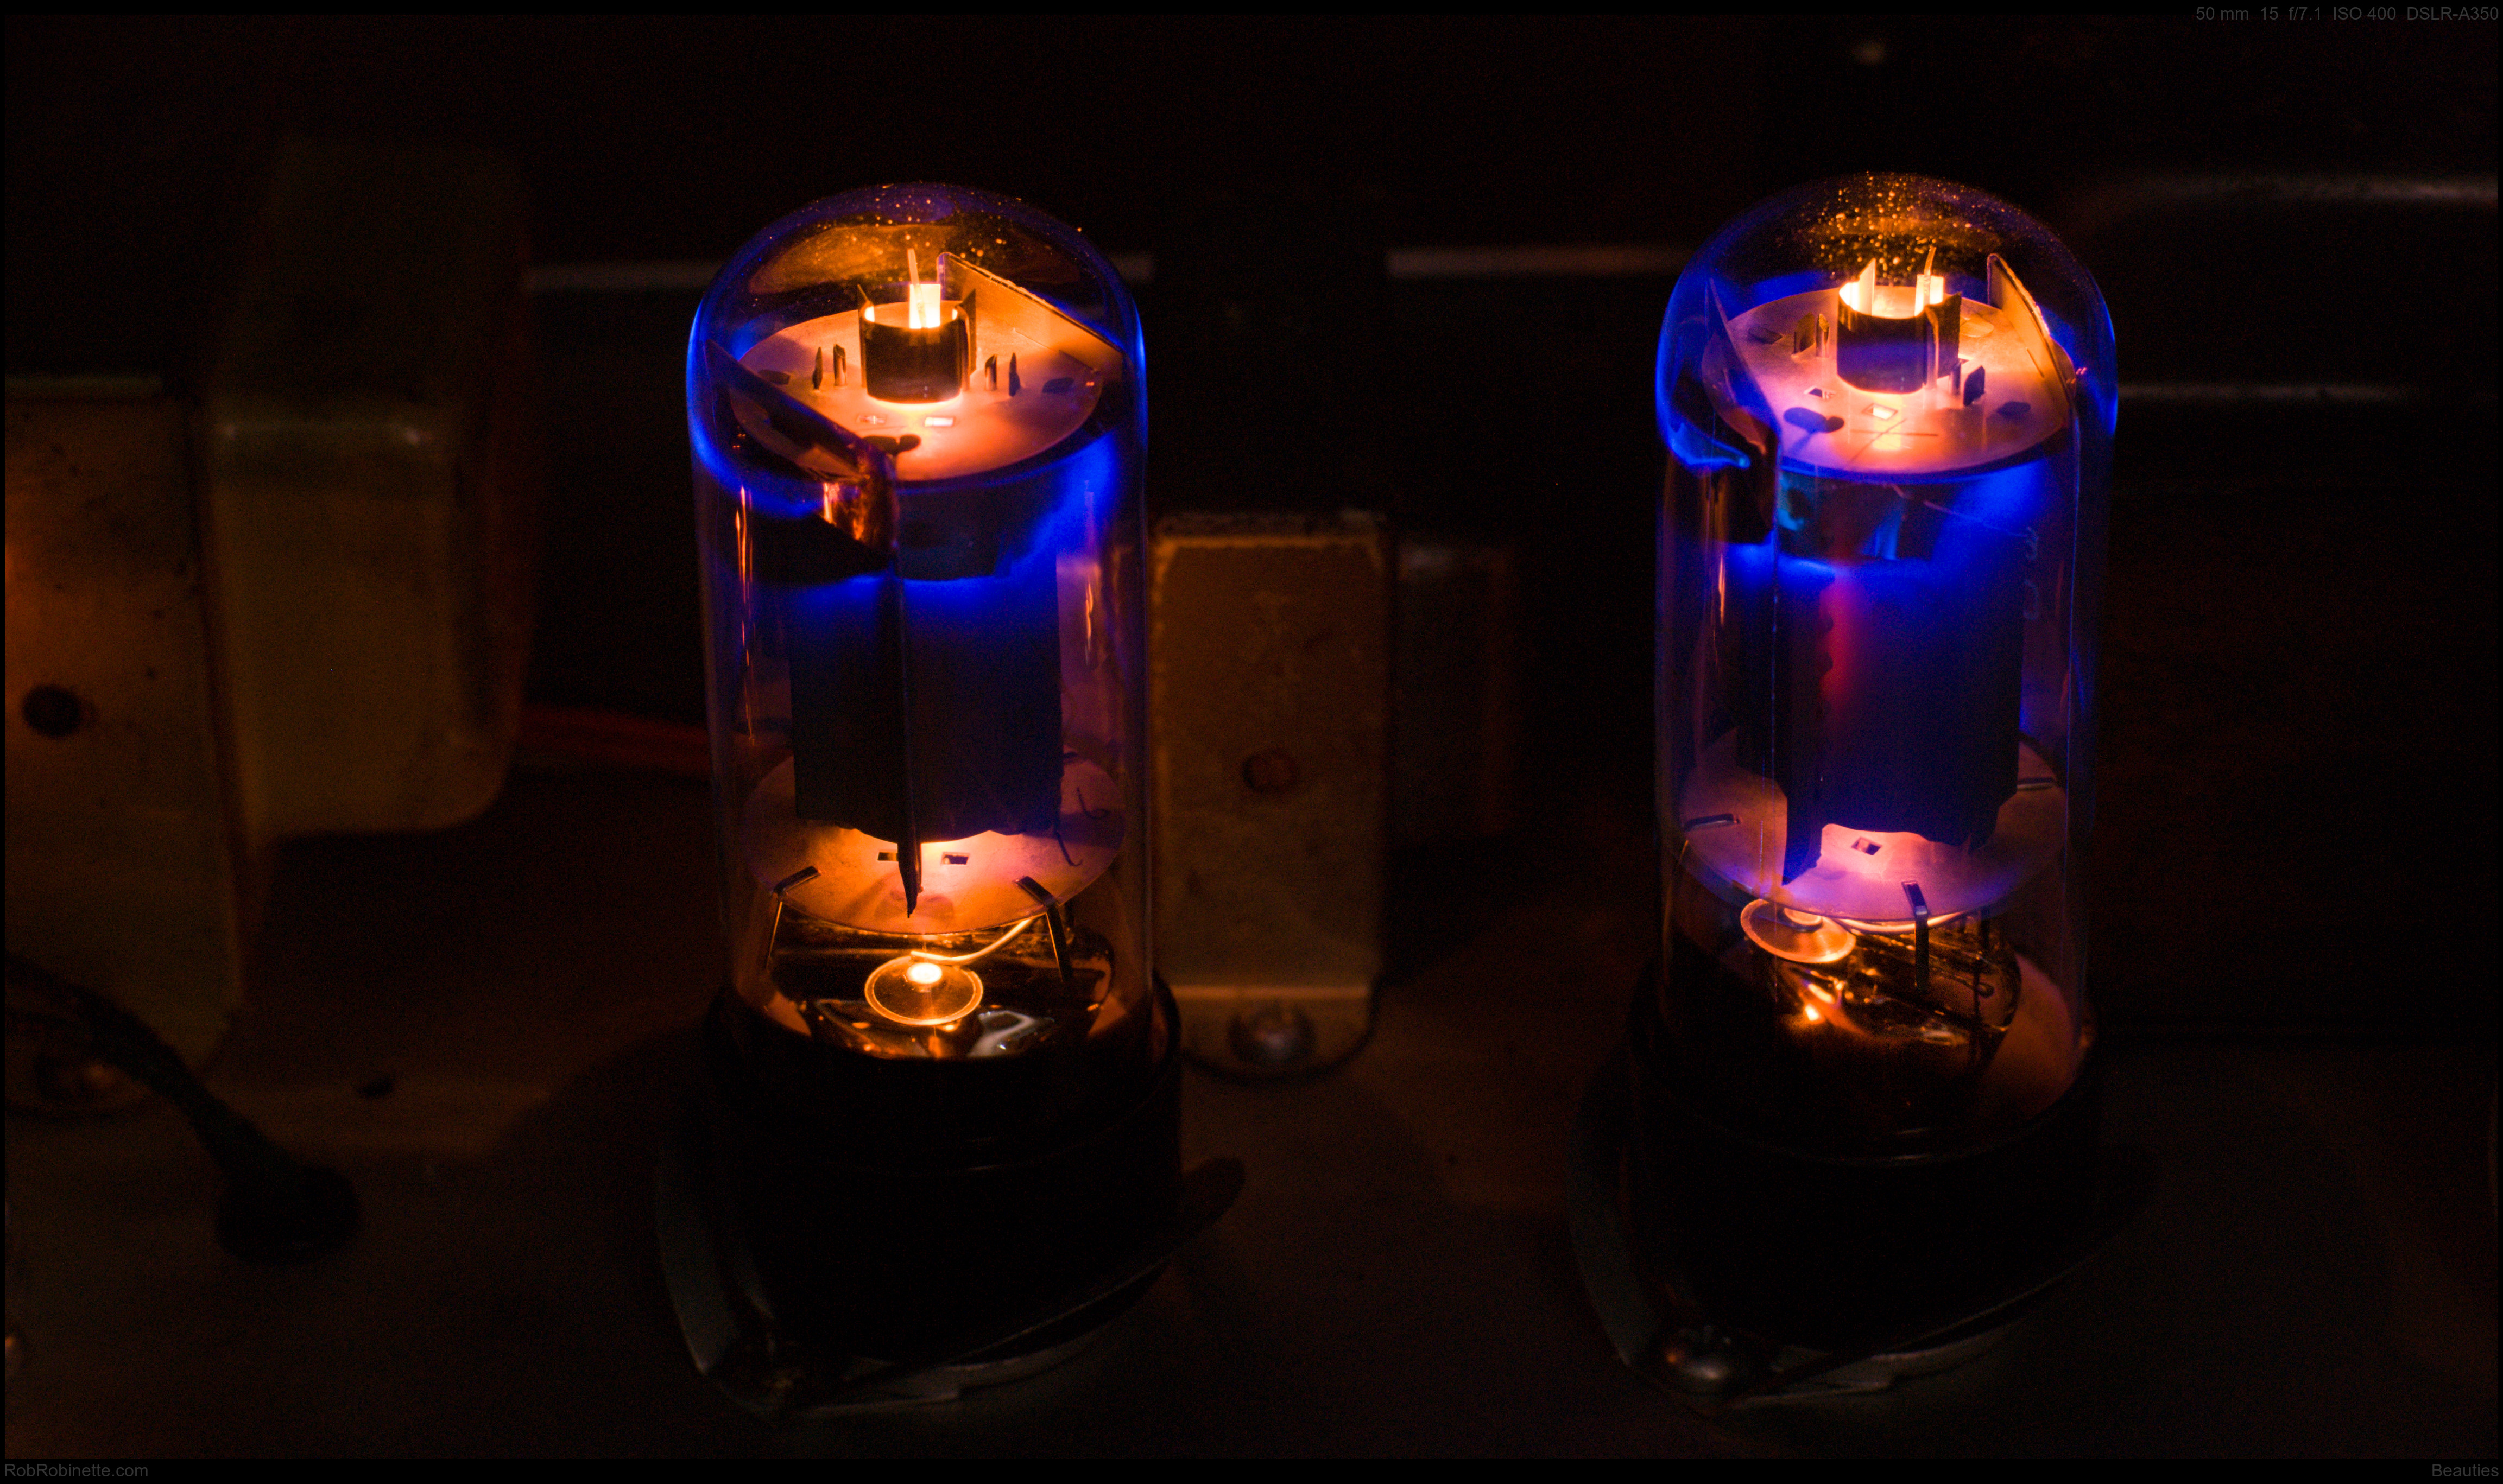
Taken with the Sony A350 camera with a Minolta 50mm f/1.4 auto focus lens, set at f/7.1, 15 second exposure and ISO 400. I shined an LED flashlight on the wall for some dim, indirect light on the chassis. Click the image to see the full resolution photo.
These glowing tube photographs make great wall posters. You can upload a file to Staples.com and they'll print it in color on thick poster board suitable for framing. The high resolution version of these photos (click on the photo to see the high-resolution version, then right click and save) look great blown up to poster size. Just click here to go to Staples poster printing service. Click on "Design Now", select the "Super Heavyweight" tab, "Get Started", "Upload Your Design", select "Landscape" and choose your size, 24 x 36 is only $30 and available for same day pickup at your local Staples but the maximum size 36 x 48 currently costs $84 and must be shipped at no additional charge.
Print These Layouts as Posters at Staples.com

After choosing your size click "Get Started" and drag your file into the upload window. You may have to size the print by dragging a corner dot. You can also click-and-hold to drag the image to center it on the paper. If you plane to use a mat with the photo be sure and leave some border around all four sides of the print.
When you're happy with the placement click on "Continue" in the upper right of the webpage, then select "Register", "continue as guest" or "sign in". Review your poster and click the approval checkbox, then click "Continue". Select shipping or "In store pickup" and click "Add to Cart" and checkout.
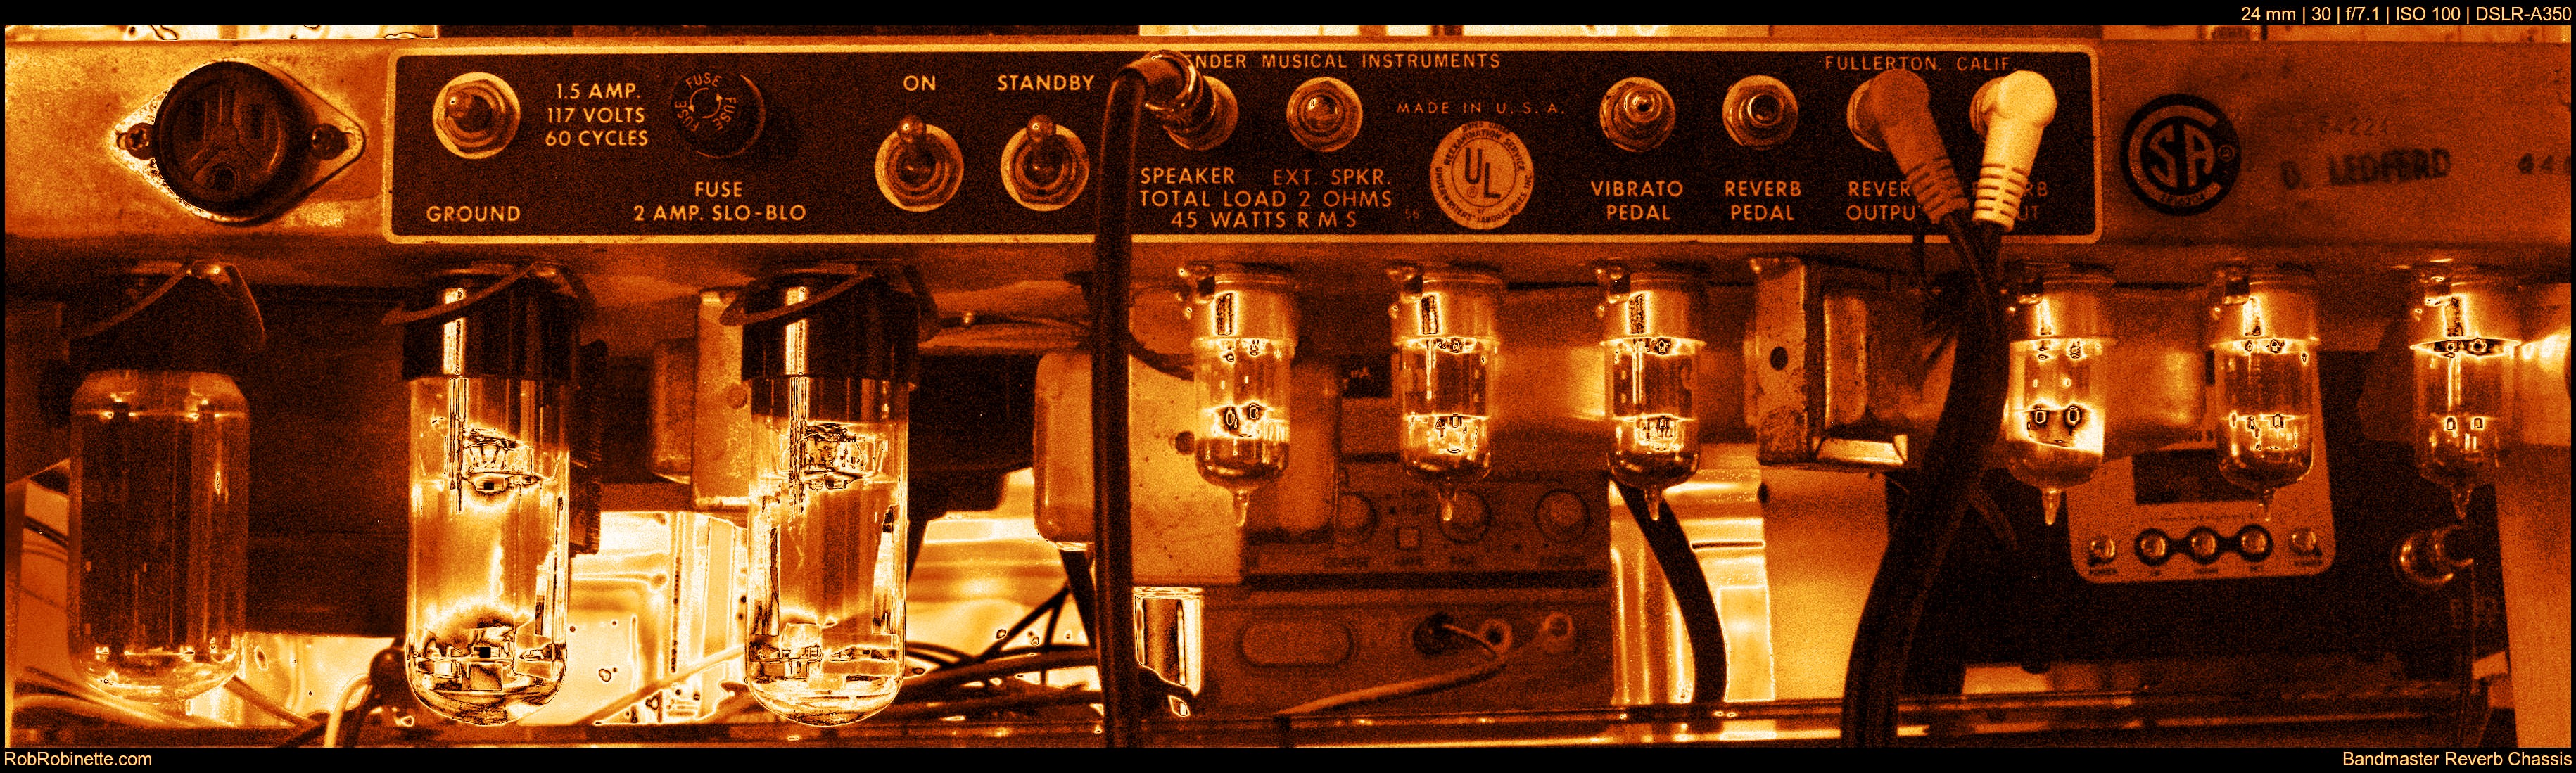
Bandmaster Reverb Chassis
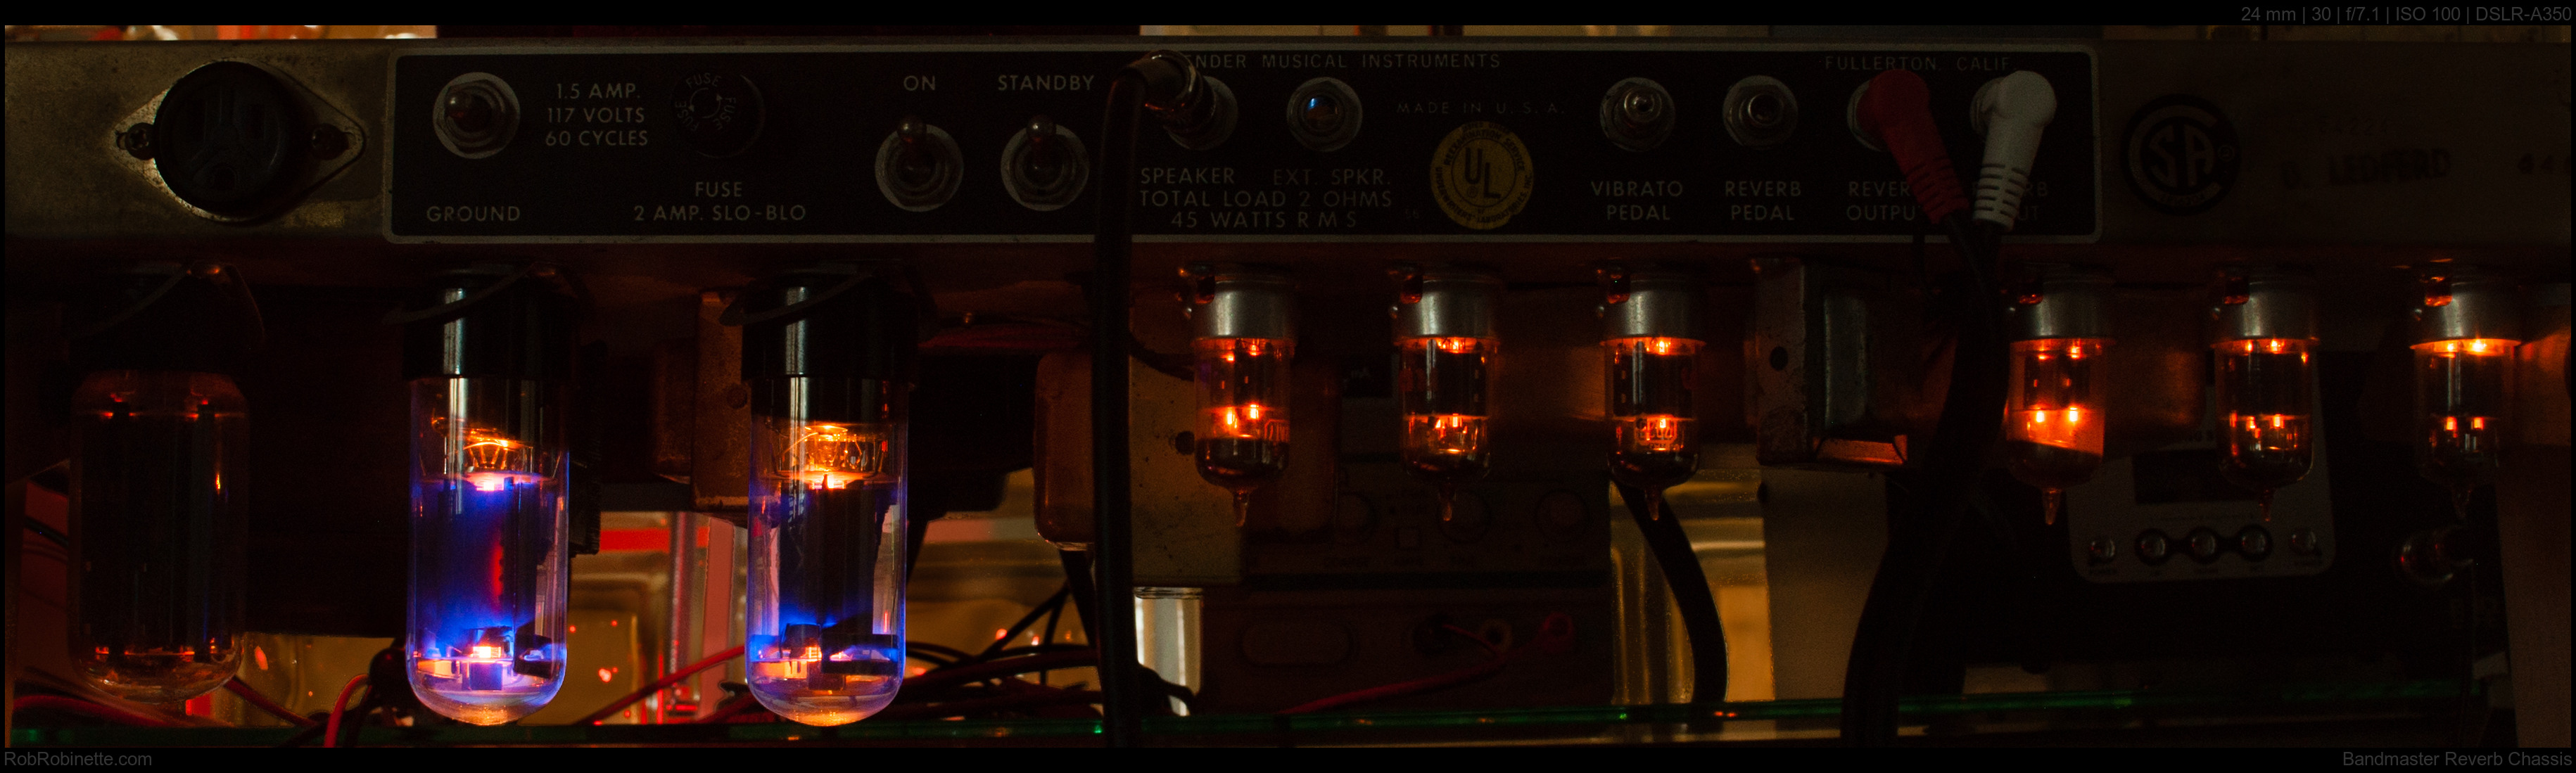
1972 Fender silverface AA1069 Bandmaster Reverb Chassis taken with a 30 second exposure at f/7 and ISO 100 with a Sony A350 with a Sigma 24mm lens. I allowed about 3 seconds of direct light from a distant fluorescent light to fall on the chassis during the exposure to make the tube glass and chassis detail visible. I also applied some post processing in Adobe Lightroom using the adjustment brush to paint on a little less exposure on the chassis front plate ends at extreme left and right to make them less dominant. You can download the full size version of this image here. It's large enough to be used as 4k wallpaper.
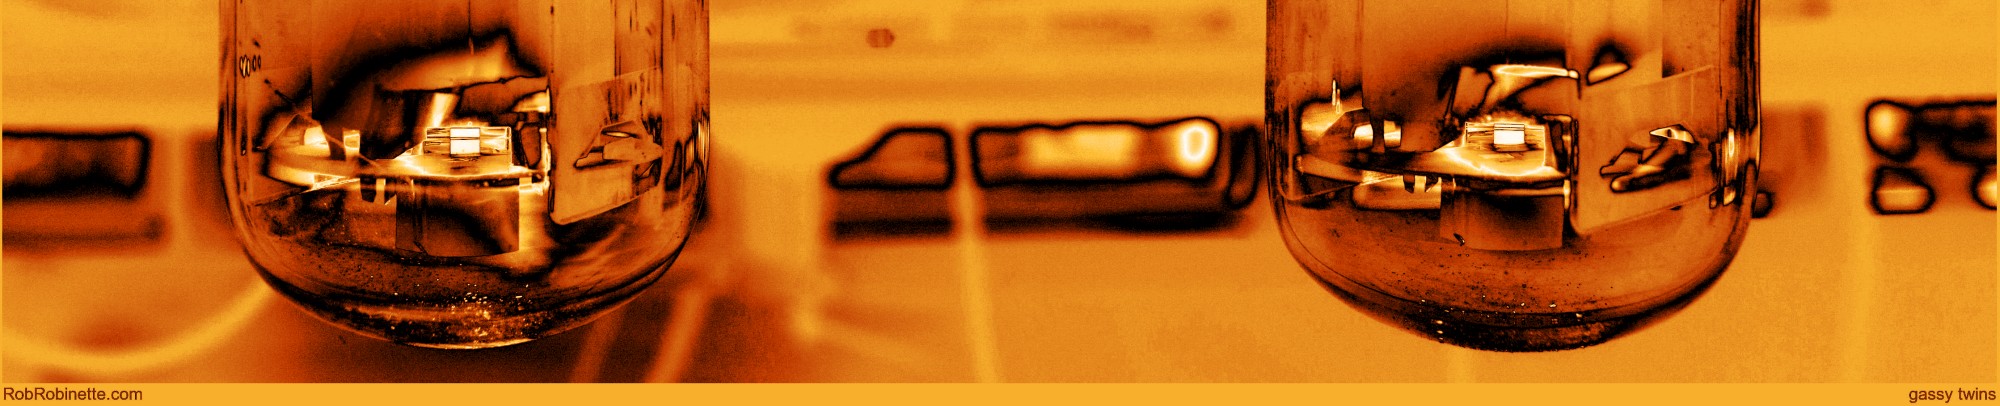
For "artsy" pics try using your photo editor's effects. The picture at the top of this webpage was made by applying irfanview's "Metal Gold" effect. The photo below was made using irfanview's Convert to Grayscale and Edge Detection effects. Irfanview is a free but powerful photo viewer/editor. I use it for simple jobs that don't require the power of Adobe Photoshop which is the industry standard photo editor.
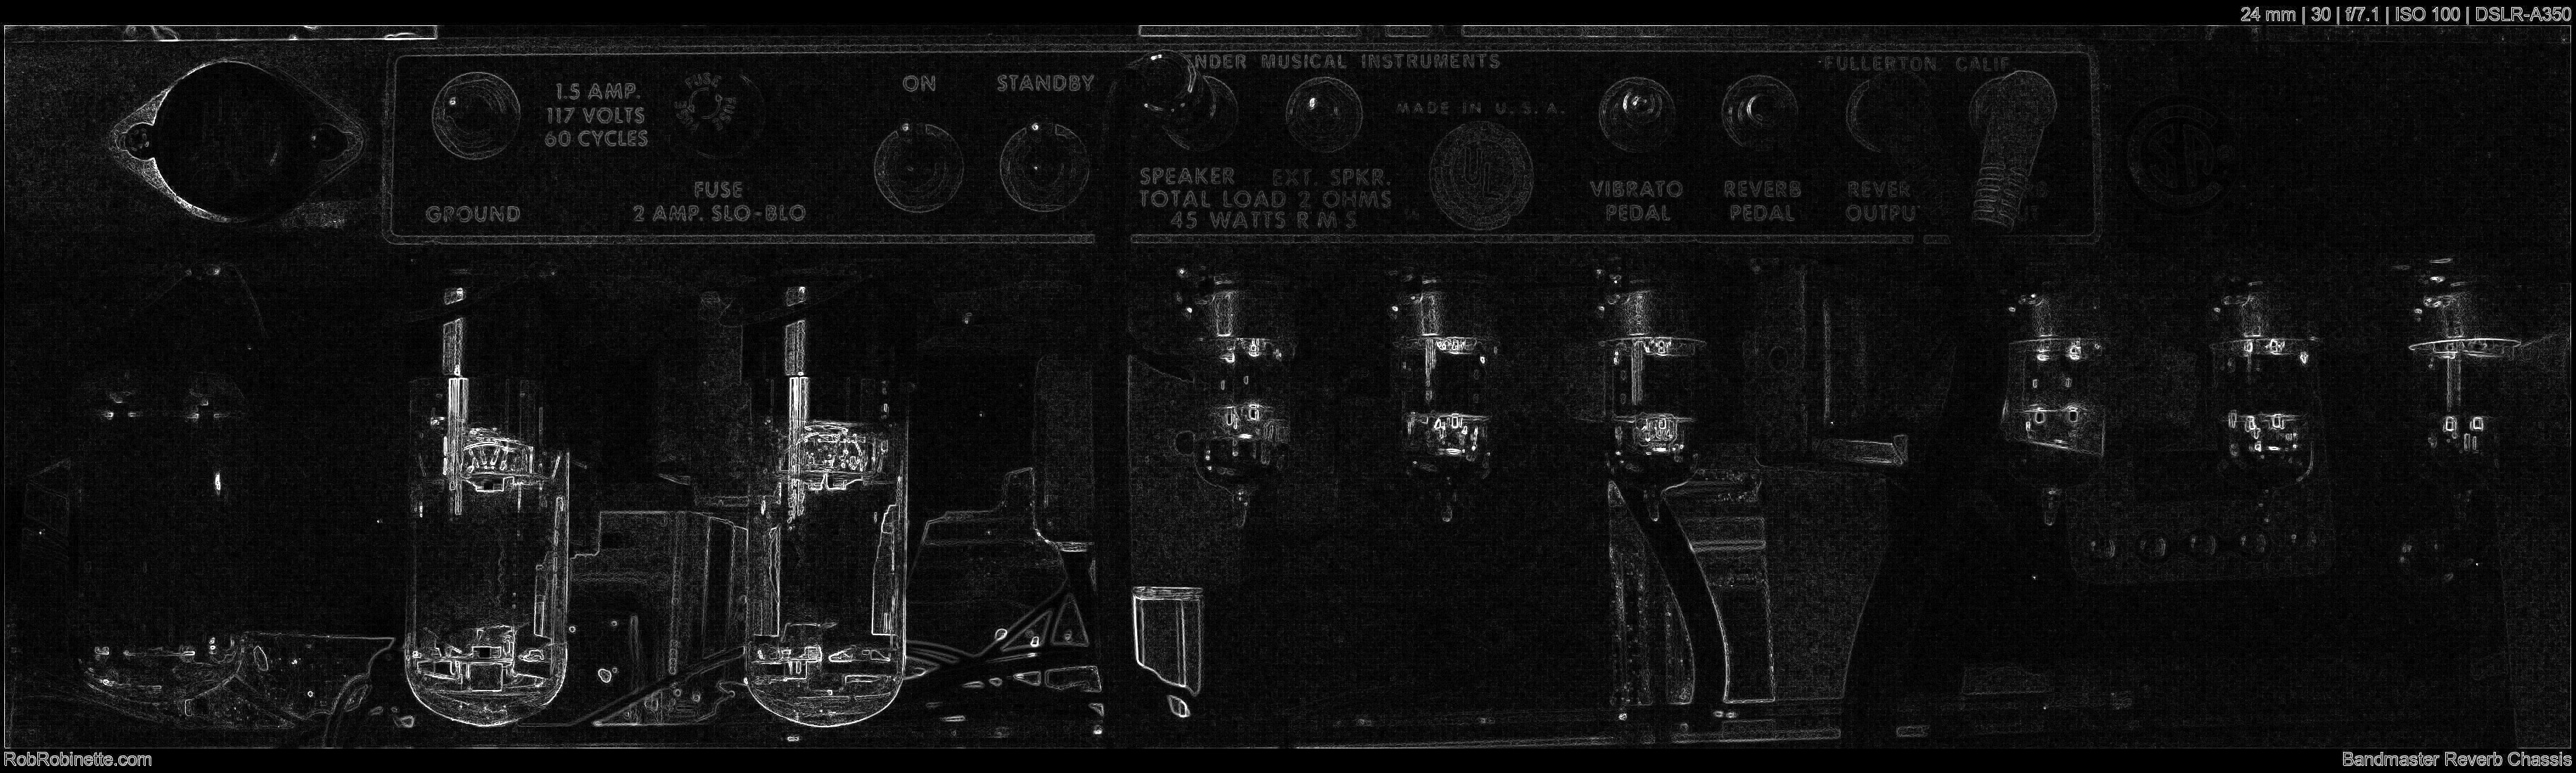
I got a cool "pen and ink" effect by converting the above "Bandmaster Reverb Chassis" image to grayscale in irfanview, then applied the "Edge Detection" effect at setting 5. The full size 4k image is here.
Irfanview "Metalic Gold" effect applied. The full size 4k image is here.
Some tubes are more photogenic than others. As can be seen in my photos most little preamp tubes look bland when compared to power tubes. The beautiful gassy blue 6N3C power tubes featured prominently on this page are perfect subjects. They even have their getter flash (silver coating inside the glass) on the base of the tube which leaves the top of the tube clear and perfect for tube photography. These 6N3Cs are the gassiest tubes I've ever seen and their ample blue glow is absolutely glorious. Tubes this gassy are usually replaced so ask your local tube amp technician to save you a pair.
You can make the tube glass more visible with more ambient light. You can add a little light by quickly flashing on the room lights during the exposure or by hitting the tubes with a flashlight beam. Just a quick flash is all that's usually needed.
For close up macro shots you can add an inexpensive extension tube between your lens and camera to make the lens focus at a closer distance. This can really help with longer focal length lenses. I got a set of three extension tubes for my A350 for $13 from Amazon. Extension tubes are best used with manual lenses with an aperture adjustment ring because most extension tubes will block the communication between camera and lens so aperture control is lost in auto focus lenses.
Take lots of pictures with different exposure settings and slightly different focus, you can always erase the pics that don't work but the odds of taking that "perfect" image go way up.
The camera's small preview screen is not good enough to evaluate your tube pics so transfer them to a computer to get a closer look.
Nixie
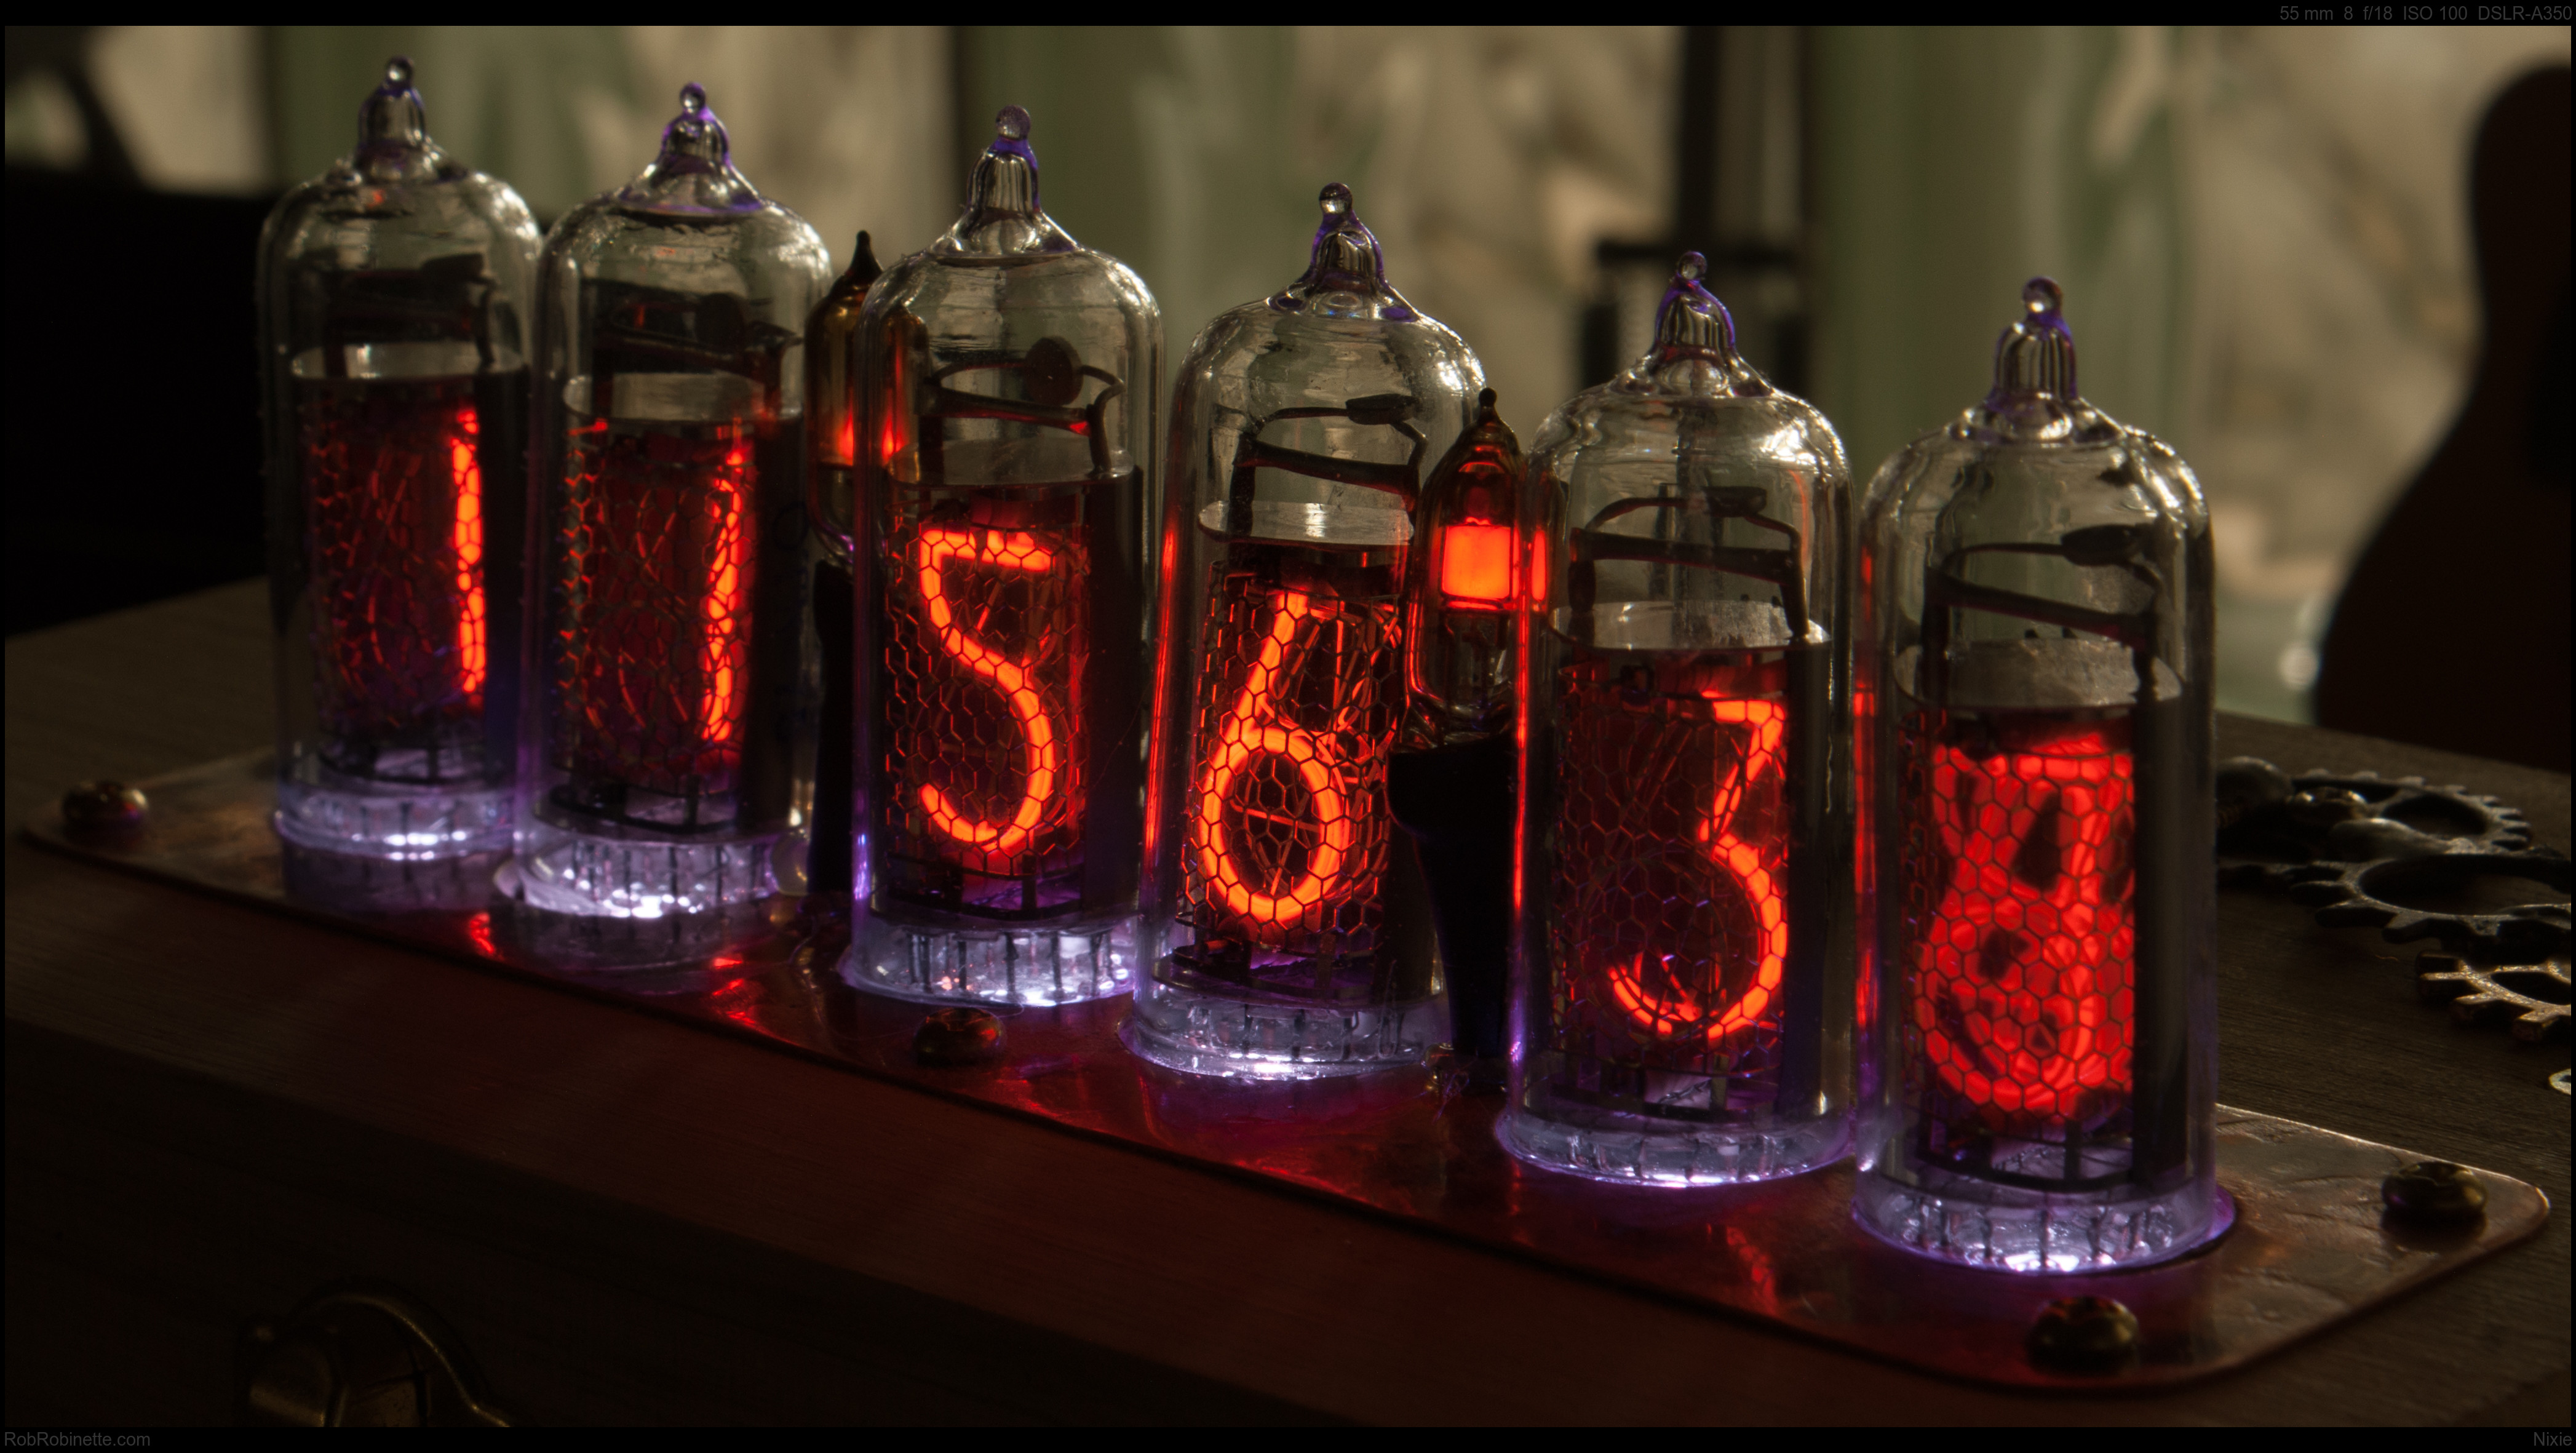
This is a clock that uses nixie tubes for its display. Each tube has 10 cathodes in the shape of the numbers 0 to 9. One cathode is selected and supplies electrons that are pulled off the cathode by the high voltage plate. The electrons collide with gas molecules and glow. Sony A350 with Sony 18-70mm f/3.5-5.6 zoom lens at 55mm, 1.5 macro lens, 8 sec exposure, f/18, ISO 100. Click the image to see the full resolution photo.
Old Man
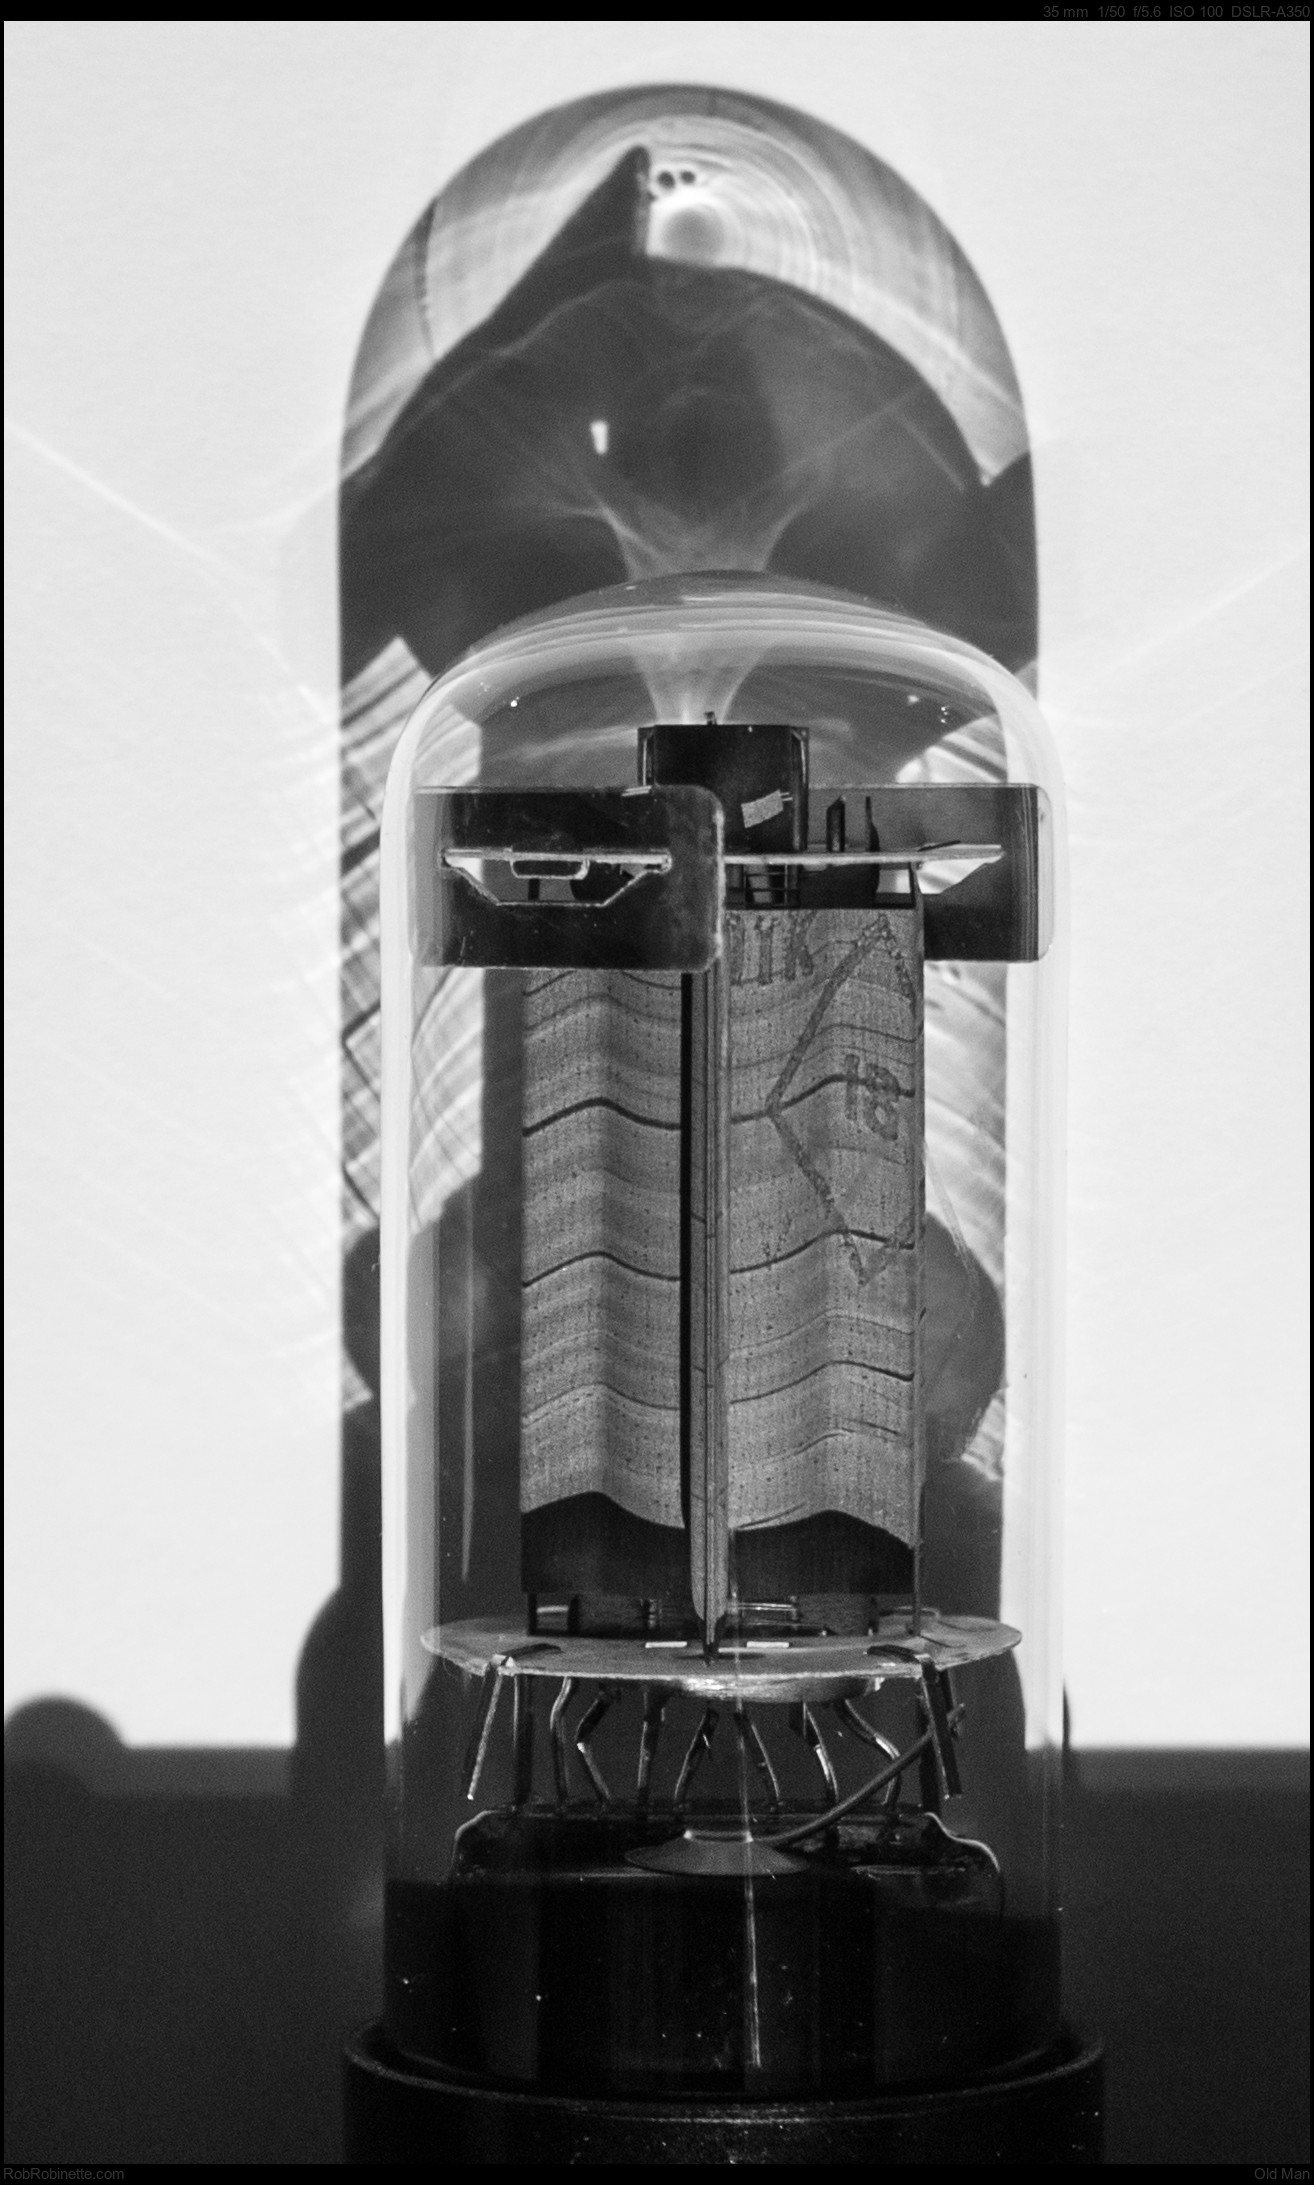
Sony A350 with Sony 18-70mm f/3.5-5.6 zoom lens at 35mm, 1.5 macro lens, 1/50 sec exposure, f/5.6, ISO 100.
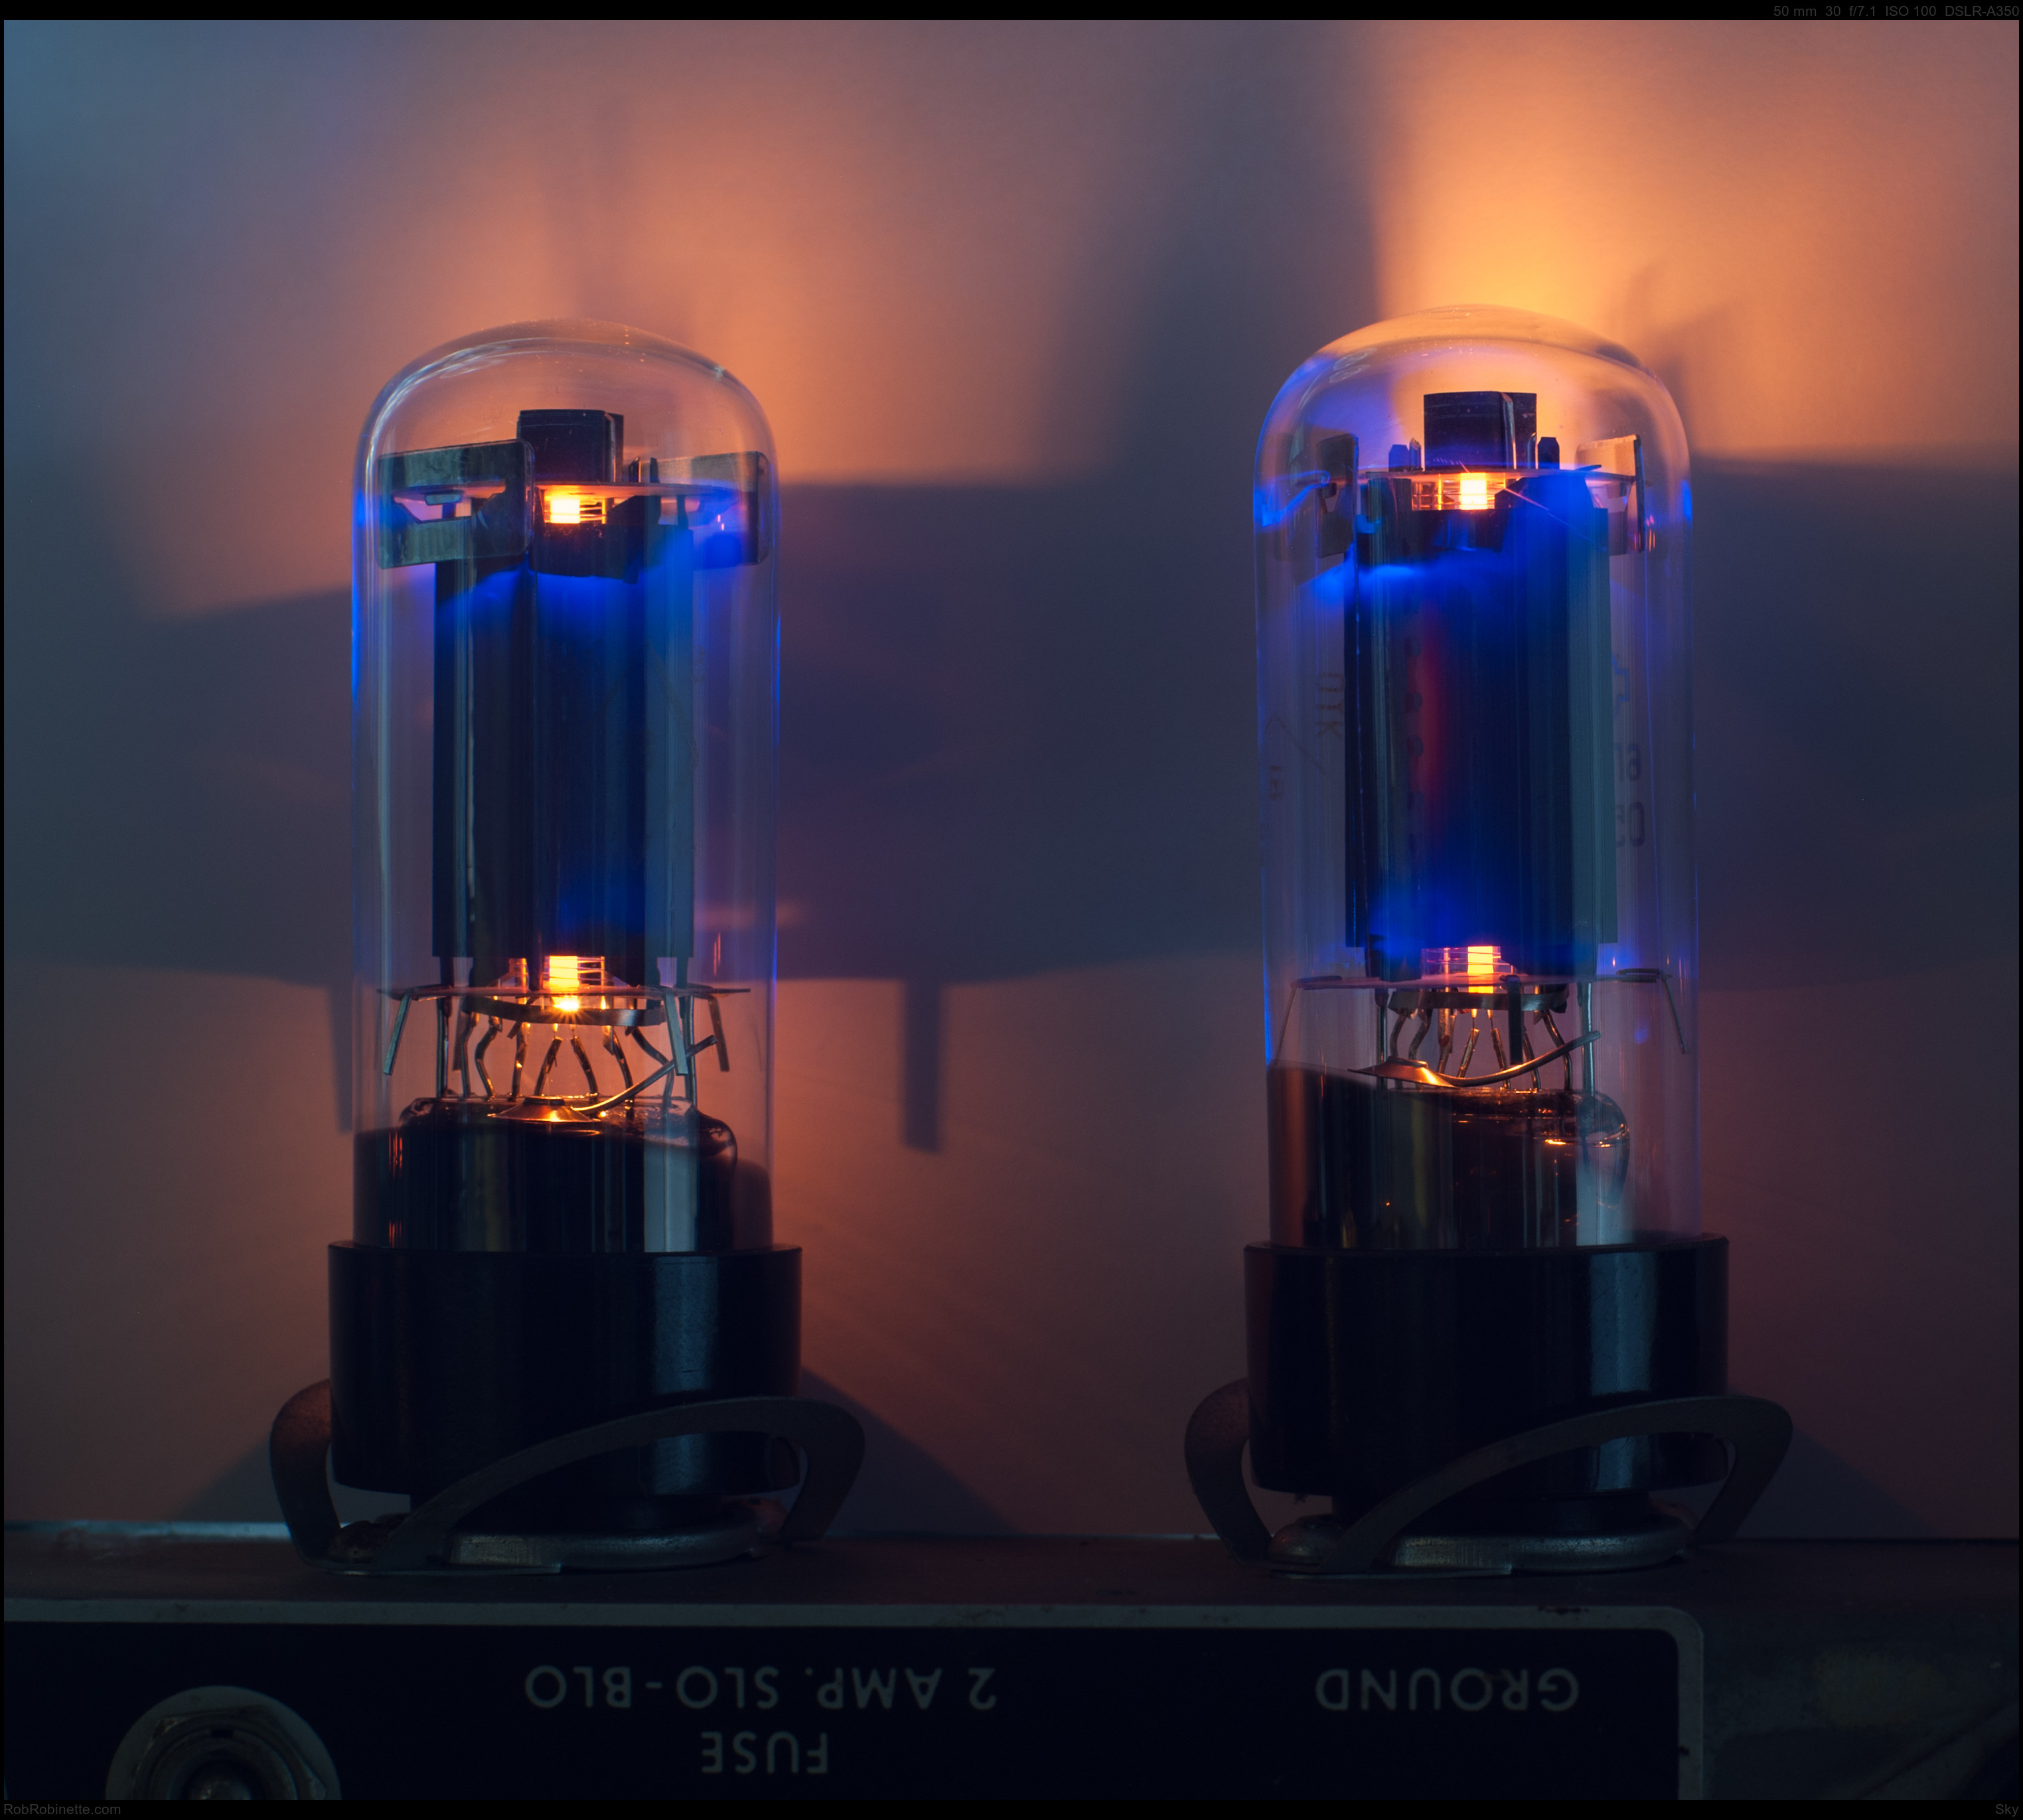
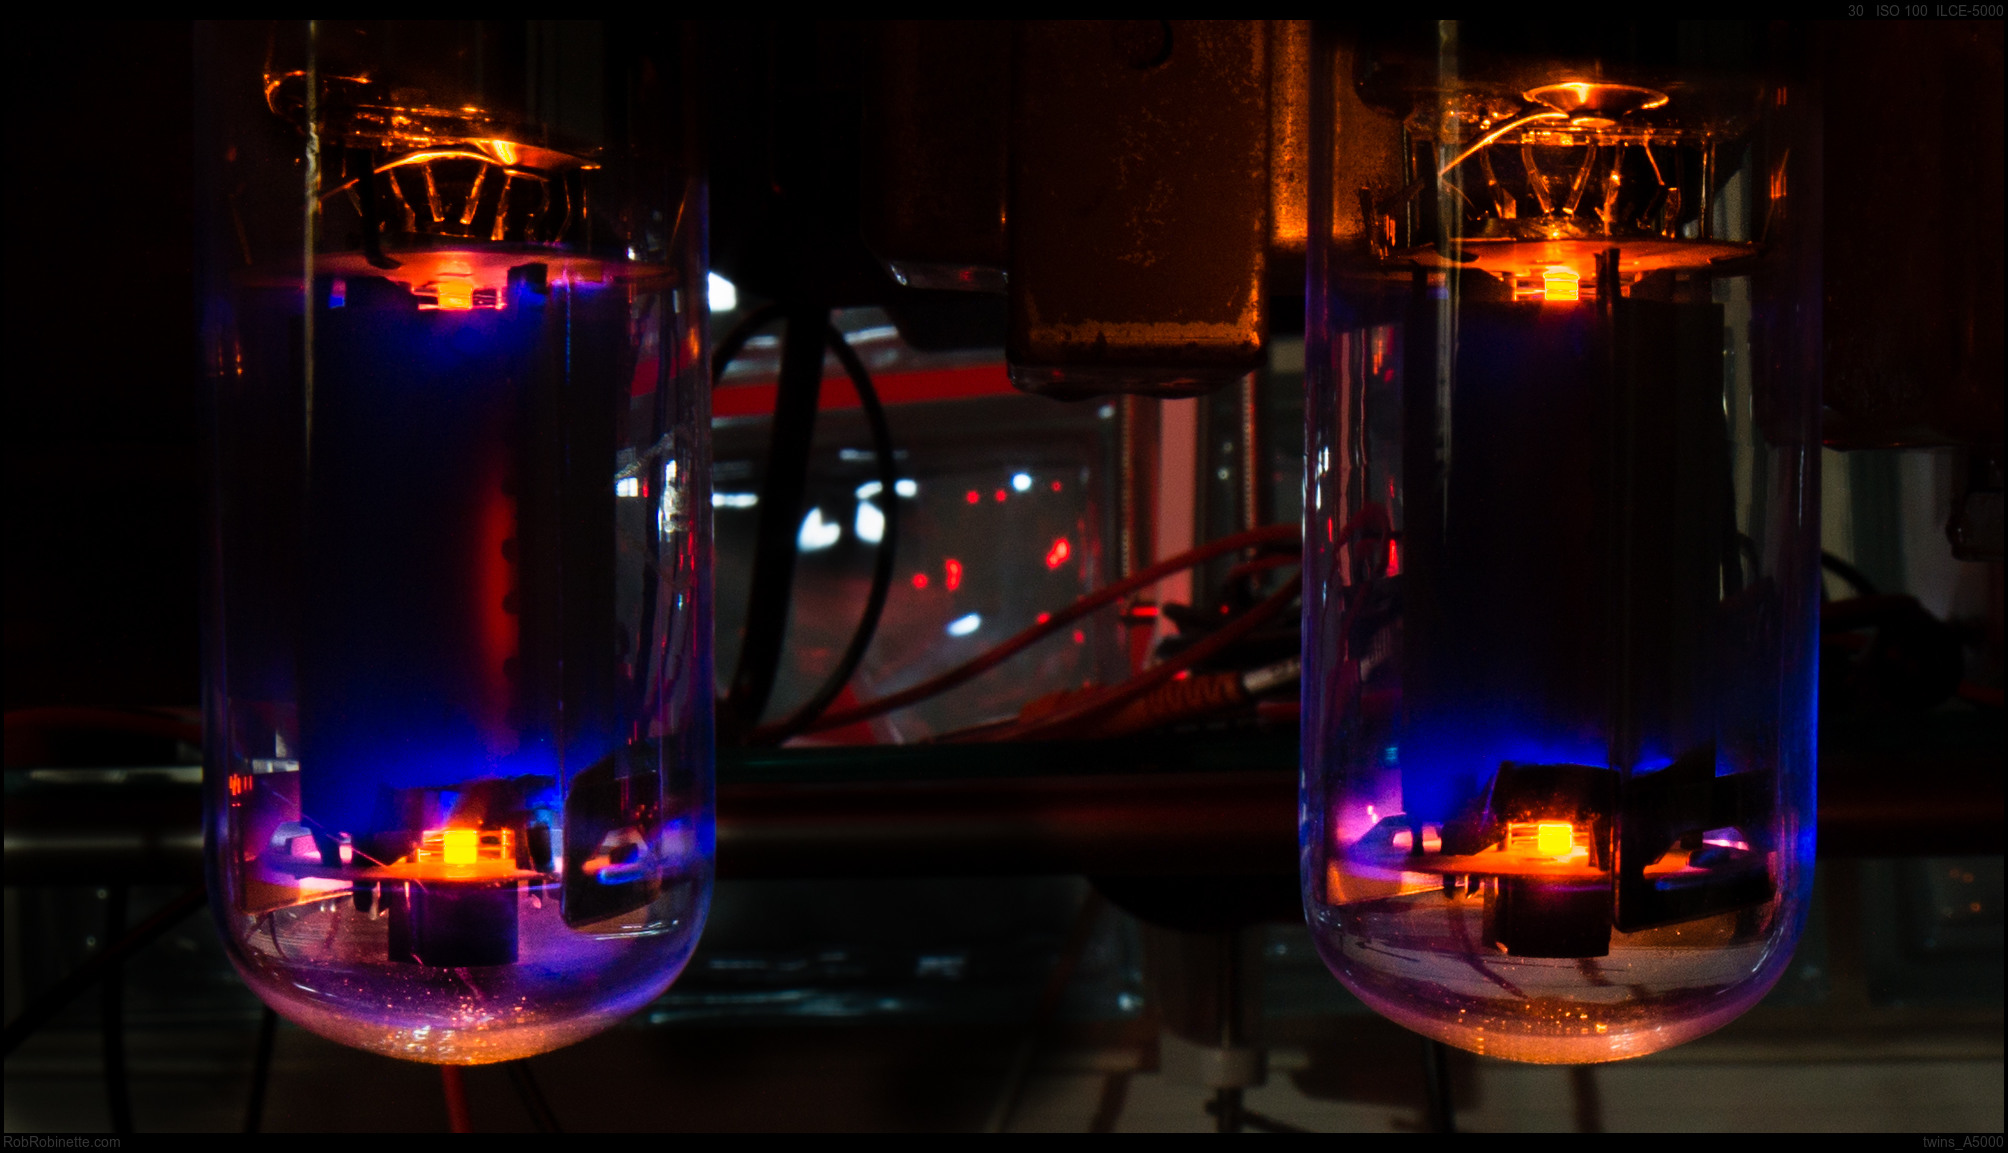
Gassy Twins
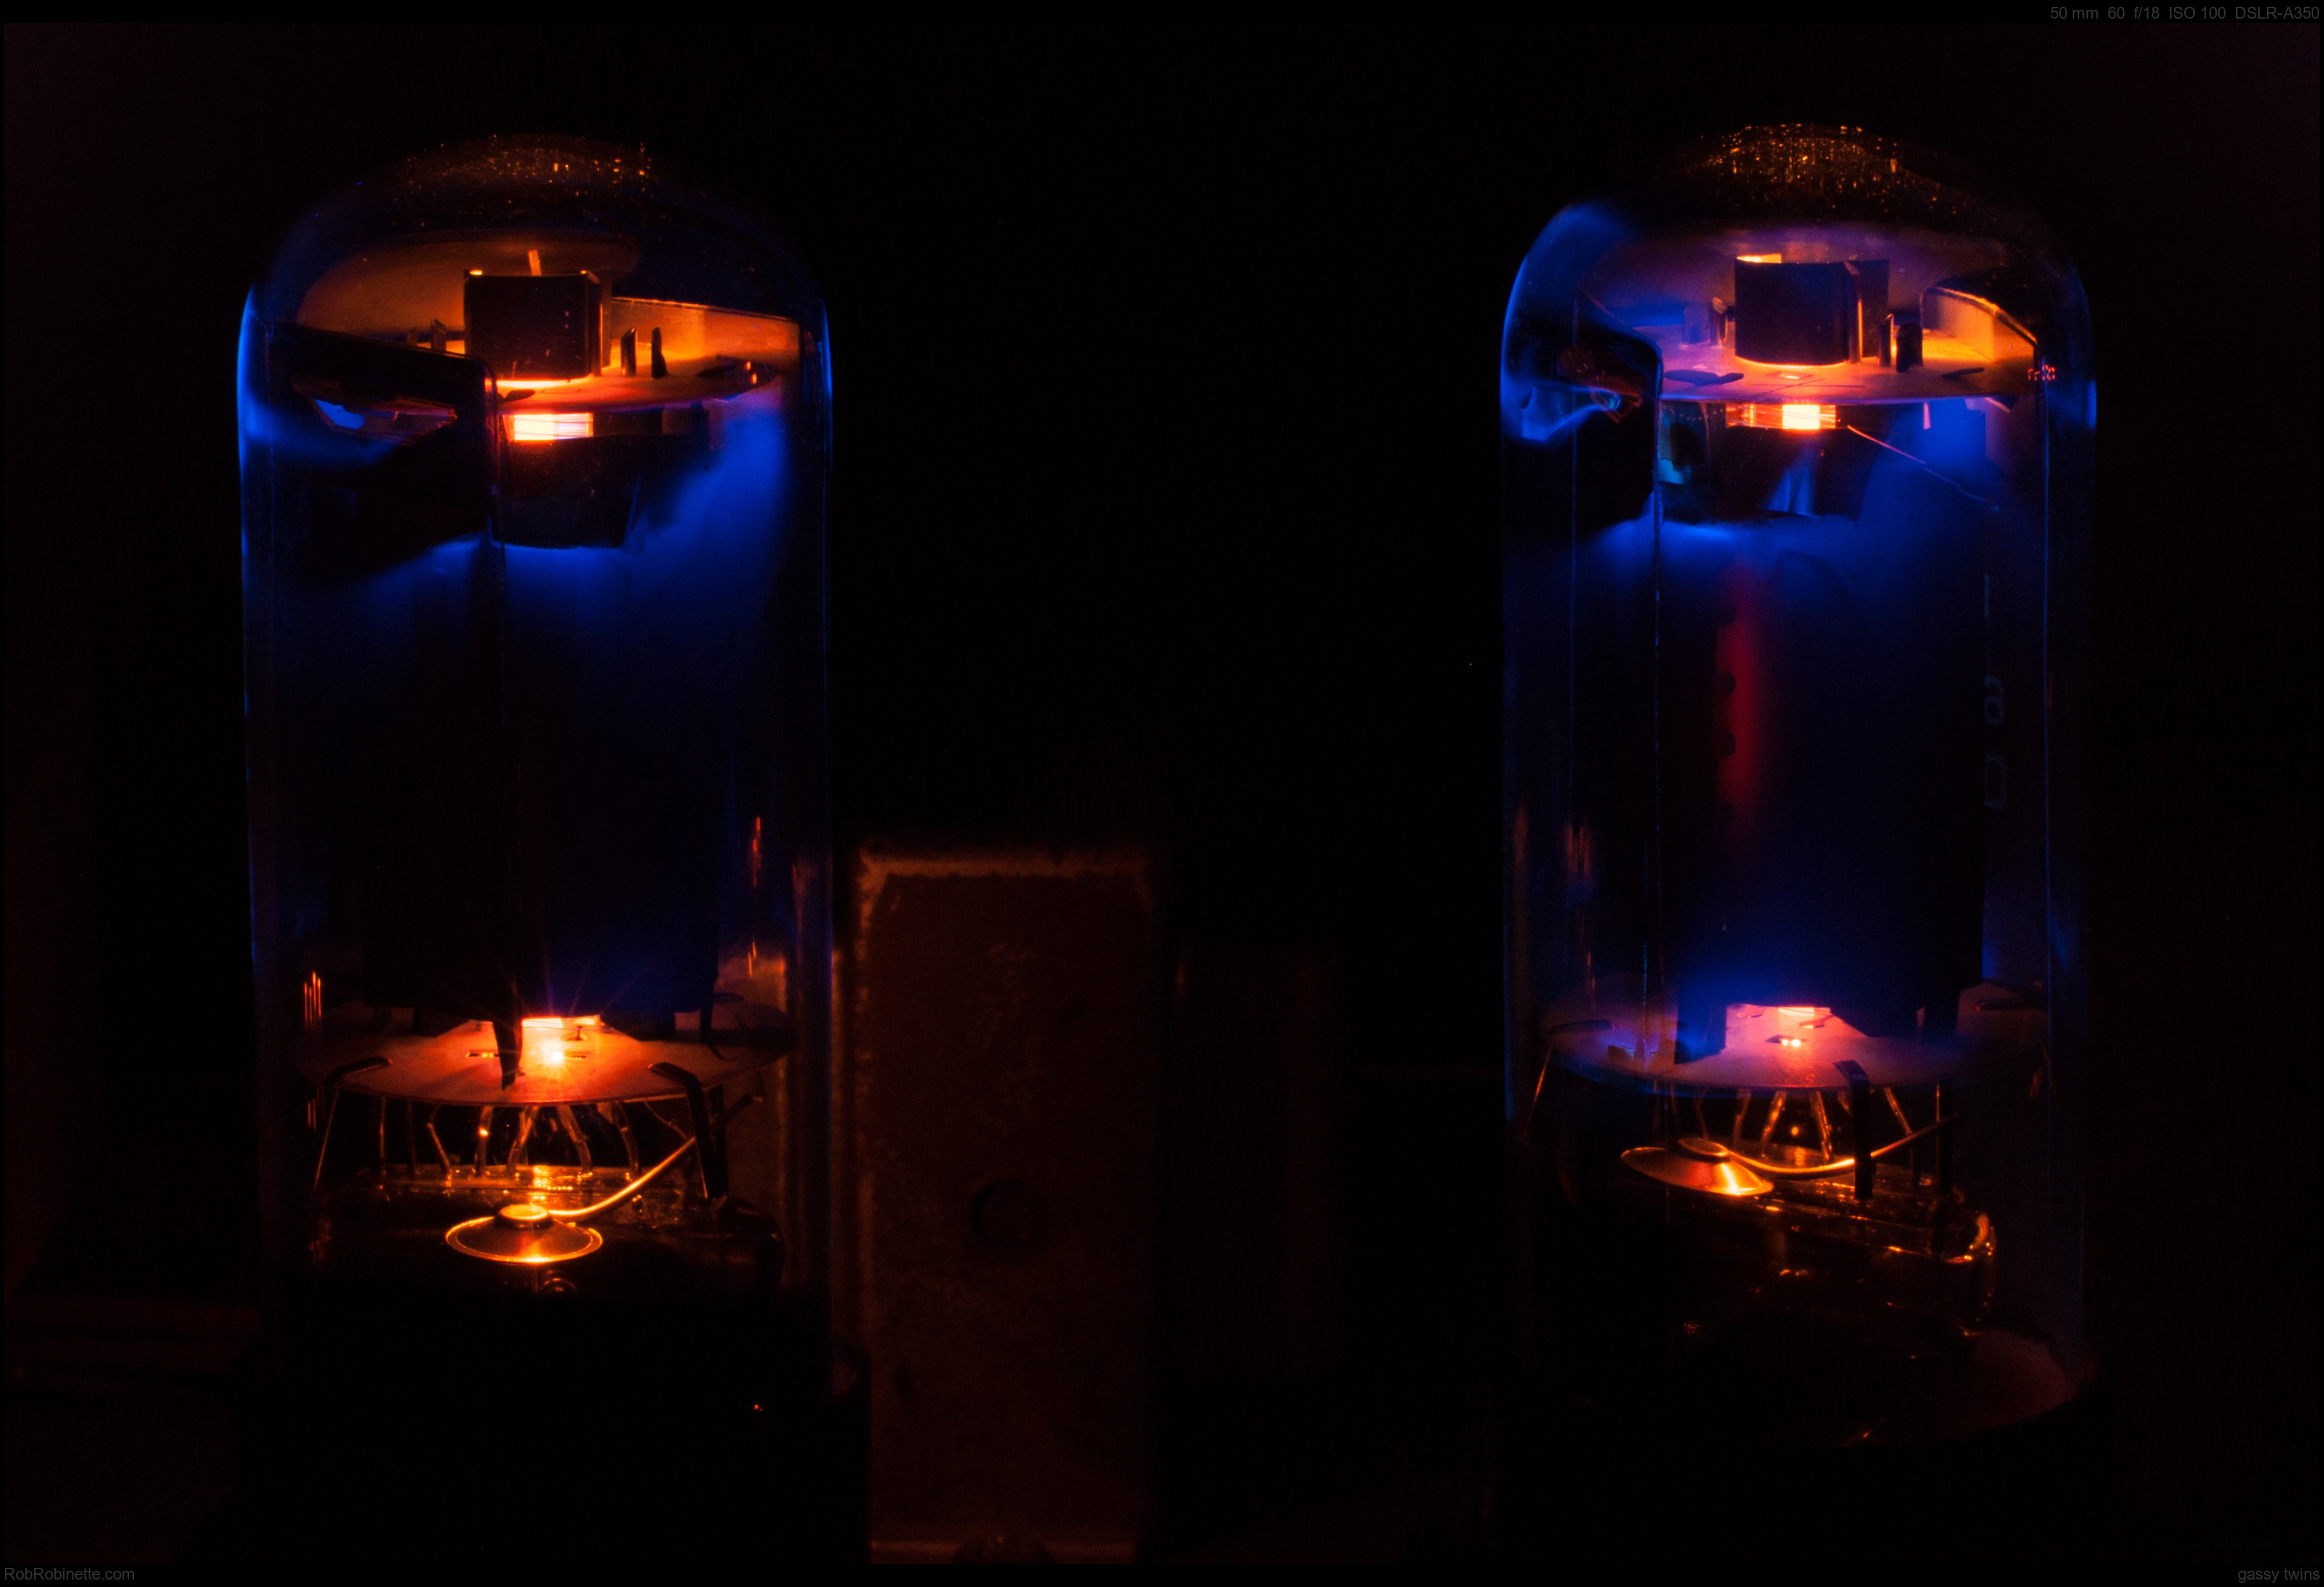
I took this picture of my Bandmaster Reverb guitar amplifier's old 6N3C Russian military power tubes on my workbench with a Sony A350 camera with a Minolta 50mm f/1.4 auto focus lens using manual focus, set at f/18, 60 second exposure and ISO 100. The camera was placed on a tripod about 12 inches from the tubes (11 inches is the minimum focus for this 50mm lens). Notice how the thin grid wires running in front of the glowing cathodes are in sharp focus. Also notice how the upper and lower support wafer discs are brightly lit by the cathode glow. The cool blue glow is caused by electrons striking gas molecules. A normal tube with no gas contamination will not show any blue glow. Also, notice the slight red plating in the center of the right tube. I over biased these tubes to increase the blue glow for the photo session and went a little too far. The full size 4k image is here.
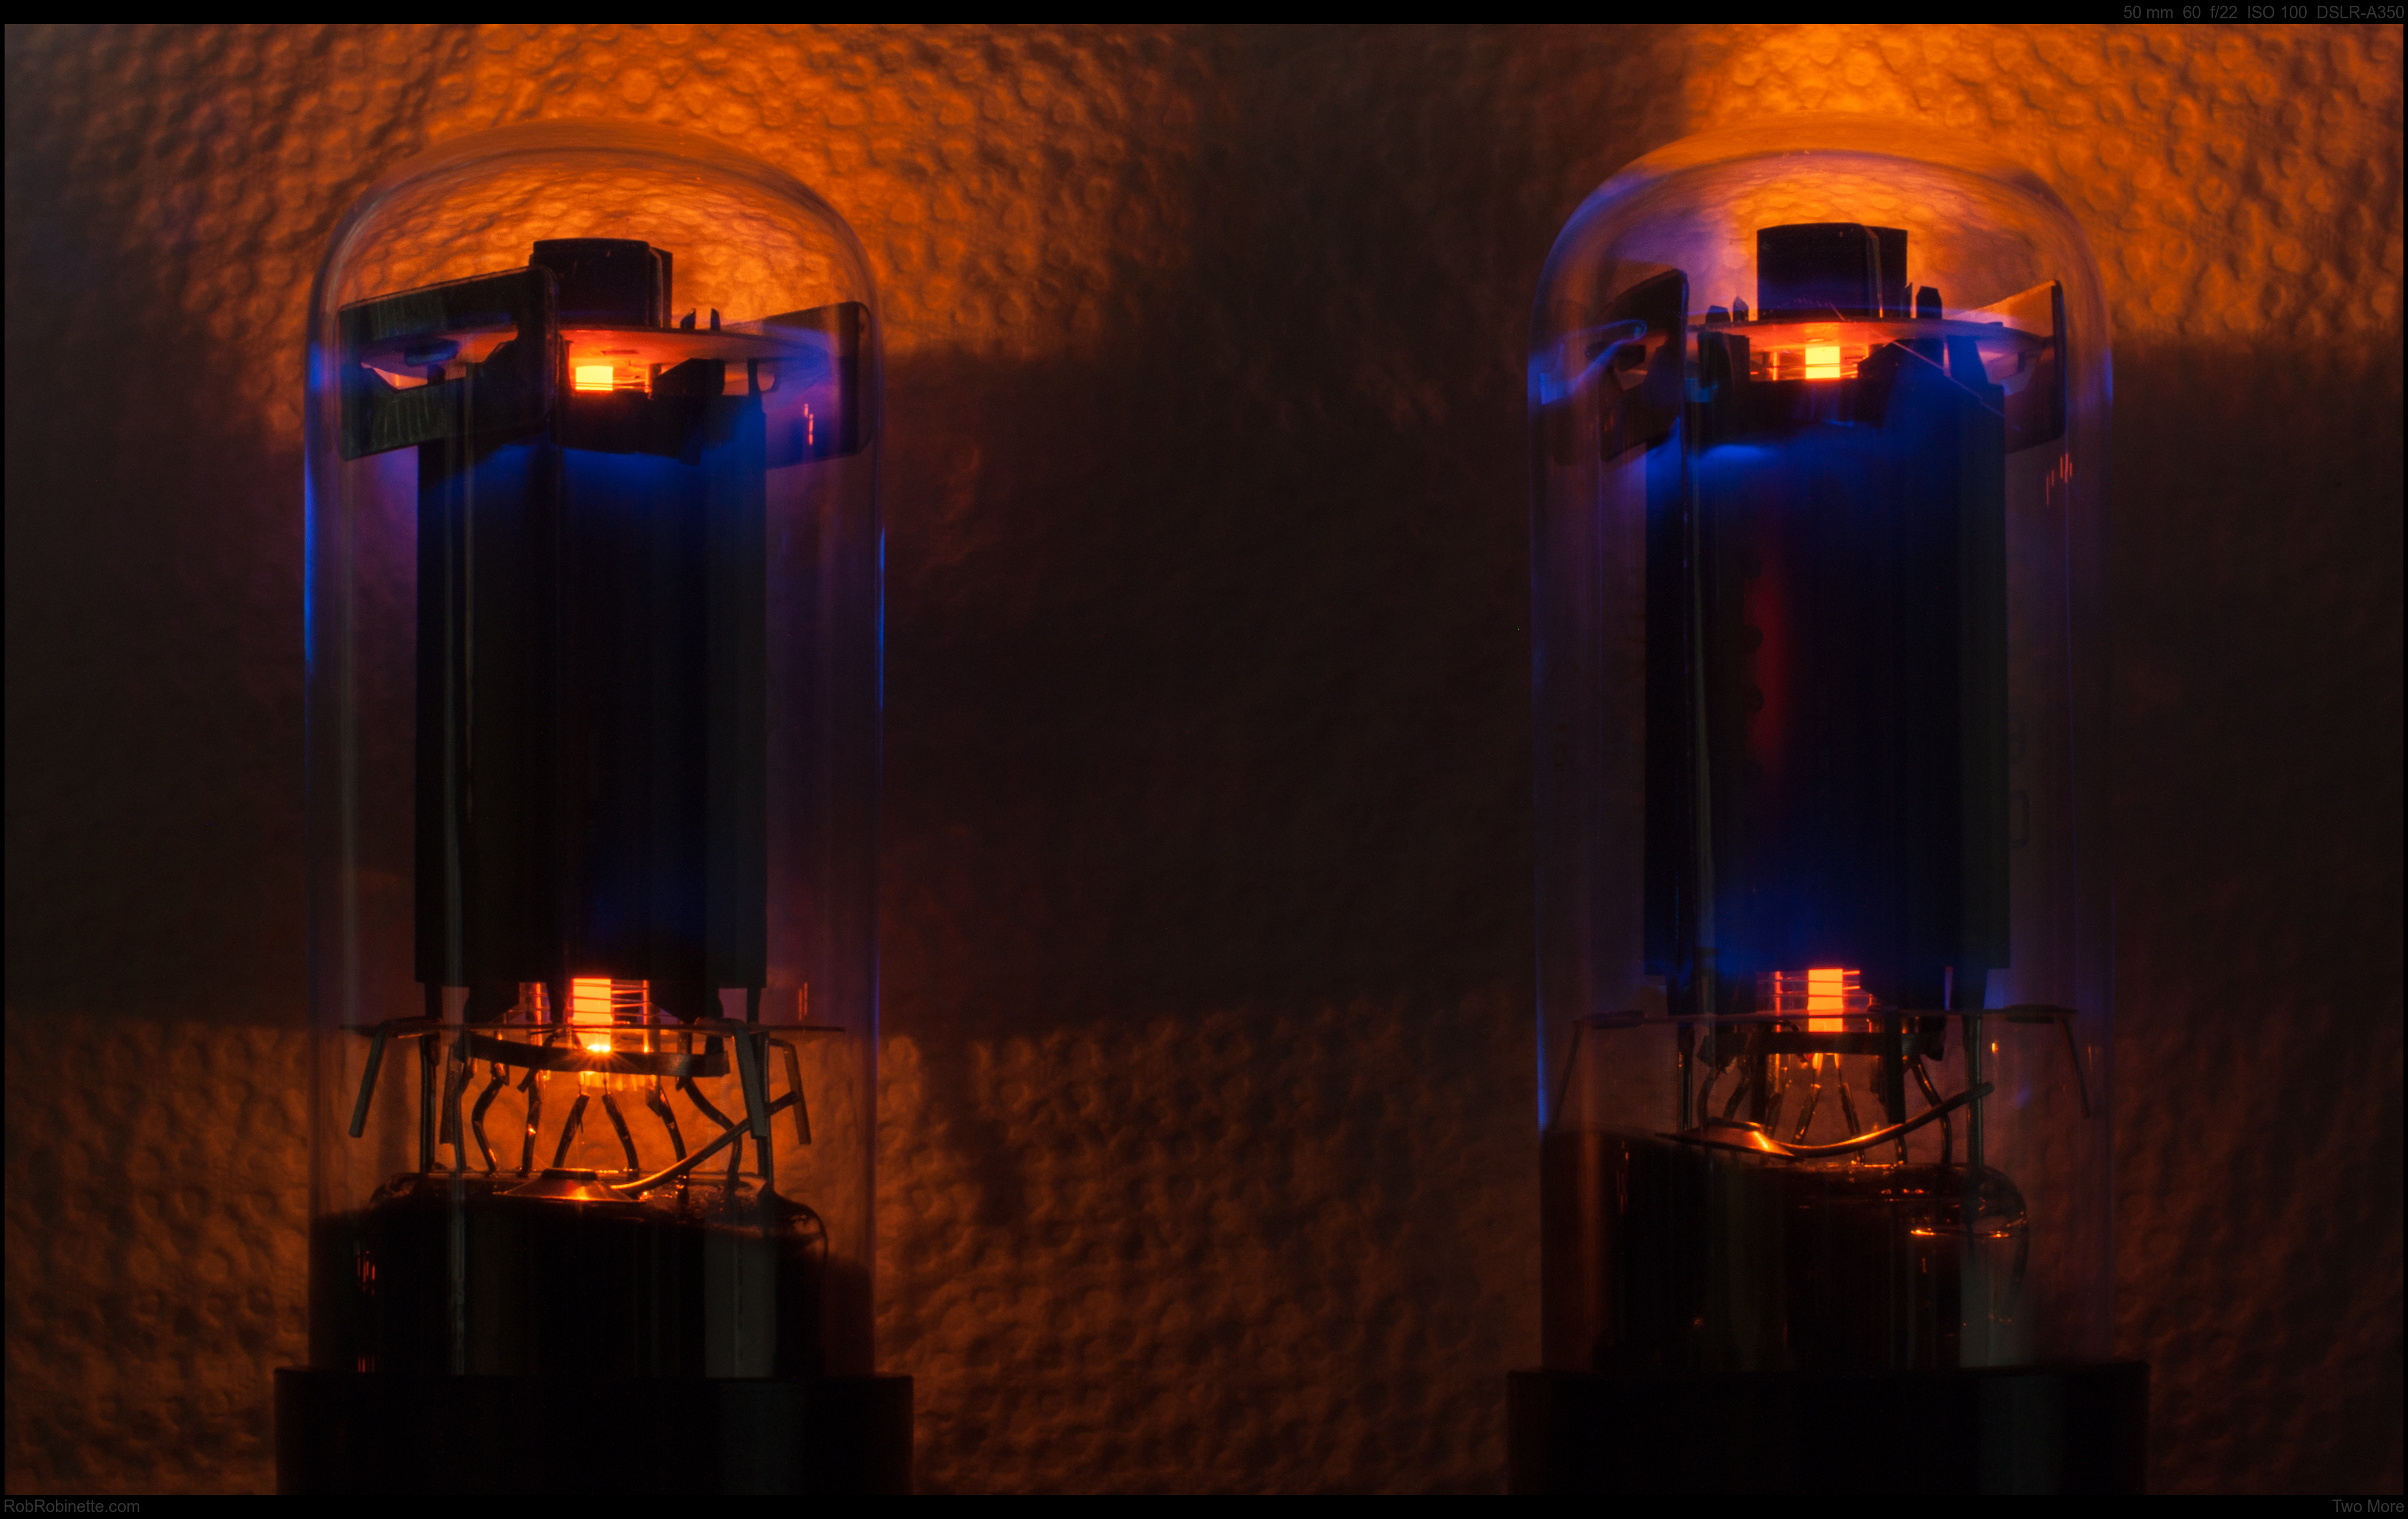
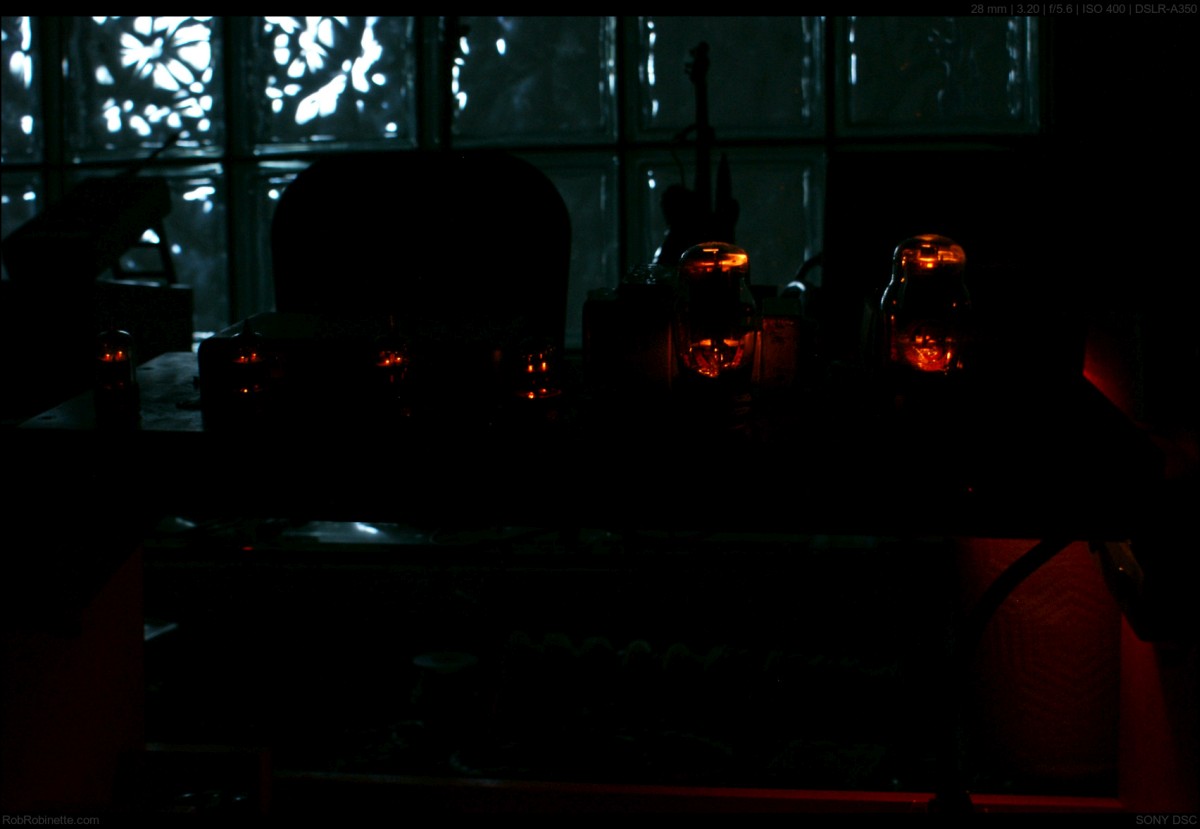
Tank
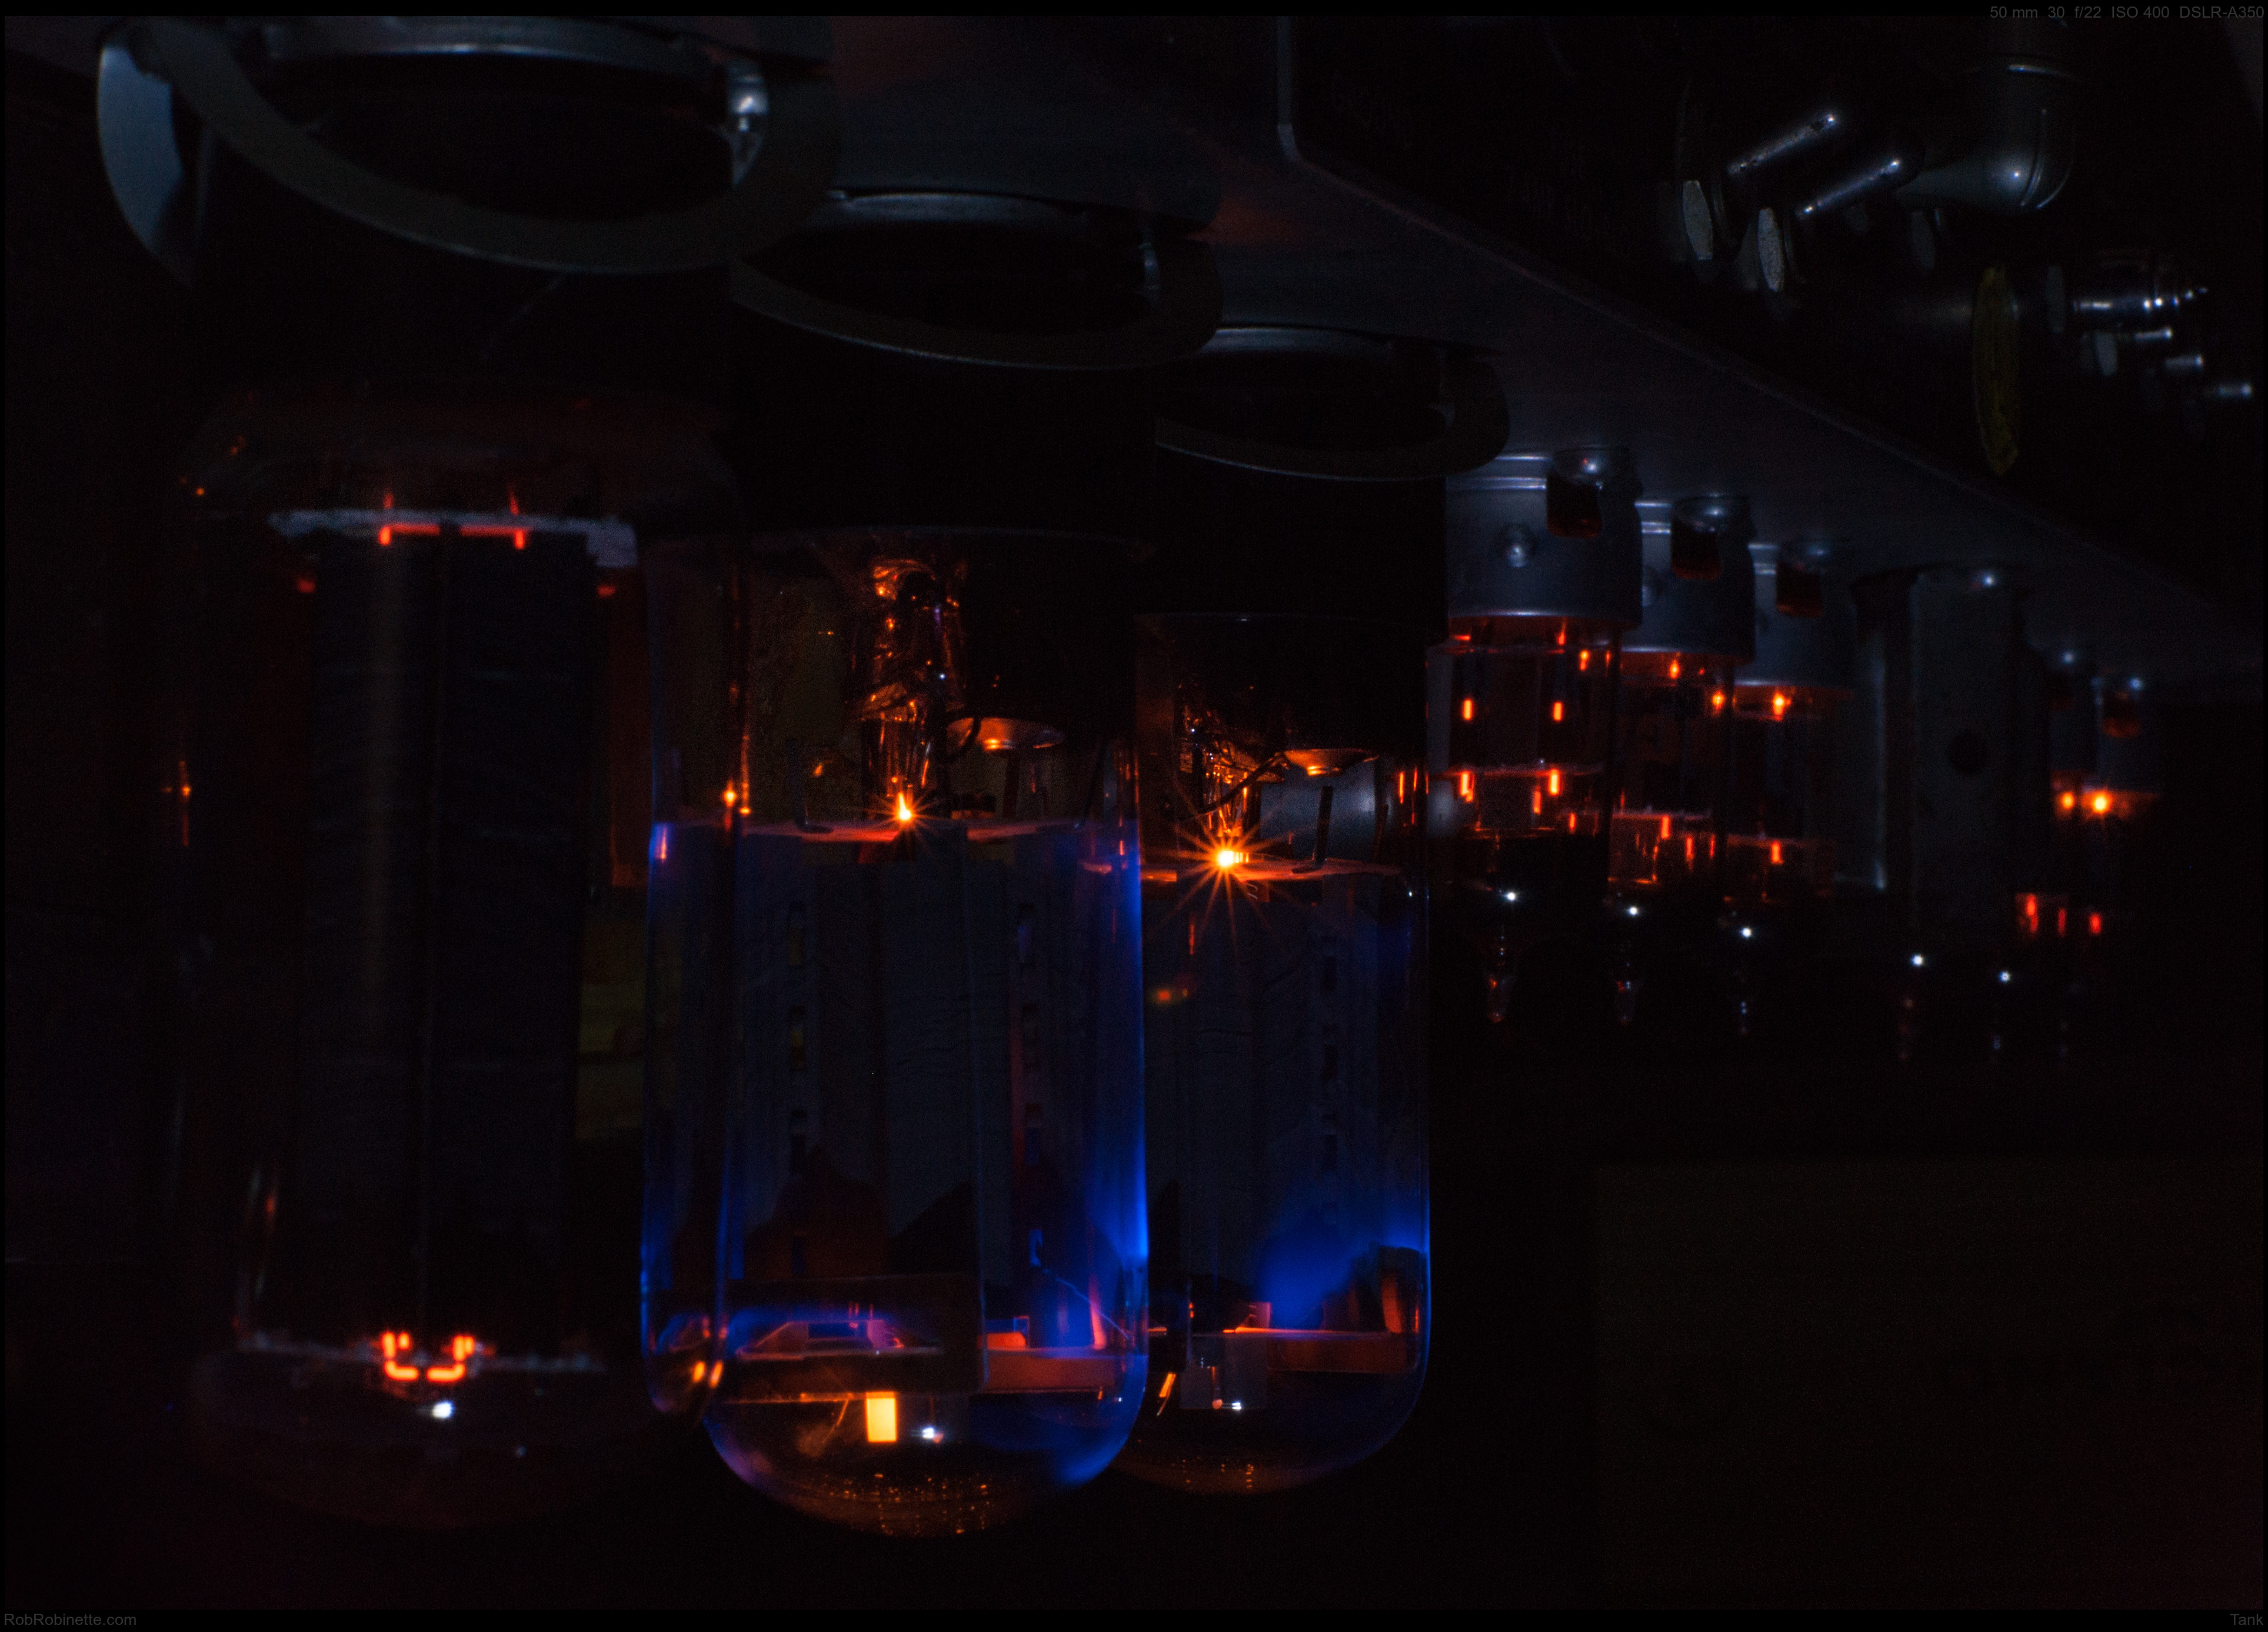
Taken in a blacked out wine cellar with the Sony A350 and Minolta 50mm 1.4 lens, 30 second exposure at f/22 ISO 400. I hit the chassis quickly with an LED flashlight in its dim mode. Click the image to see the full resolution photo. I accidentally left the ISO set to 400 so the picture is a grainy compared to the rest of the pics on this page which used ISO 100.
Twin Towers
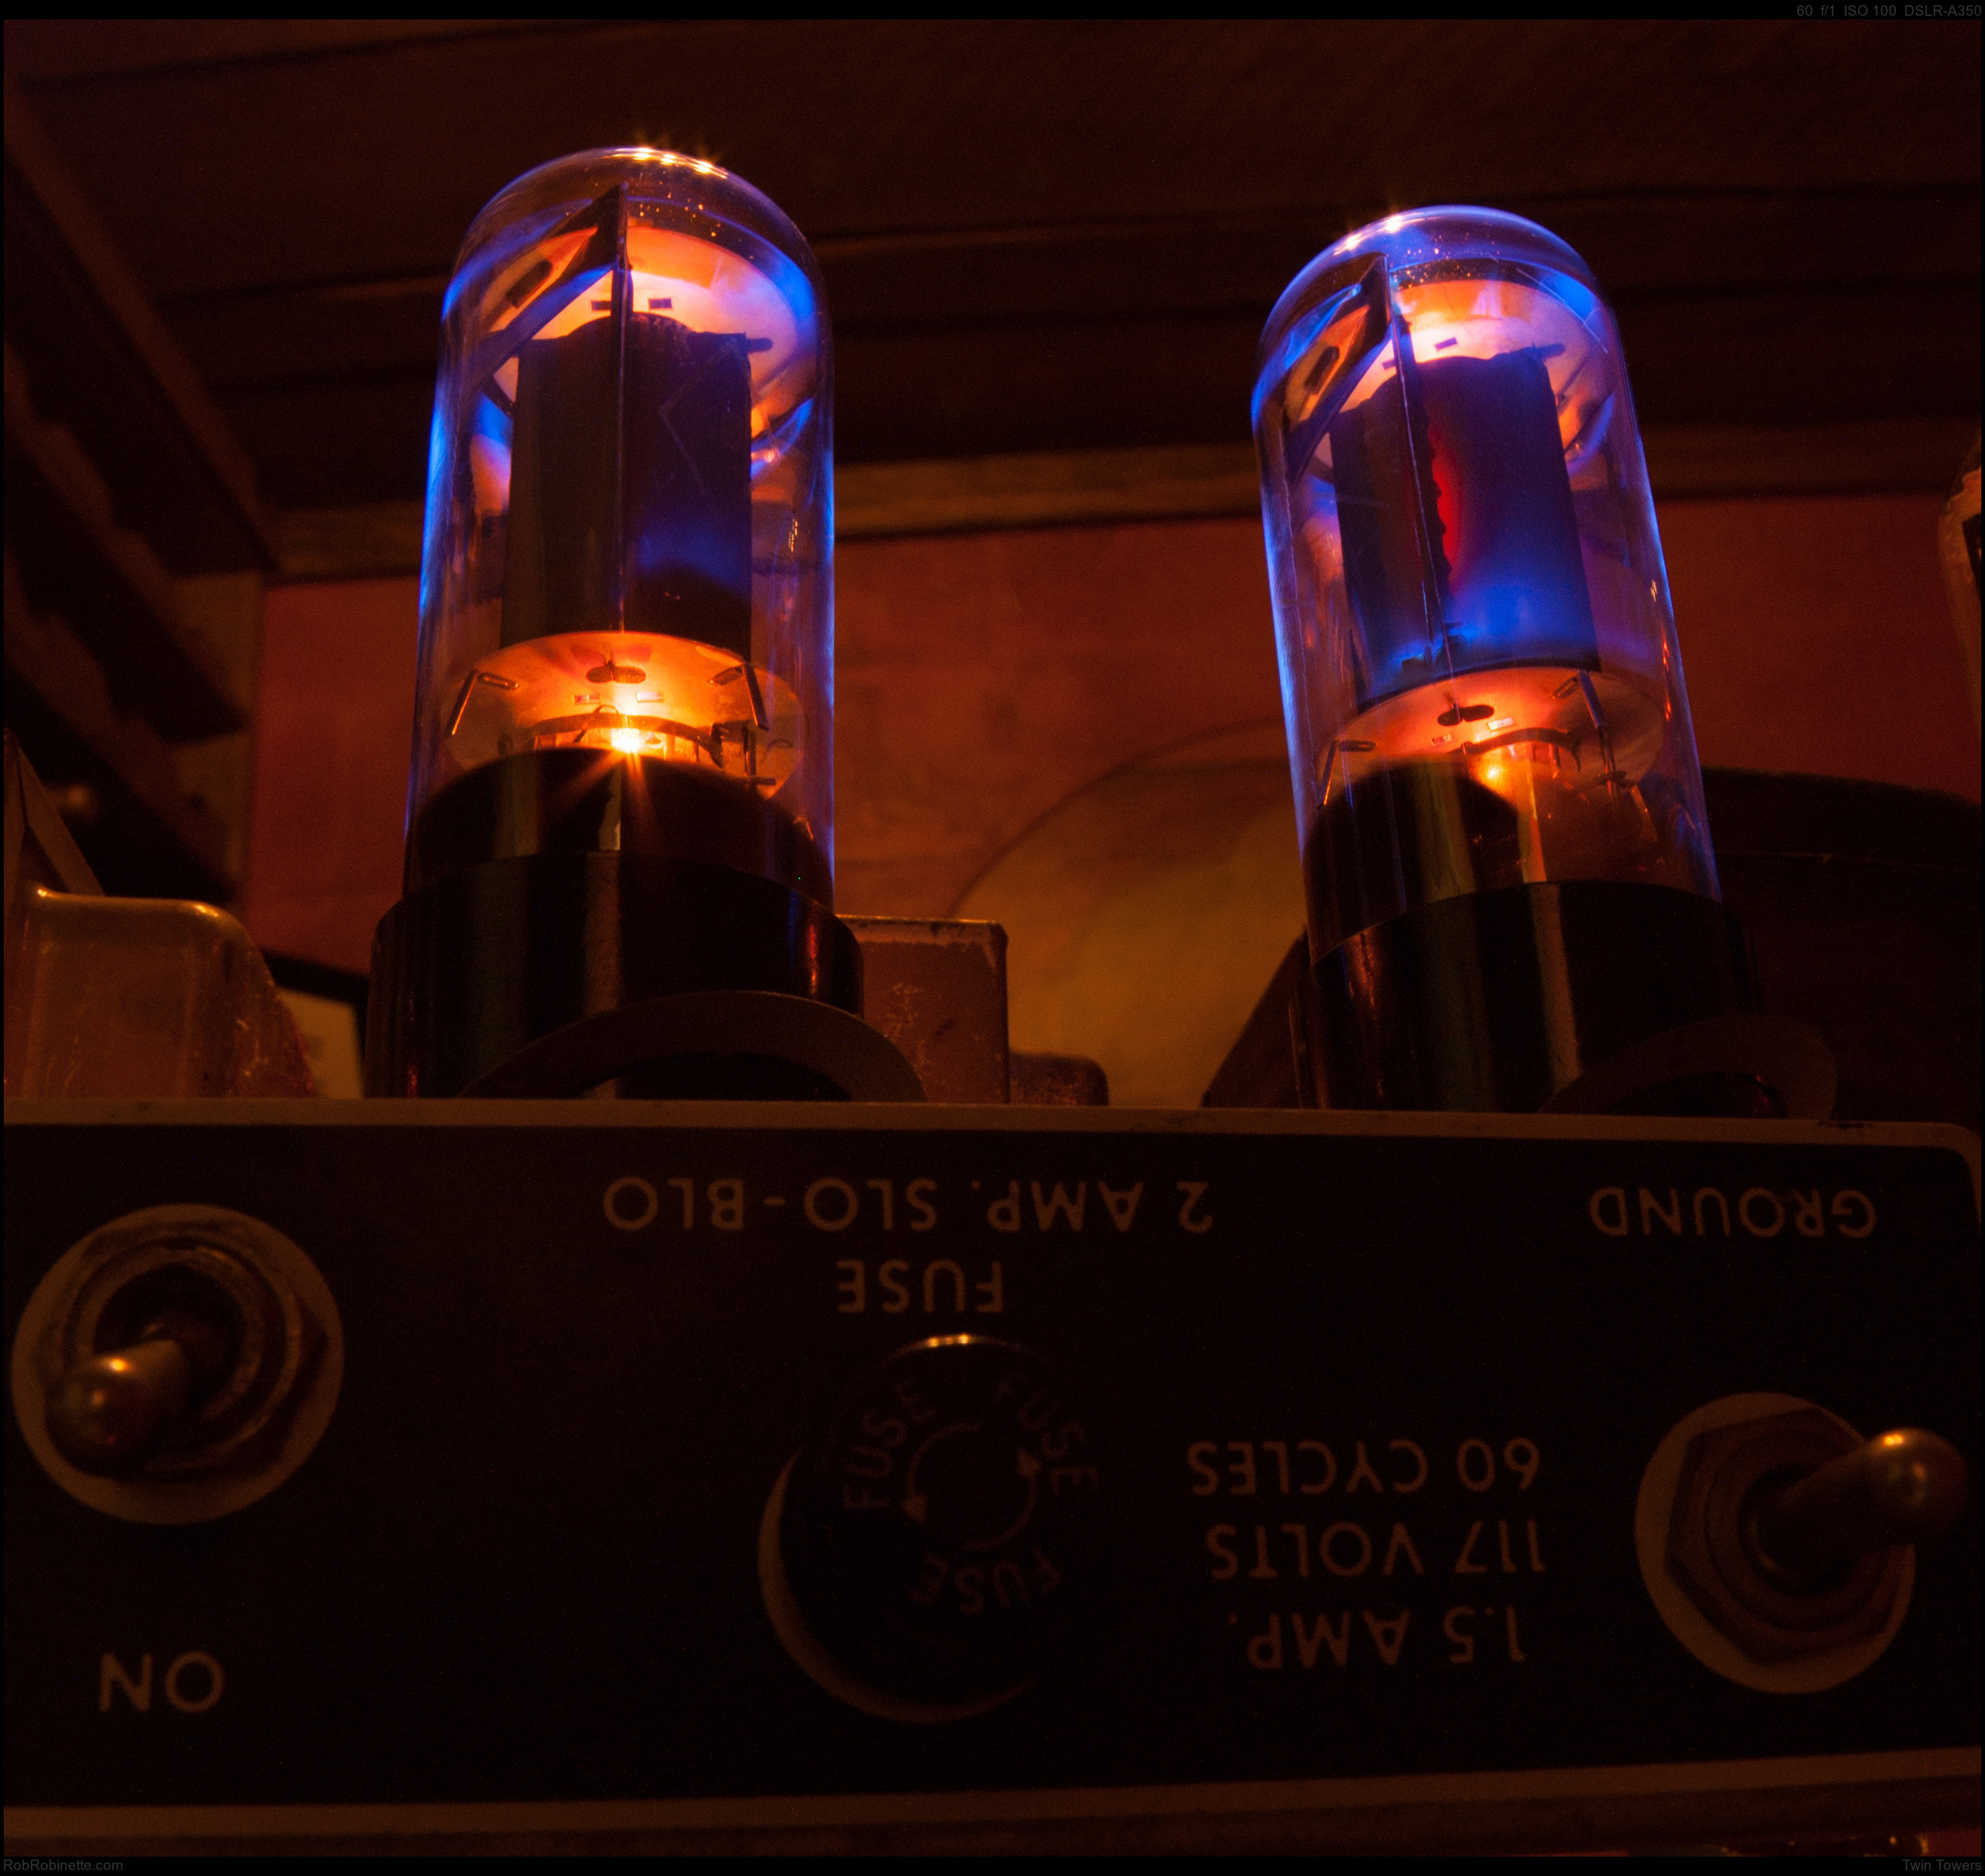
This photo was taken in a completely blacked out wine cellar but I flashed the room lights on for about a second during the exposure to light the chassis and room interior. It has a kind of comic book look to it but that just happened by chance. The only post processing I did to this picture was cropping. Taken with Sony A350 with Rokinon 14mm f/2.8 lens set at f/16, 60 second exposure, ISO 100. 4k version here.
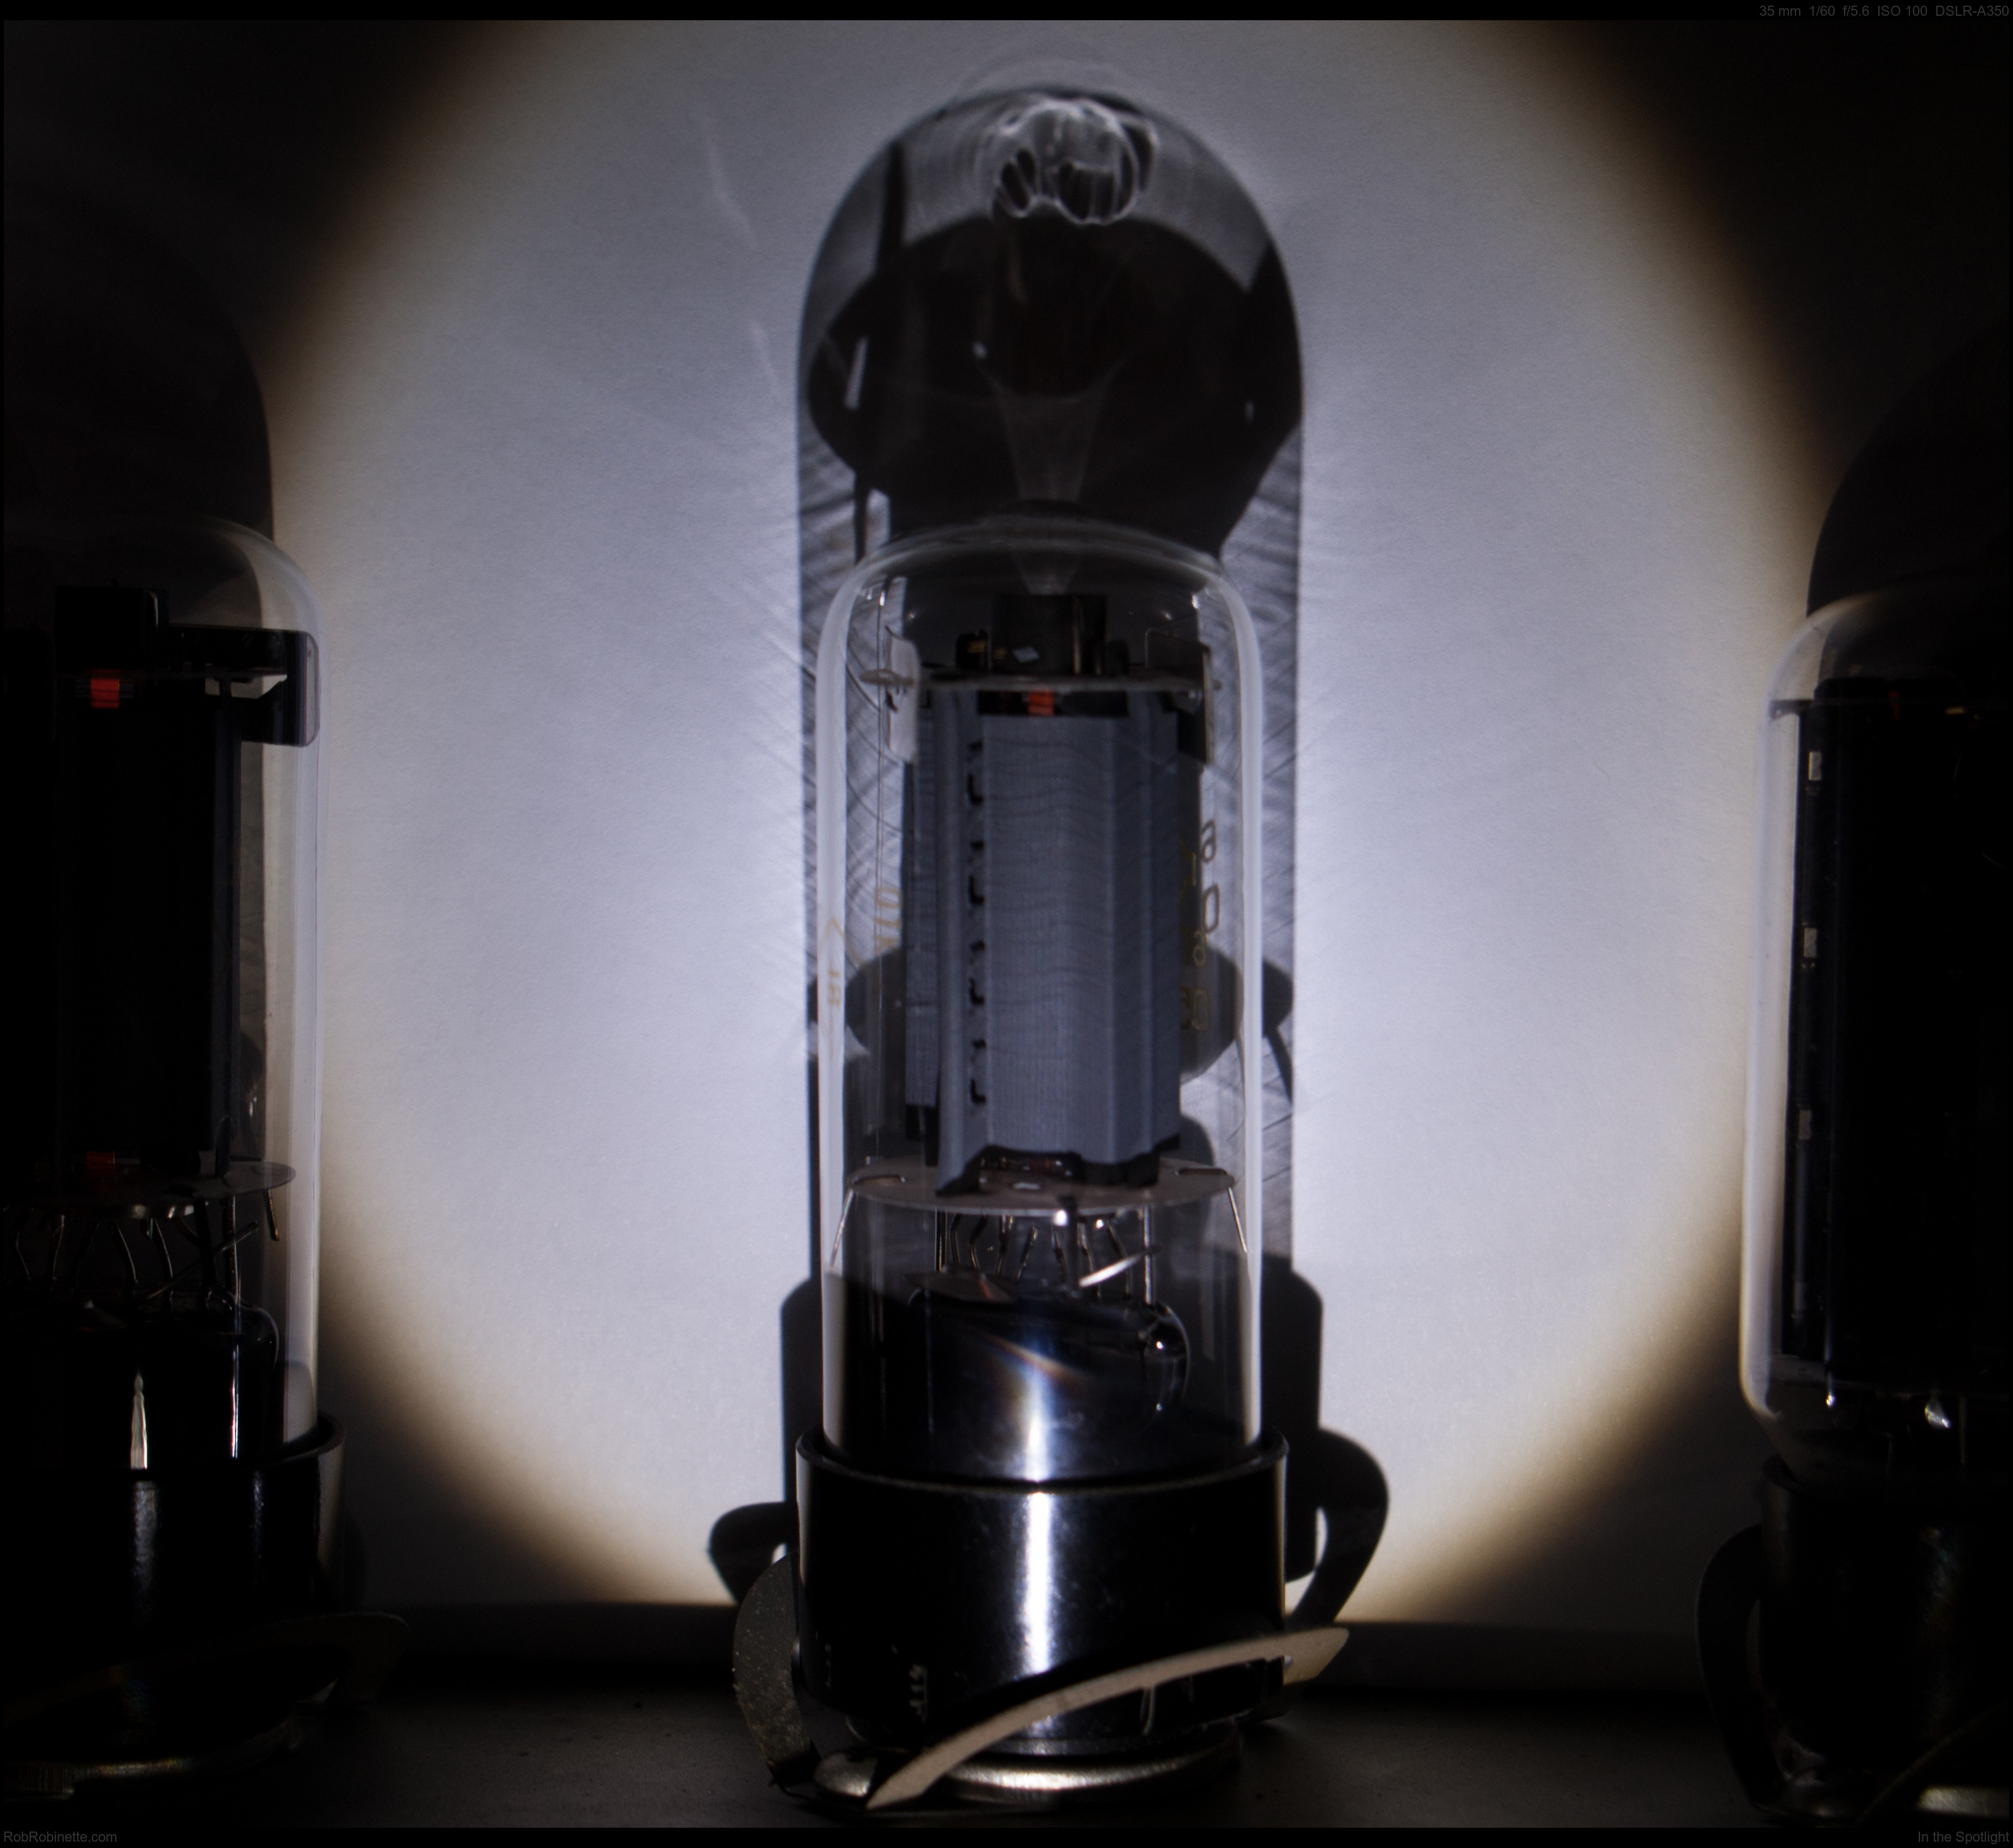
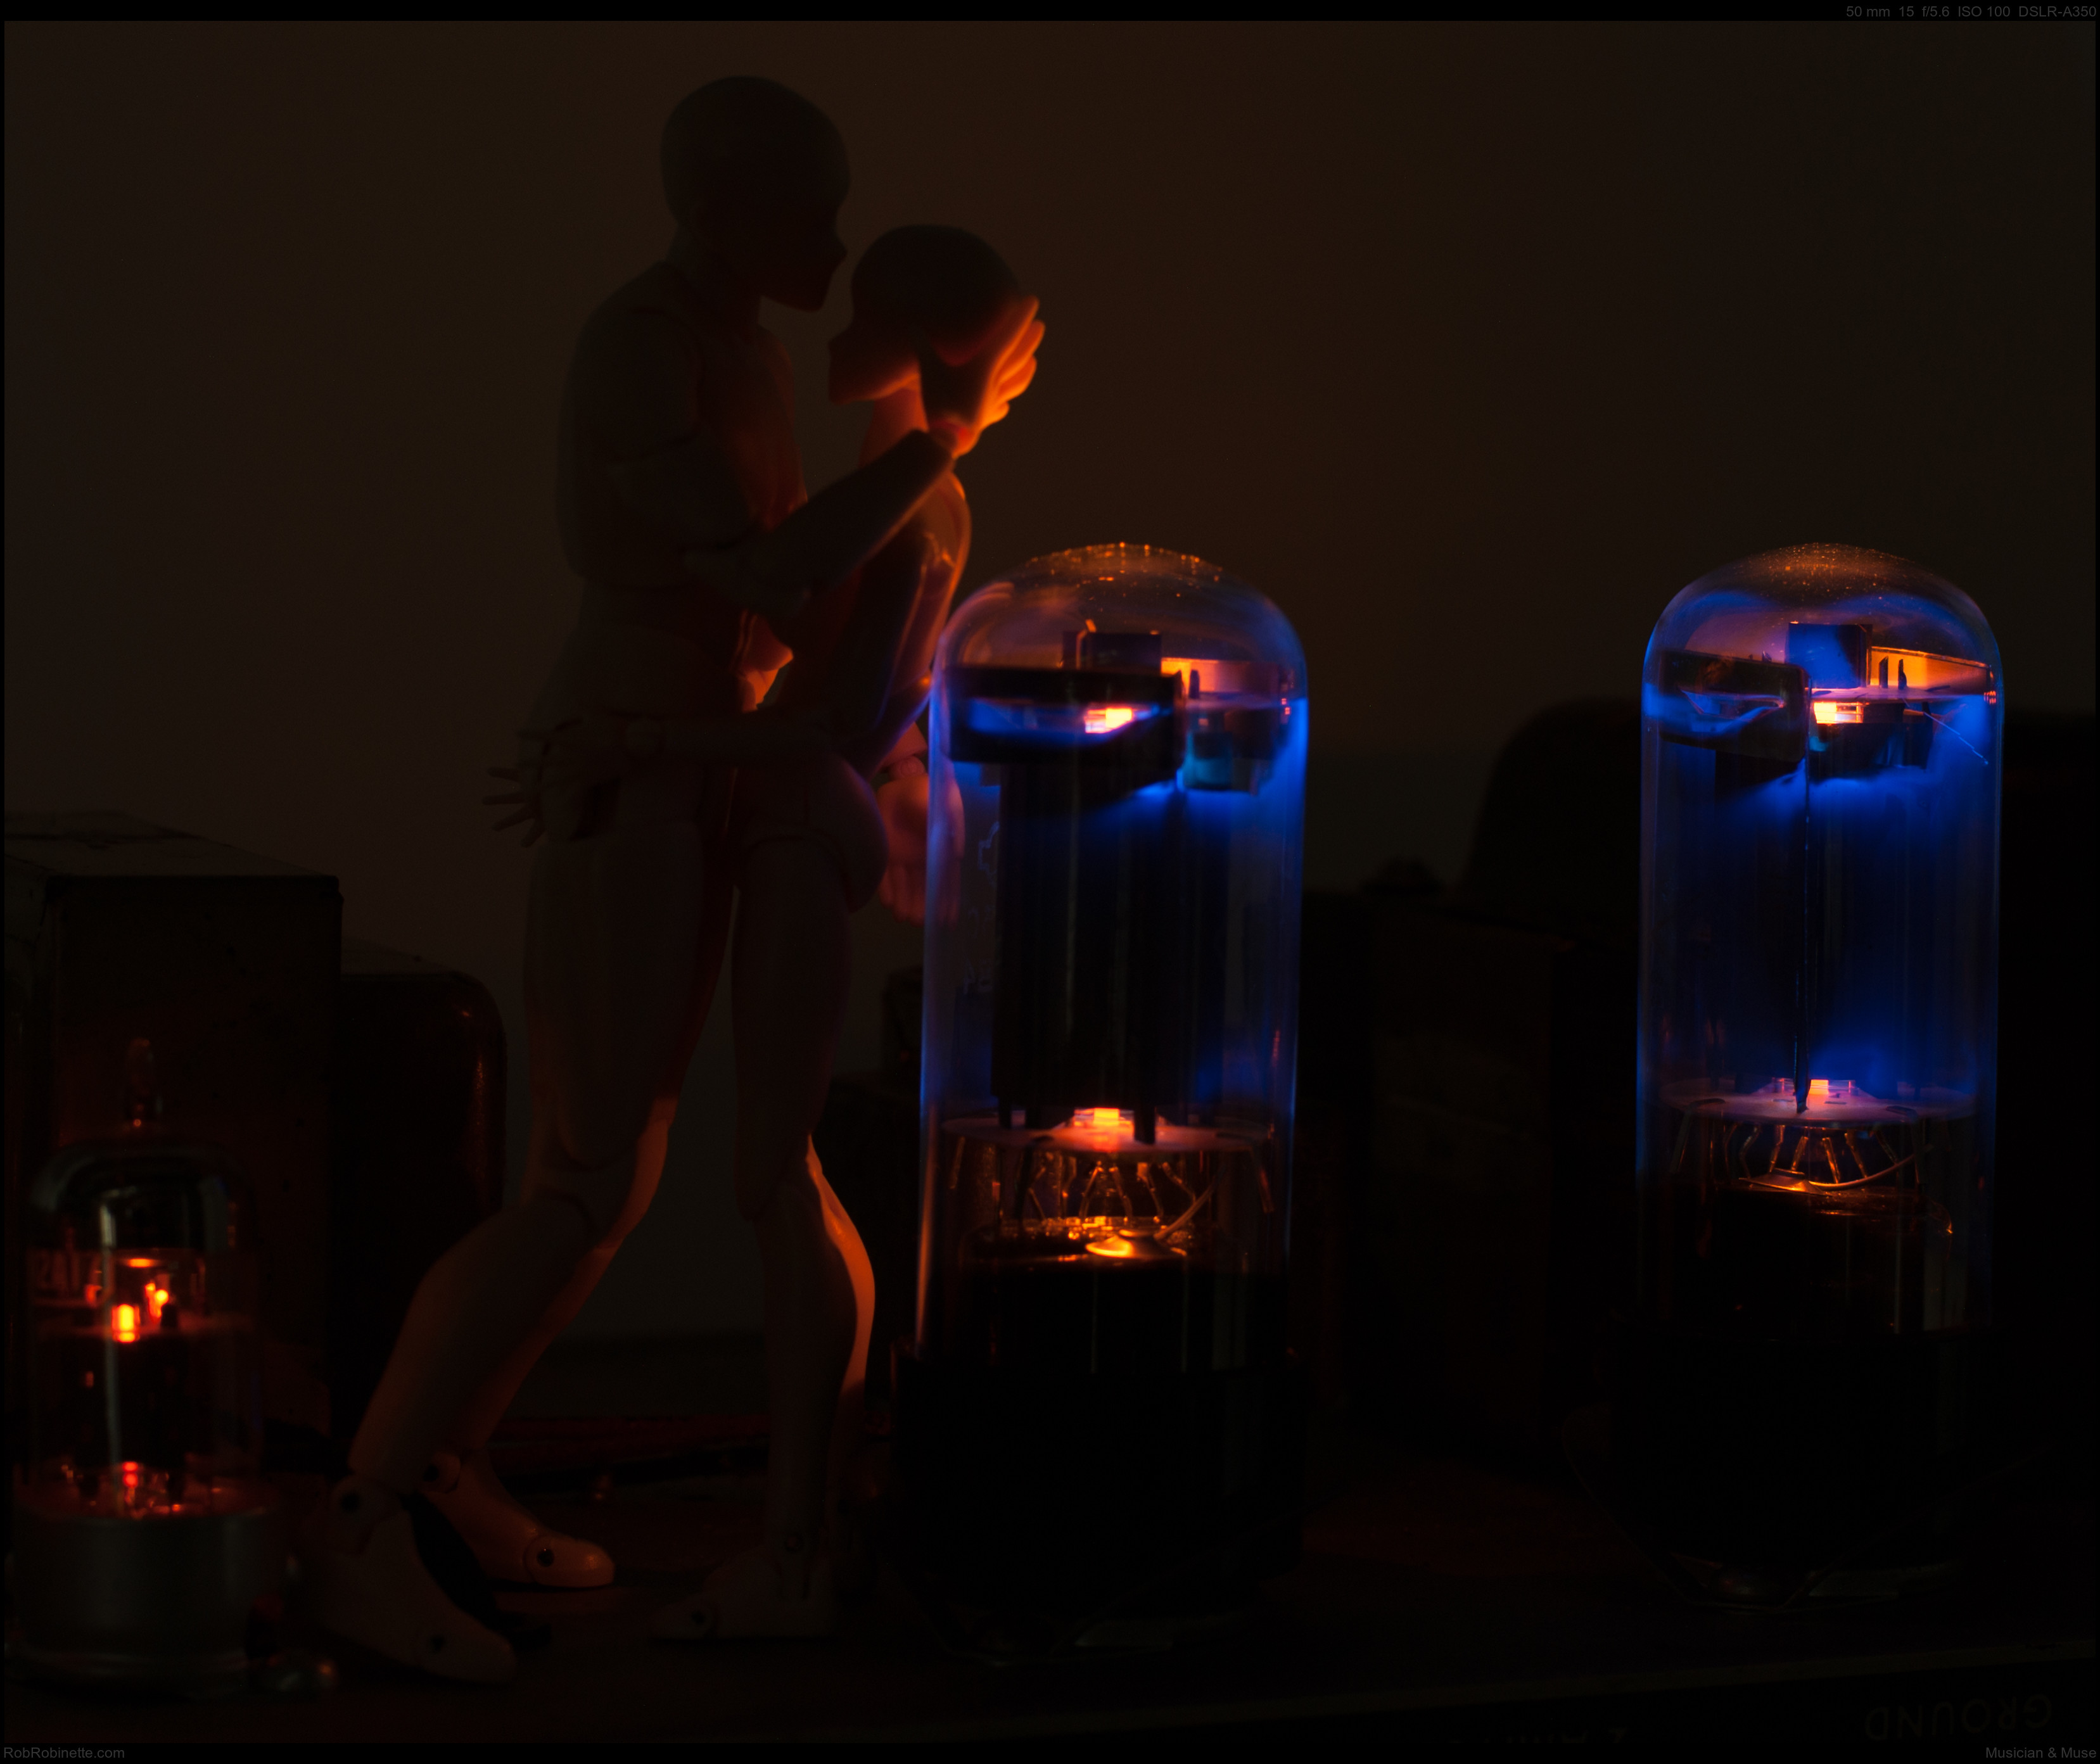
In the Spotlight
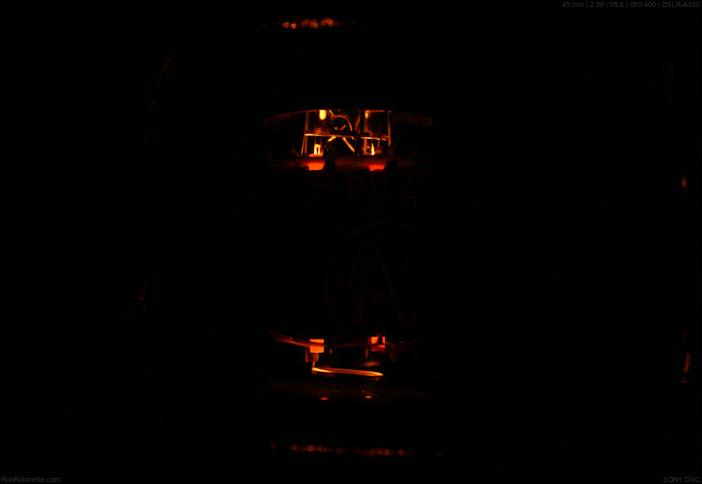
Cathode & Heater
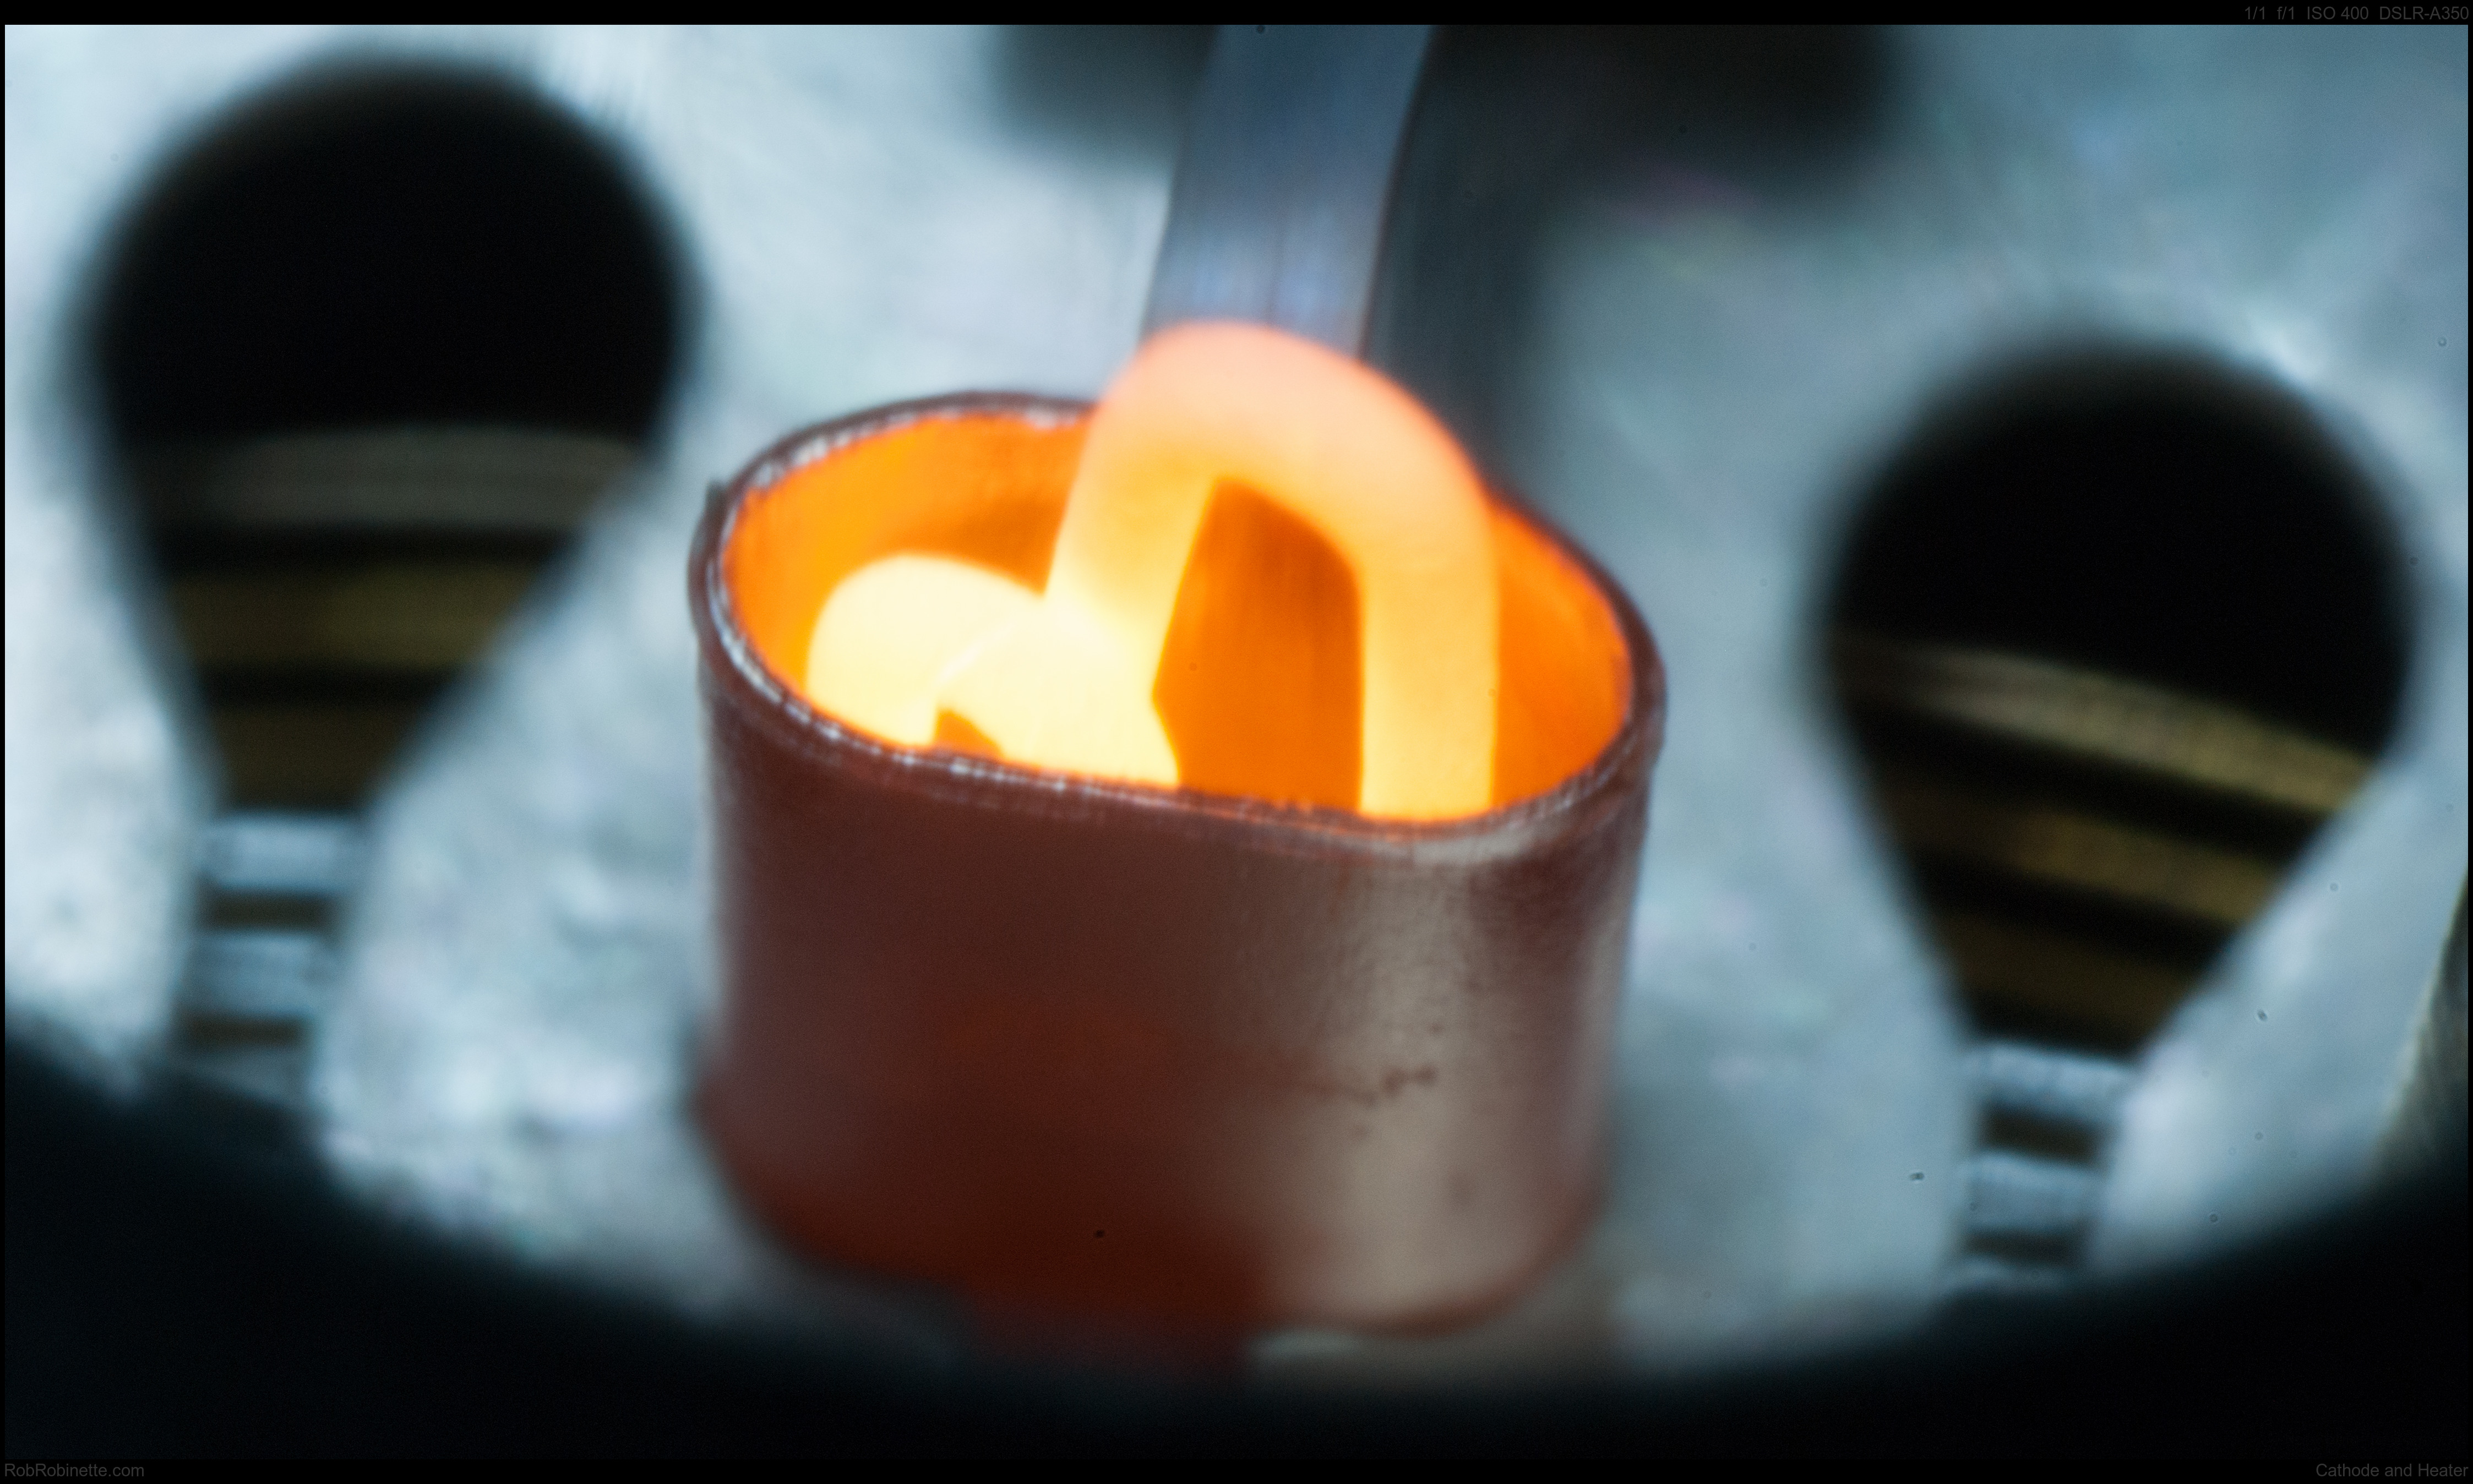
This is the top of a 6N3C beam tetrode power tube with the hollow cathode showing the glowing hot heater filaments. The control grid and screen grid wires can be seen through the cooling vent holes on both sides of the cathode. For these super macro shots I had to shine an LED flashlight on the tube to aid in focusing the camera. The photo was taken with a special Mitakon 20mm 4x Super Macro f/2 lens set at f/16 for maximum focus, 3 seconds exposure and ISO 400. The scene was lit from above with a fluorescent work light.
RCA 12AX7 Cathode
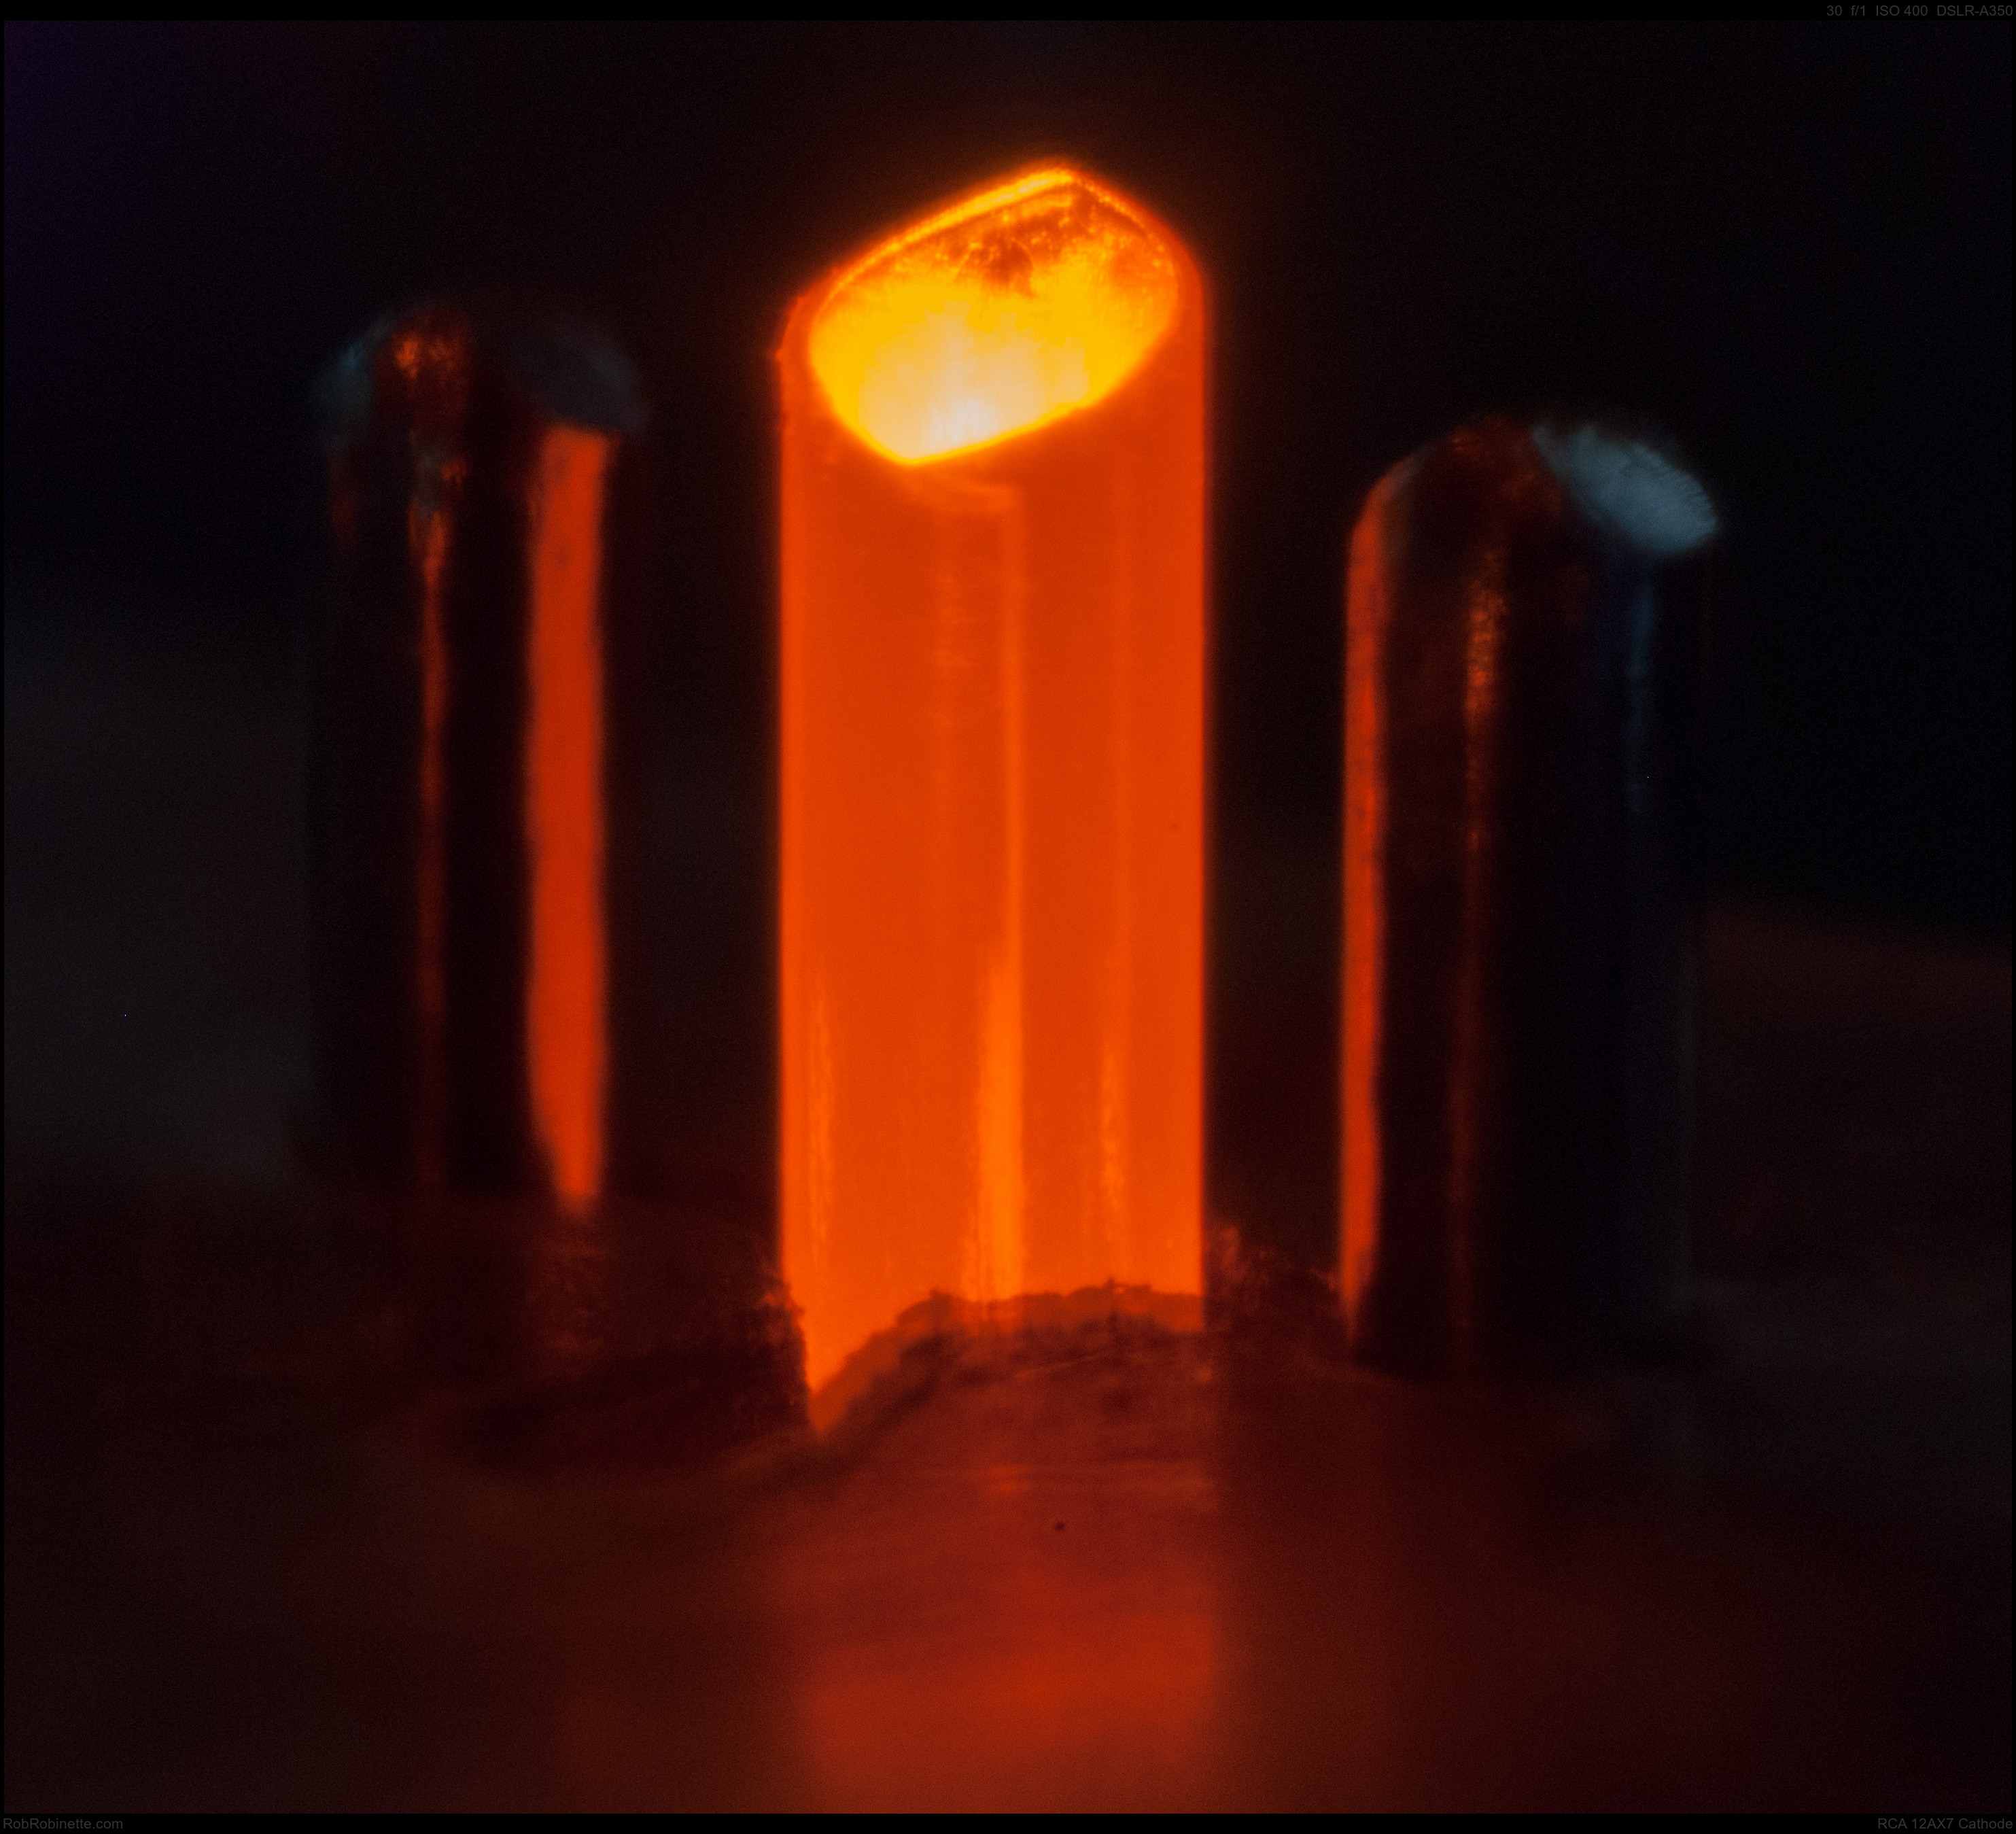
RCA 12AX7 hollow cathode sticking up through the tube's top mica wafer support with two control grid wire supports on each side. This photo was taken with a Mitakon 20mm 4x Super Macro f/2 lens set at f/16 for maximum focus dept of field, 3 second exposure and ISO 400. The scene was briefly lit from above with a fluorescent work light.
Taken with the Sony A350 with Sigma 24mm f/2.8 lens at f/22, 30 seconds, ISO 400. Click the image to see the full resolution photo.
The Above Image Was Used On A Magazine Cover
Three Amigos
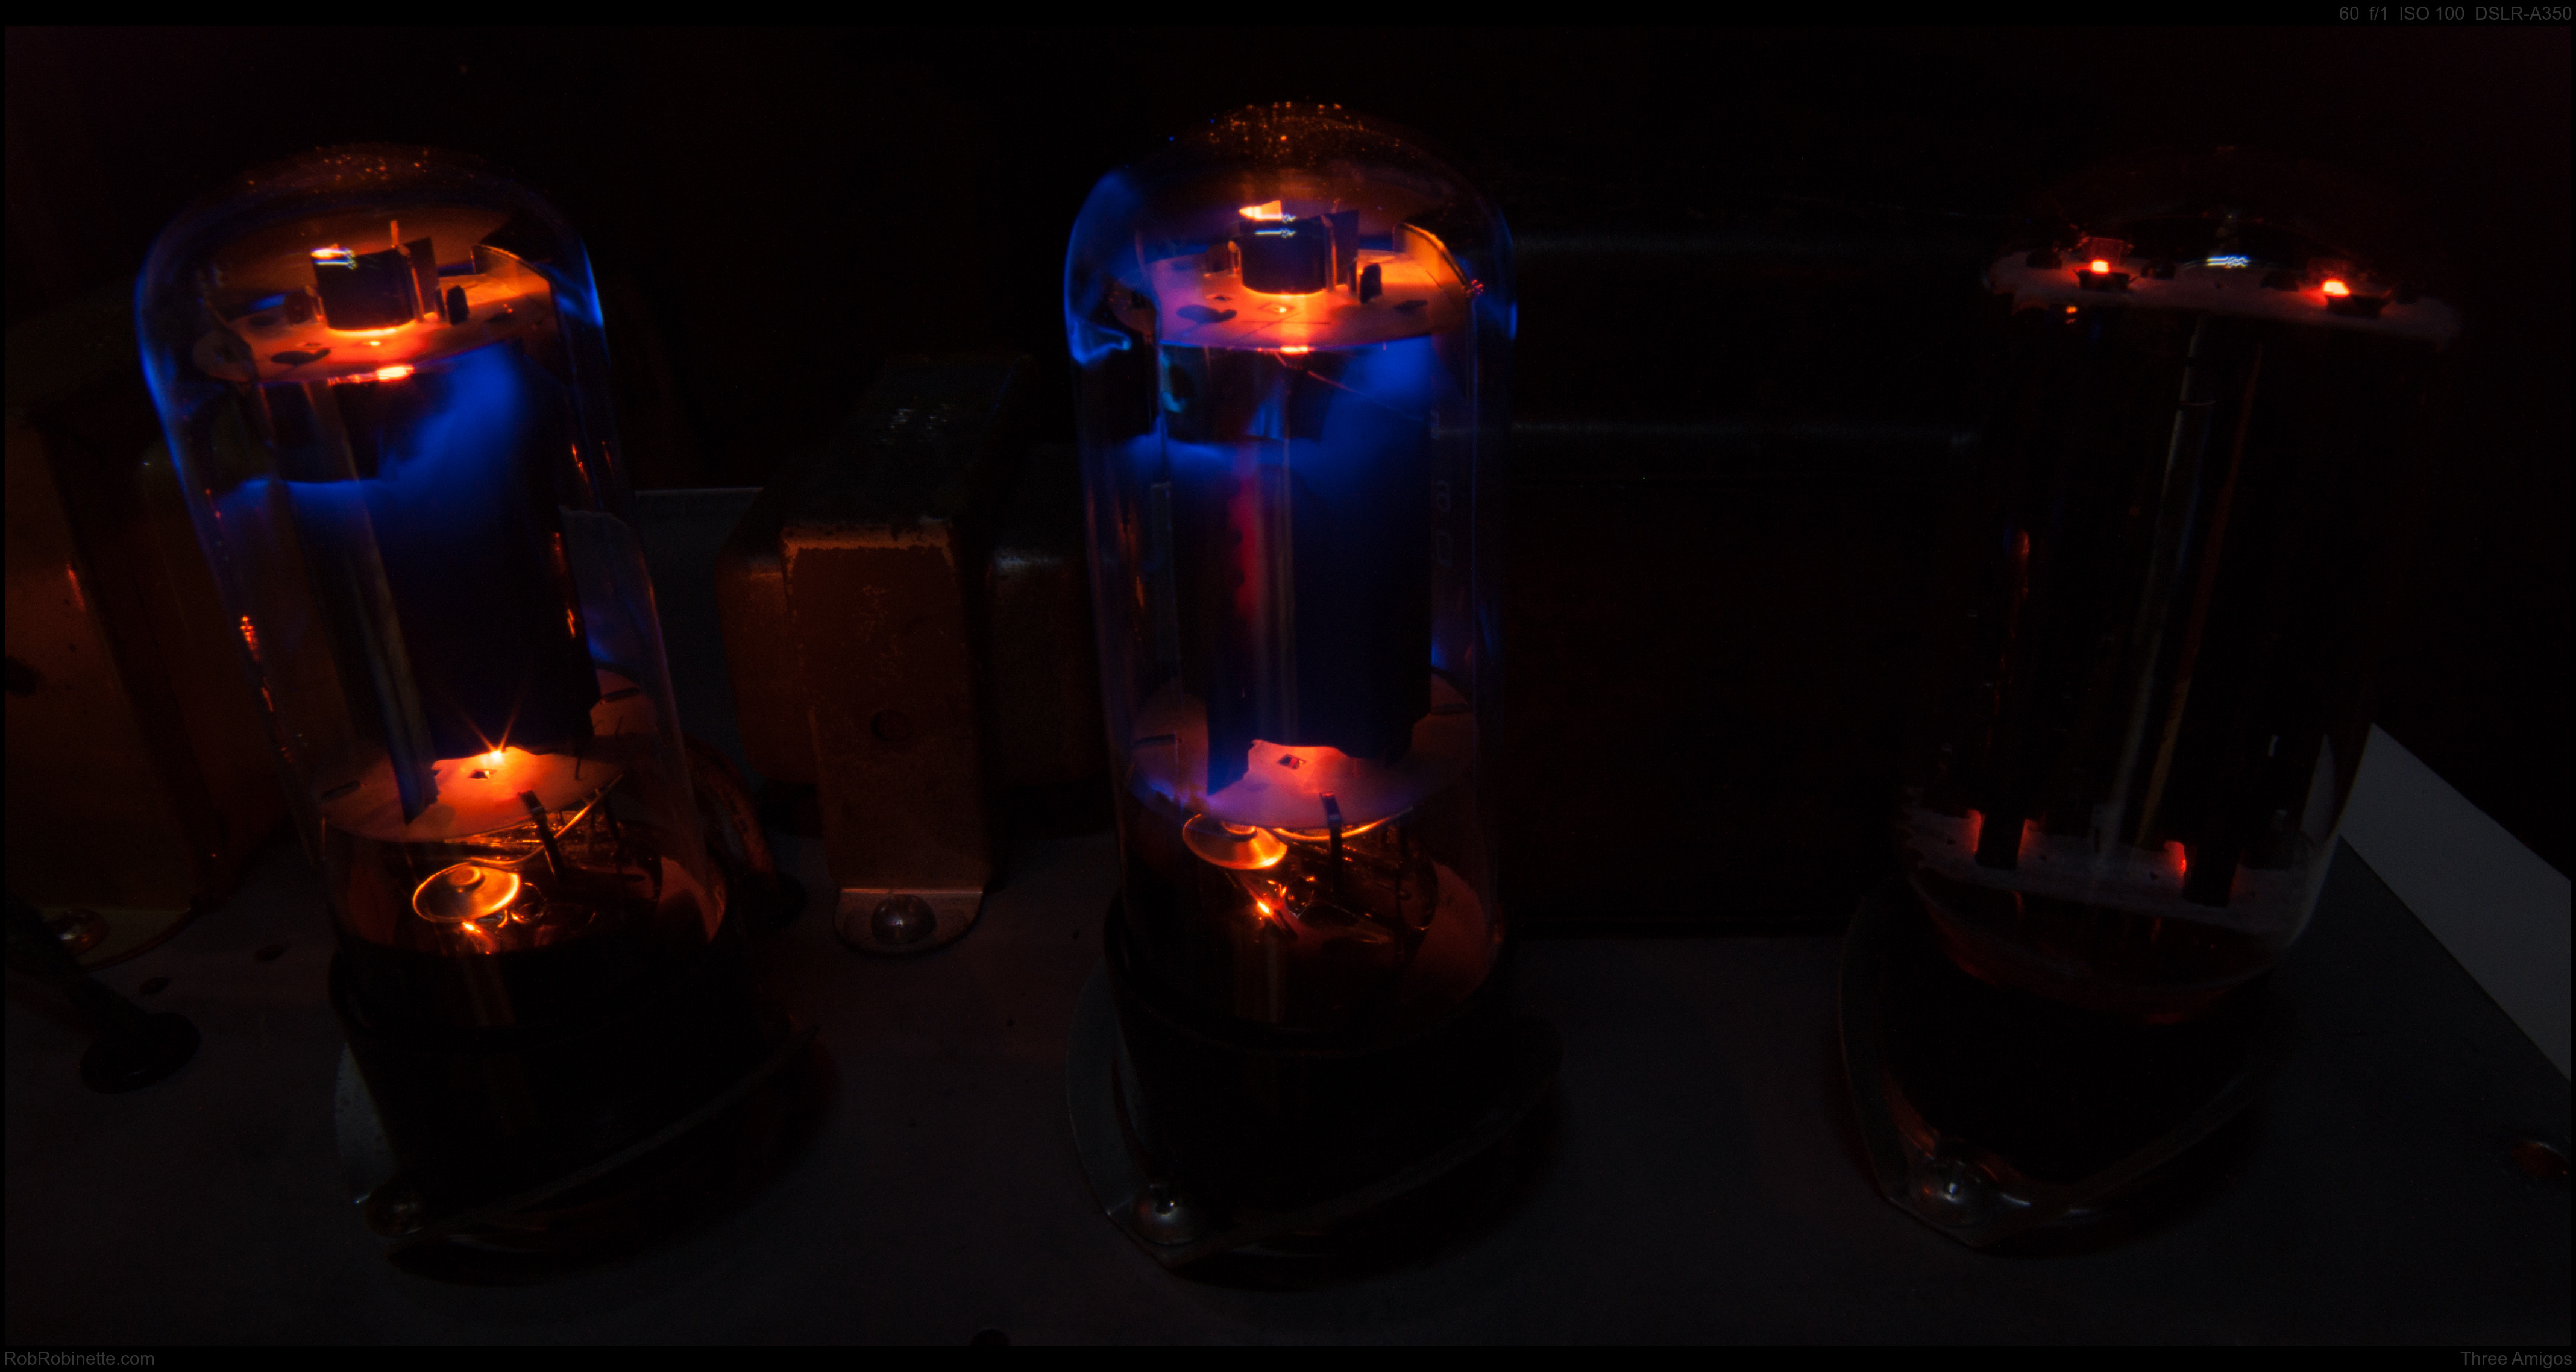
Taken with a Sony A350 with Rokinon 14mm f/2.8 lens set to f/16, 60 seconds and ISO 100. These 6N3C power tubes have their getter flash in the bottom of the tube so the top is clear making them ideal for tube photography. Click the image to see the full resolution photo.
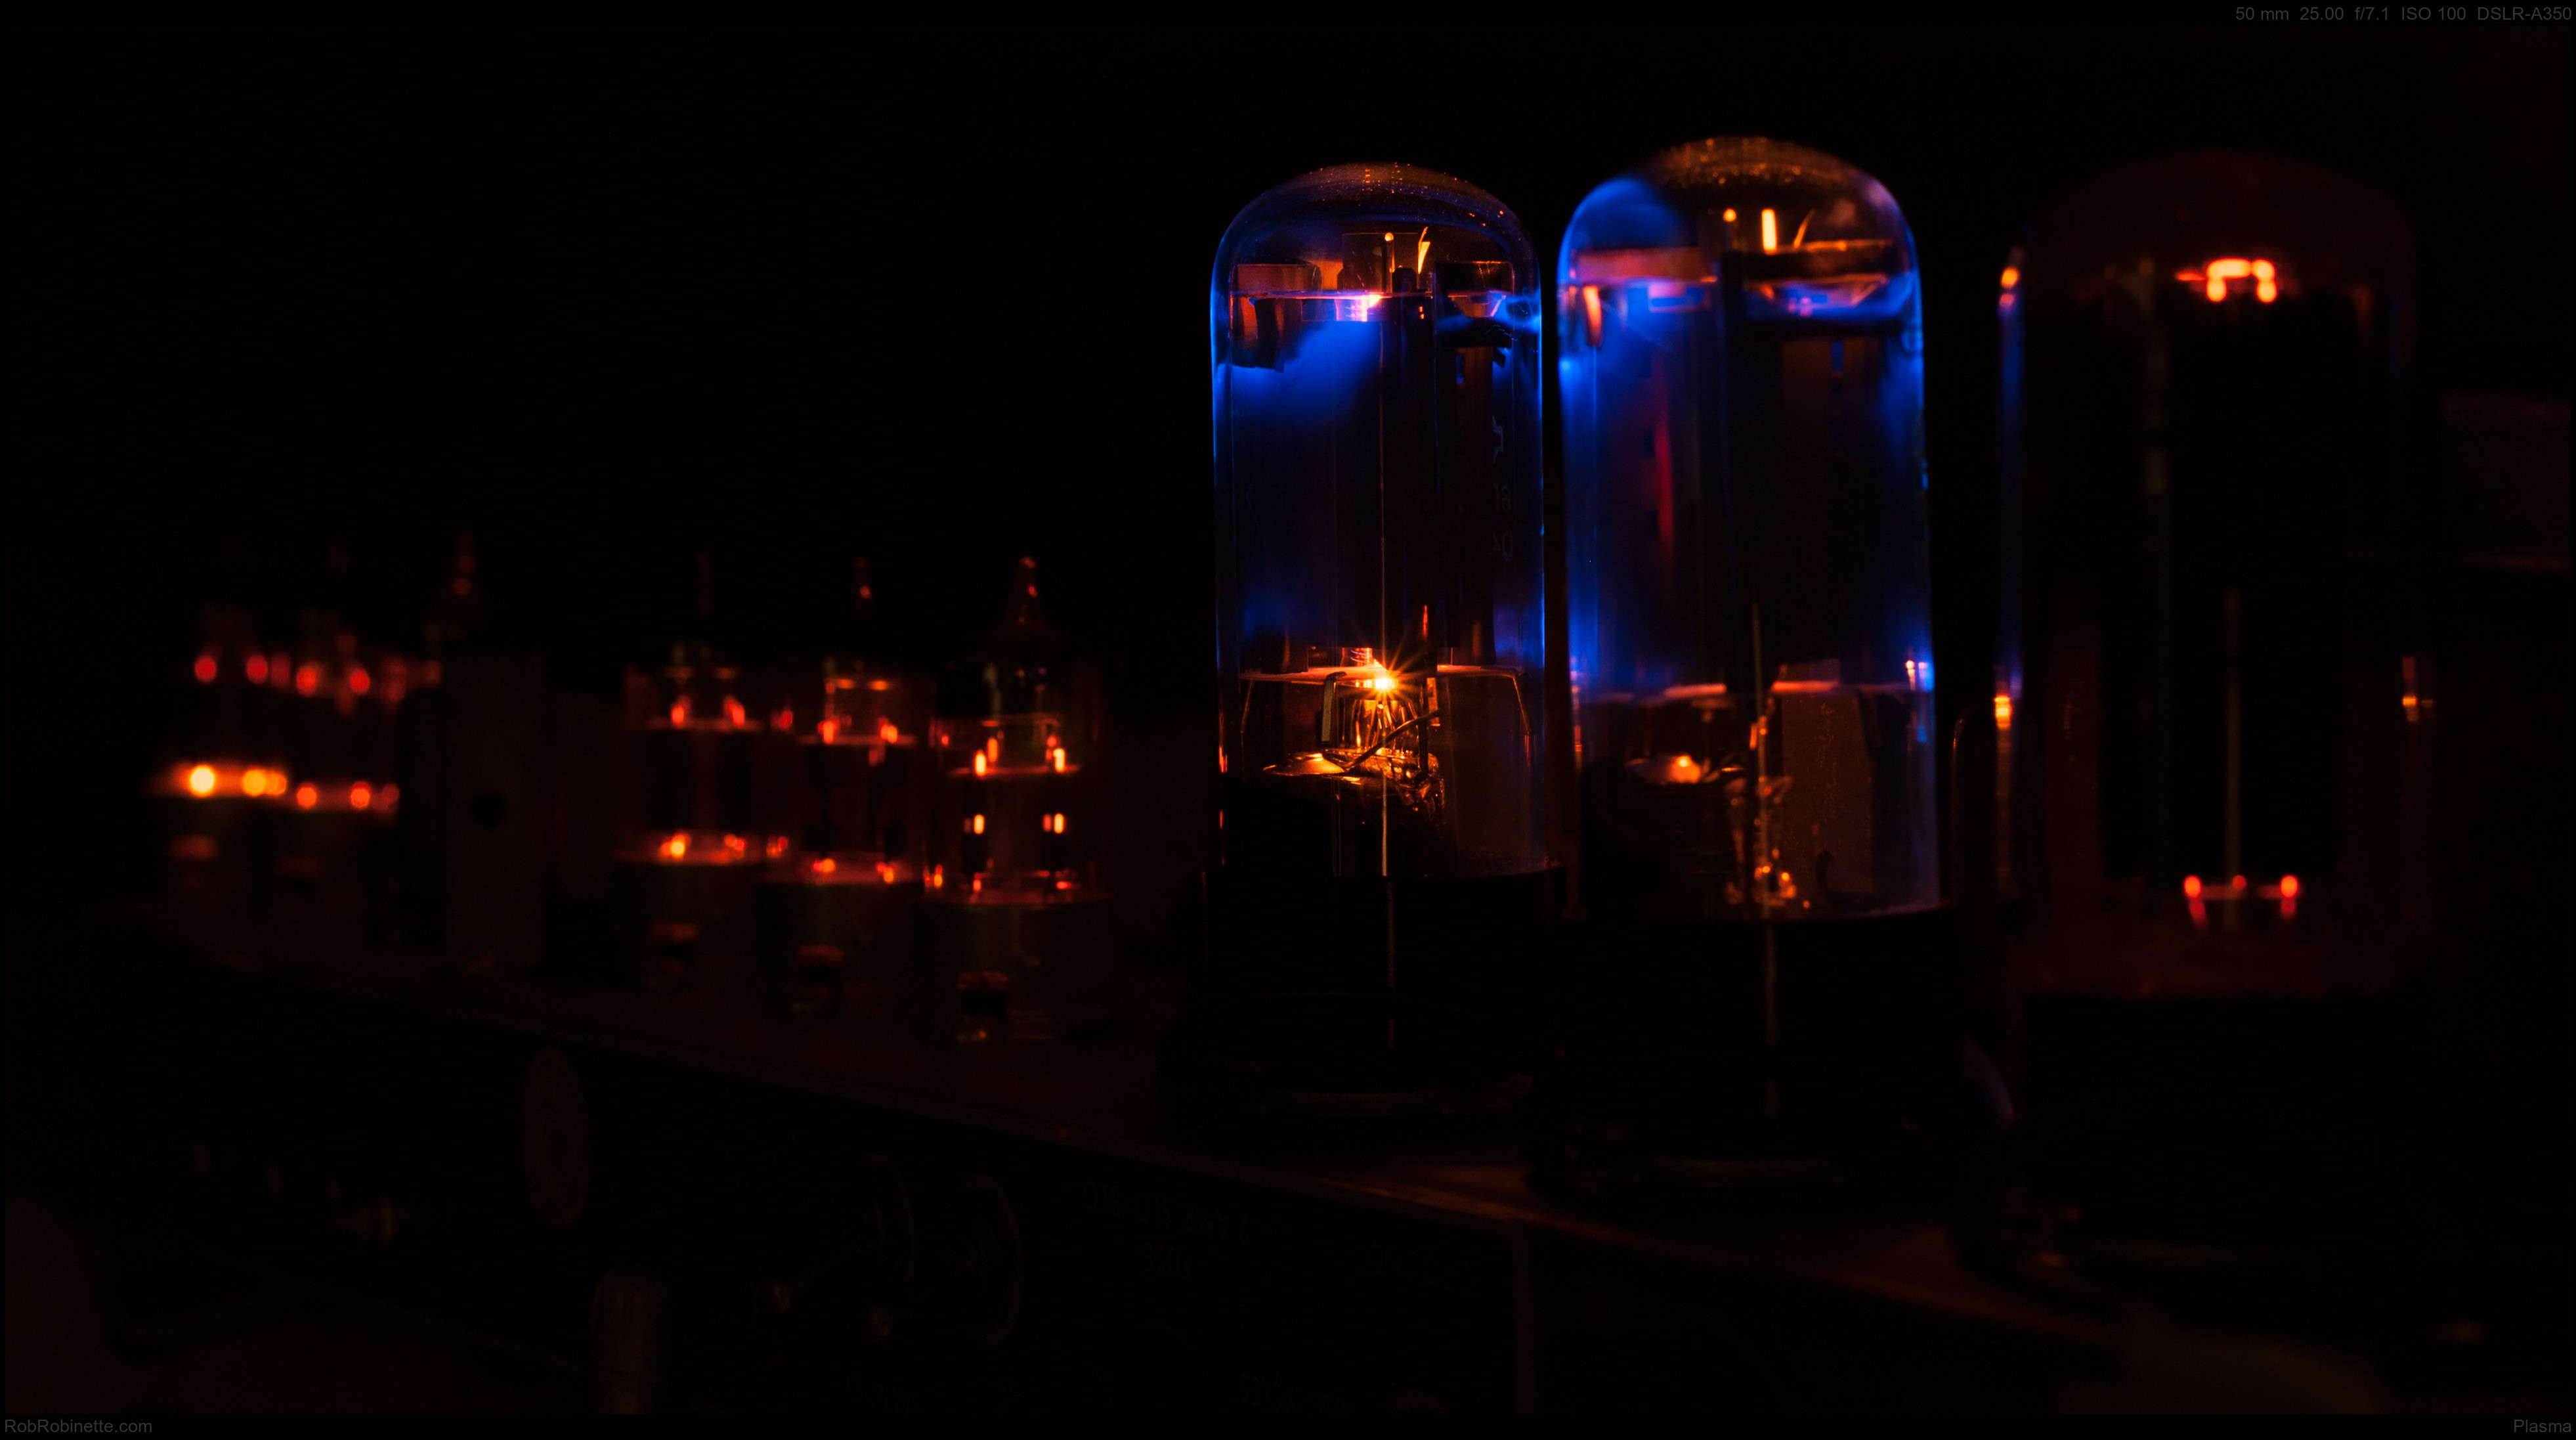
Plasma
There was a little light coming into the wine cellar through the door to light the chassis. Taken with the Sony A350 with Minolta 50mm f/1.4 lens set at f/7.1, 25 seconds, ISO 100. Click the image to see the full resolution photo.
Four Plus One
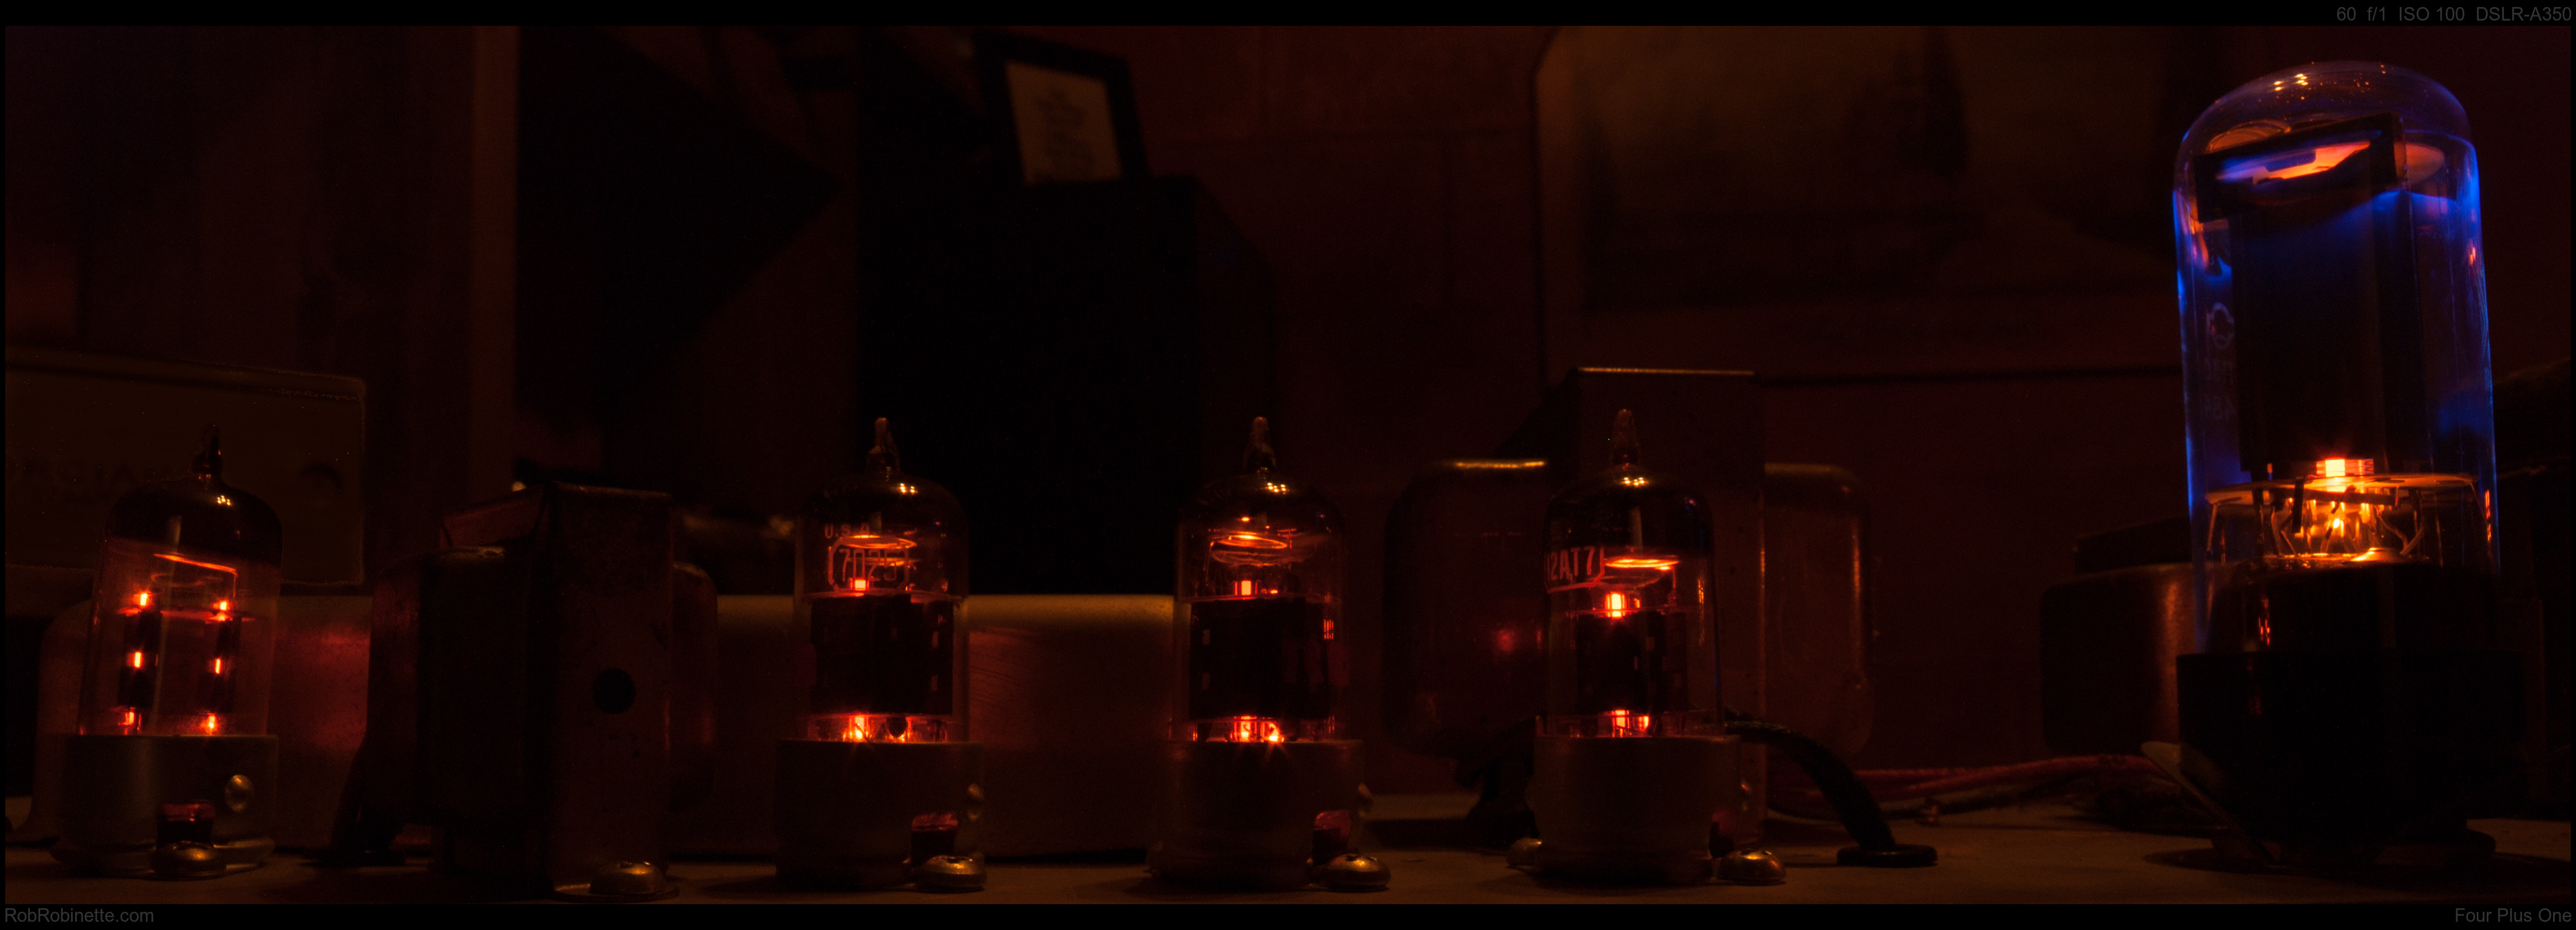
Taken with a Sony A350 with Rokinon 14mm f/2.8 lens set at f/16, 60 seconds and ISO 100. The wide angle 14mm lens distorts the tubes at far left and far right. A 50mm lens would keep the tubes straight and parallel with the other tubes. I flashed the room lights on for about 1 second to light the chassis and room. Tube at far left is a 12AT7 reverb driver then a 7025 reverb recovery/preamp, RCA 12AX7 tremolo oscillator/driver, RCA 12AT7 phase inverter and 6N3C beam tetrode power tube. Click the image to see the full resolution photo.
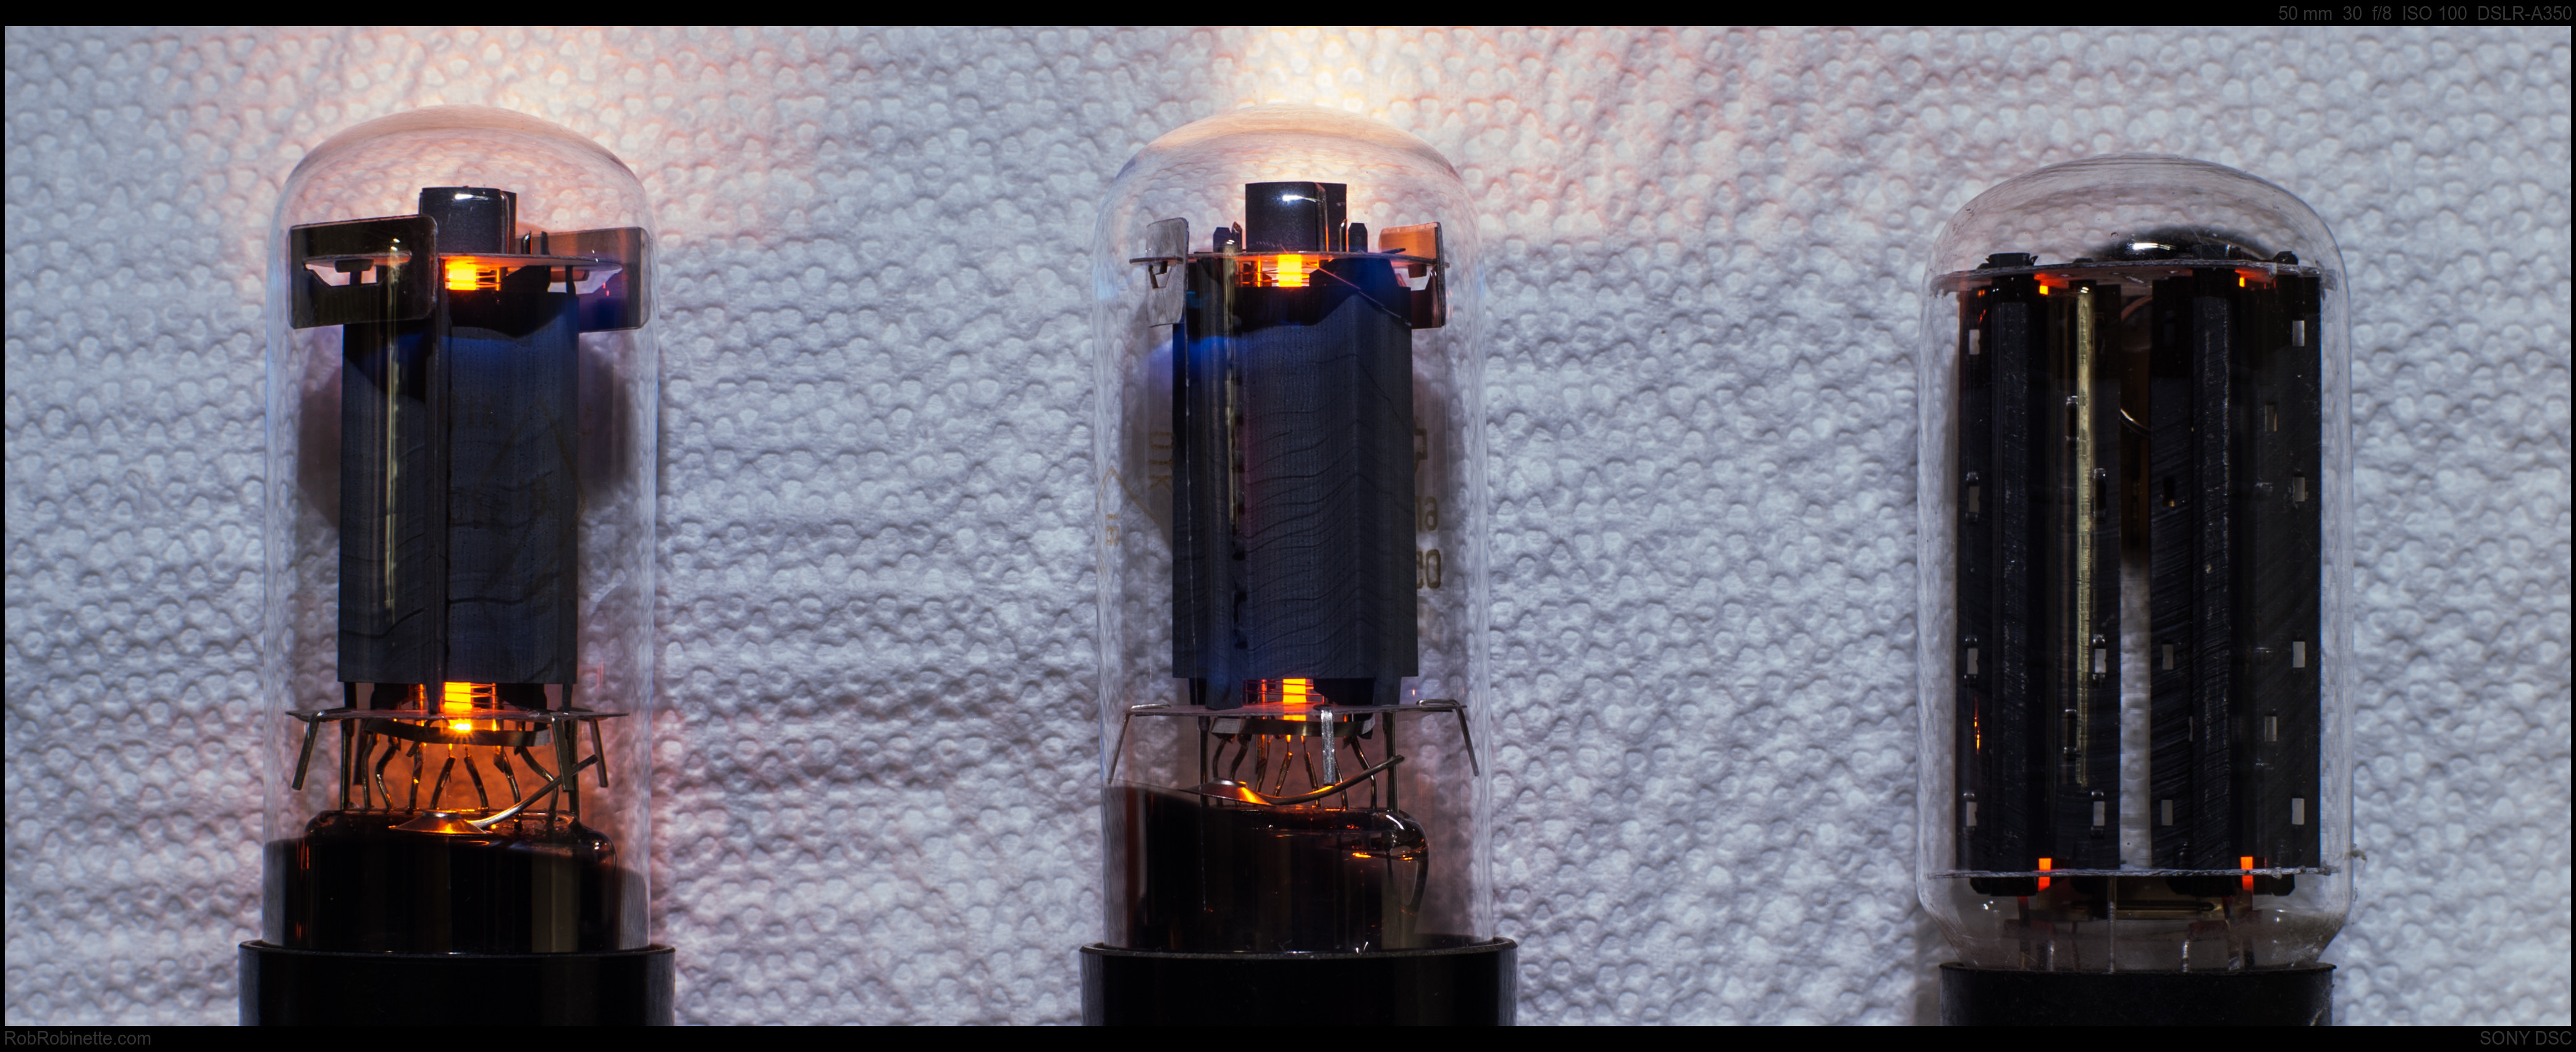
Twin Tubes
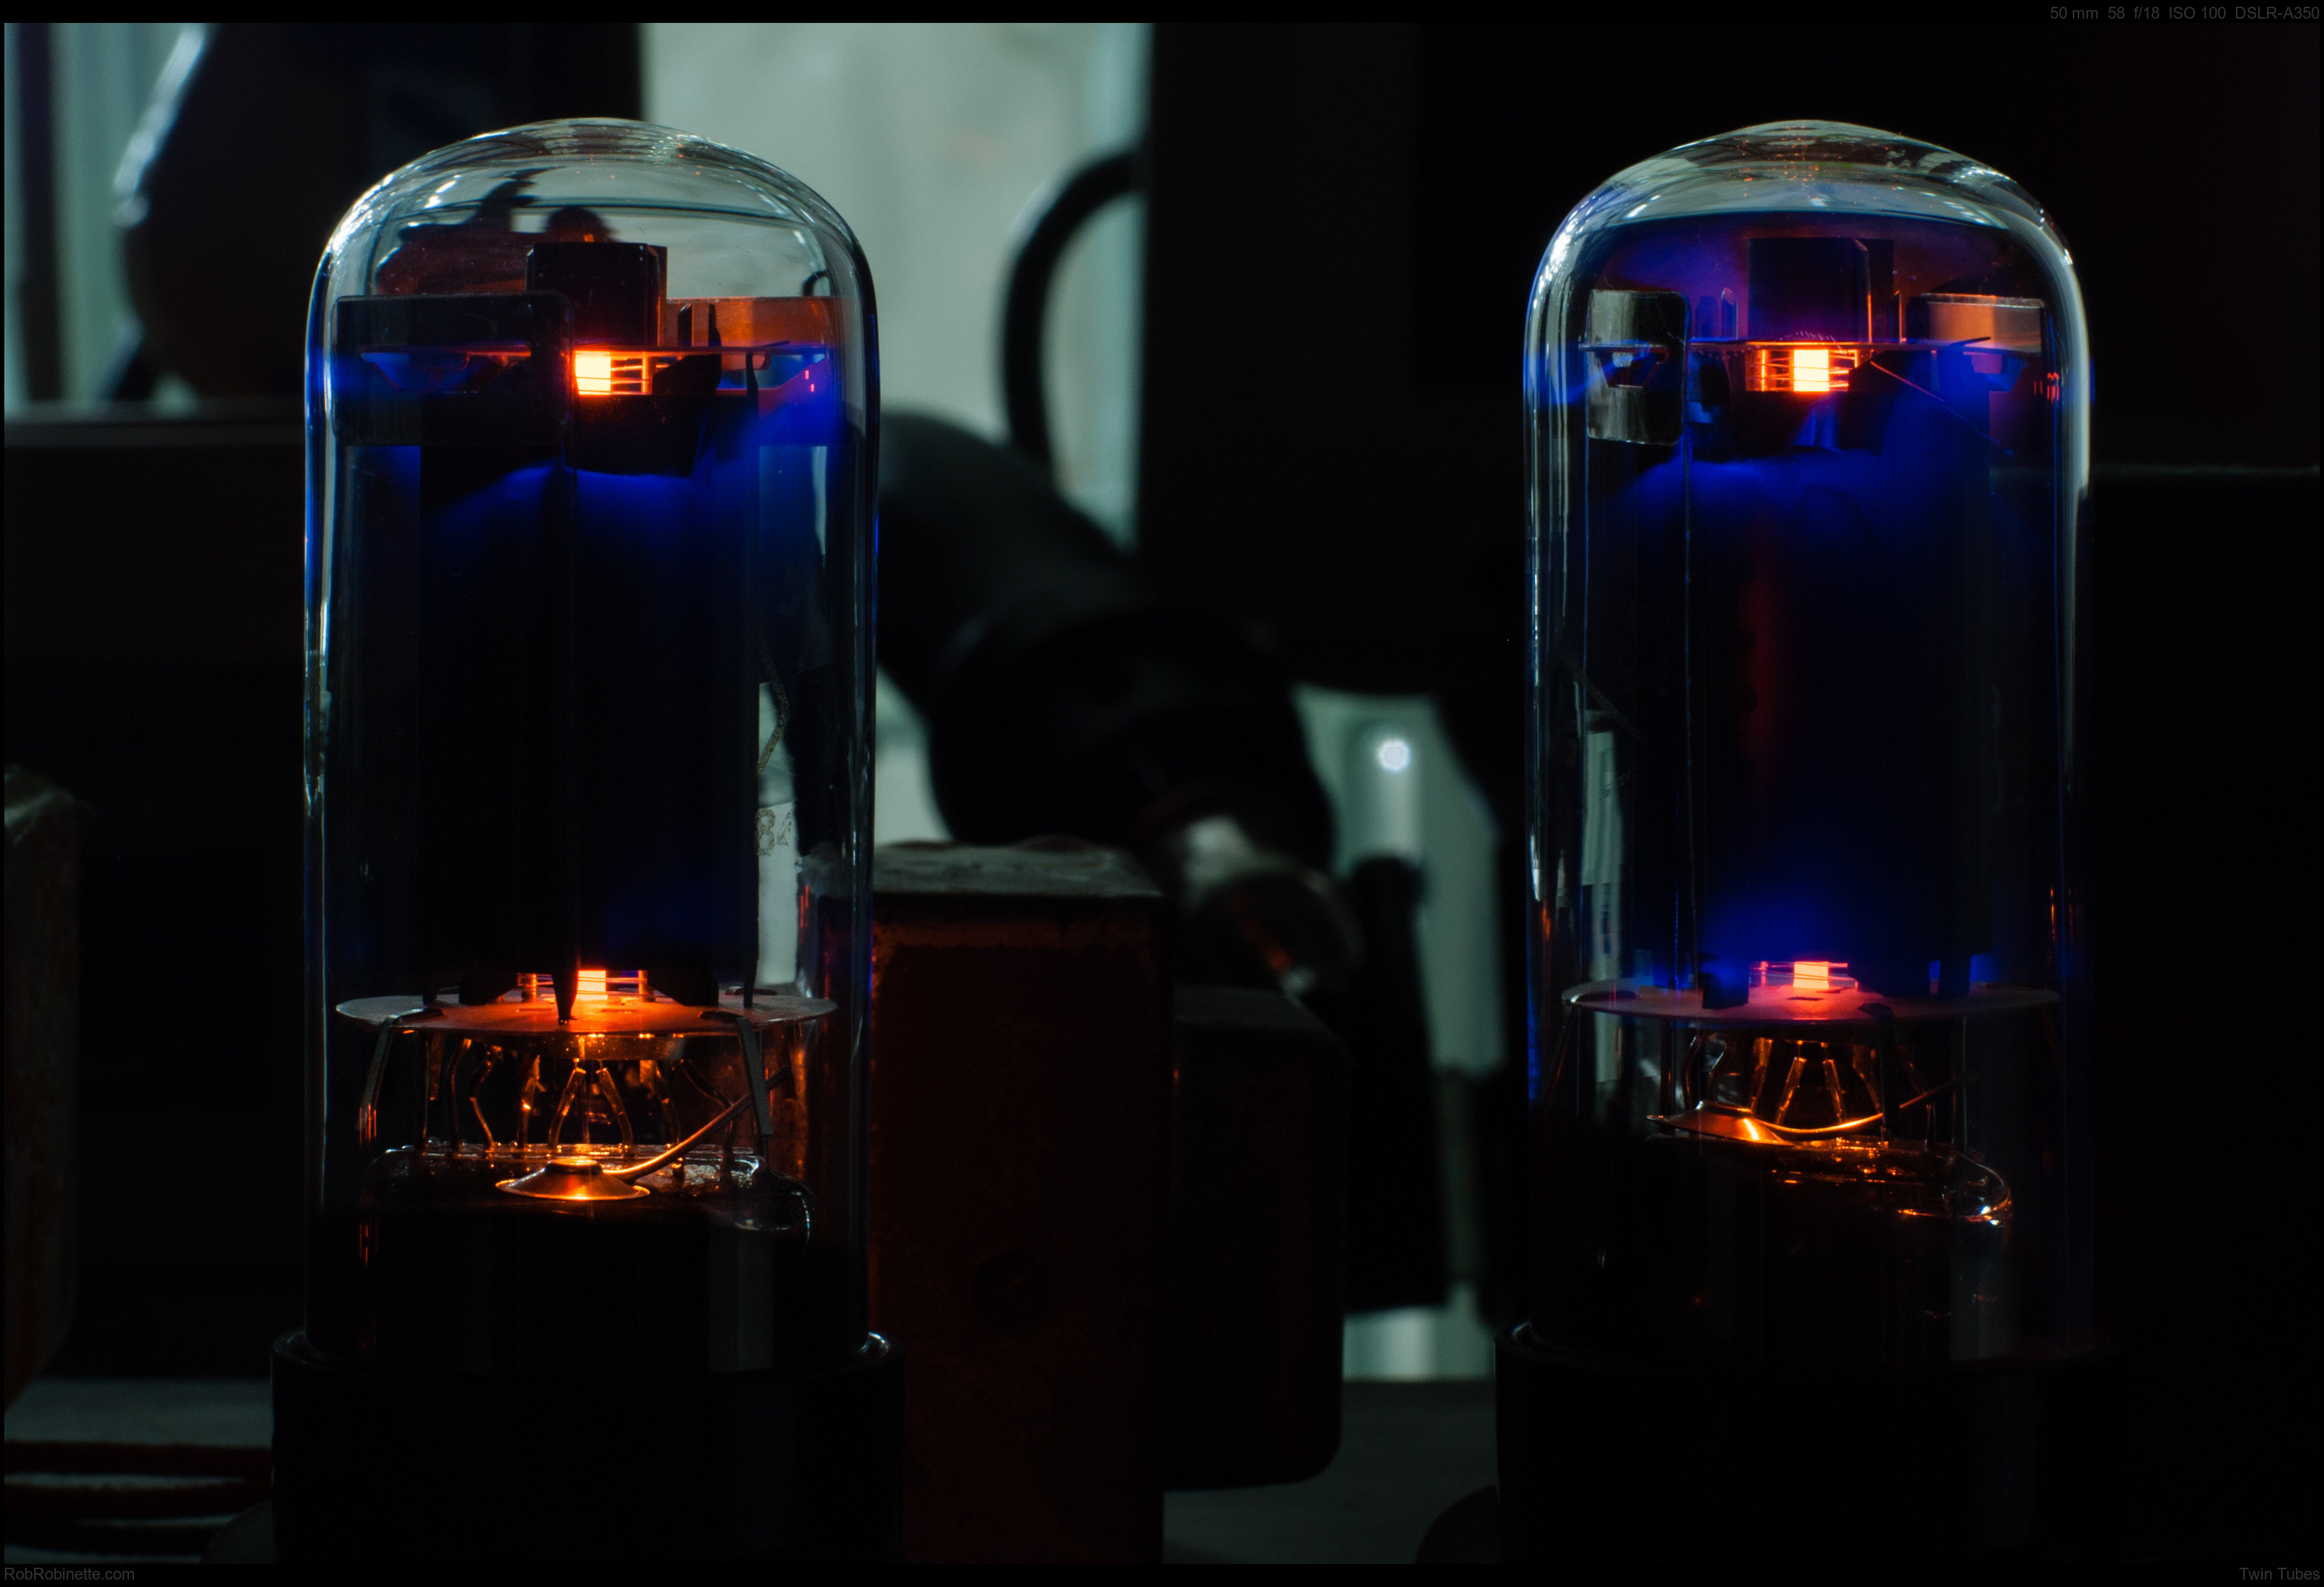
Russian 6N3C beam tetrode power tubes taken with the Sony A350 and Minolta 50mm 1.4 lens, 58 second exposure at f/18 ISO 100. The longer 58 second exposure allowed me to stop down the aperture for a deeper field of focus for maximum clarity and focus. I used the remote shutter controller to automatically time the exposure. The camera shutter was set to "Bulb," which keeps the shutter open as long as the shutter button is held down. Background light is from a small window. The little UFO looking thing near the base of the tube is the getter halo that held the getter flash during manufacturing. Since the getter flash is on the bottom of the tube these tubes are great for overhead shots because their top glass is clear. Click the image to see the full resolution photo.
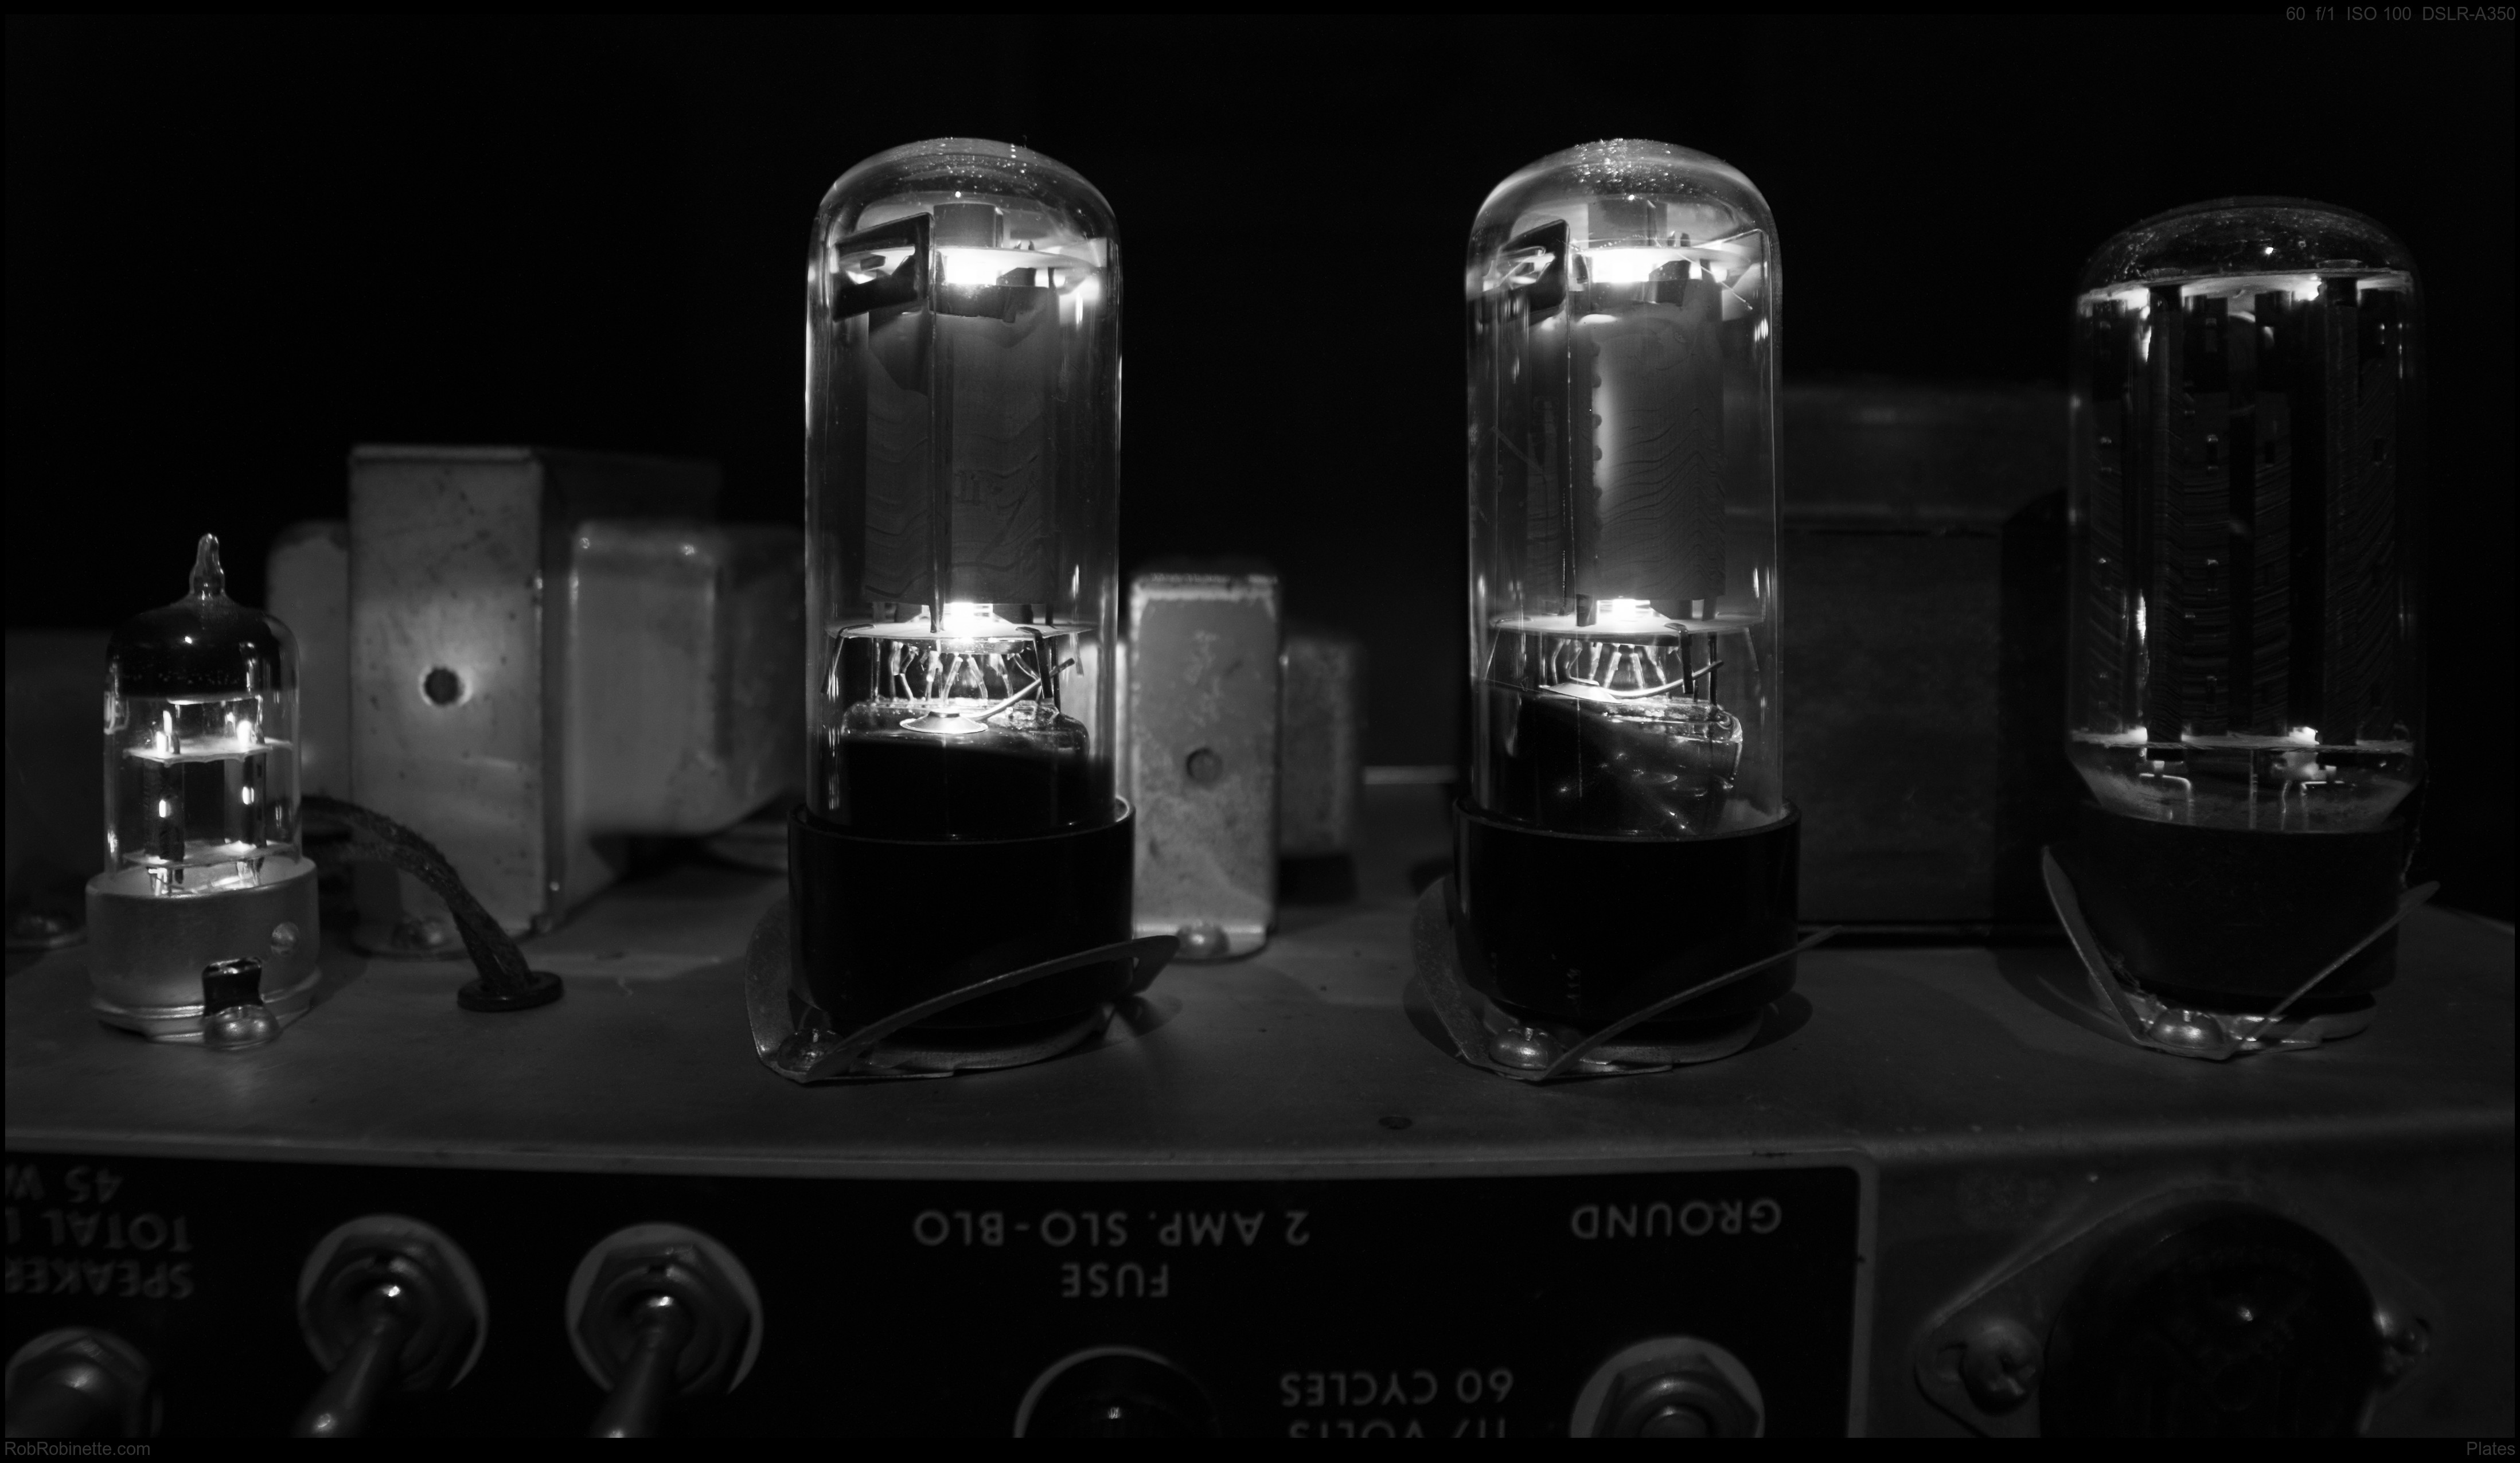
Plates
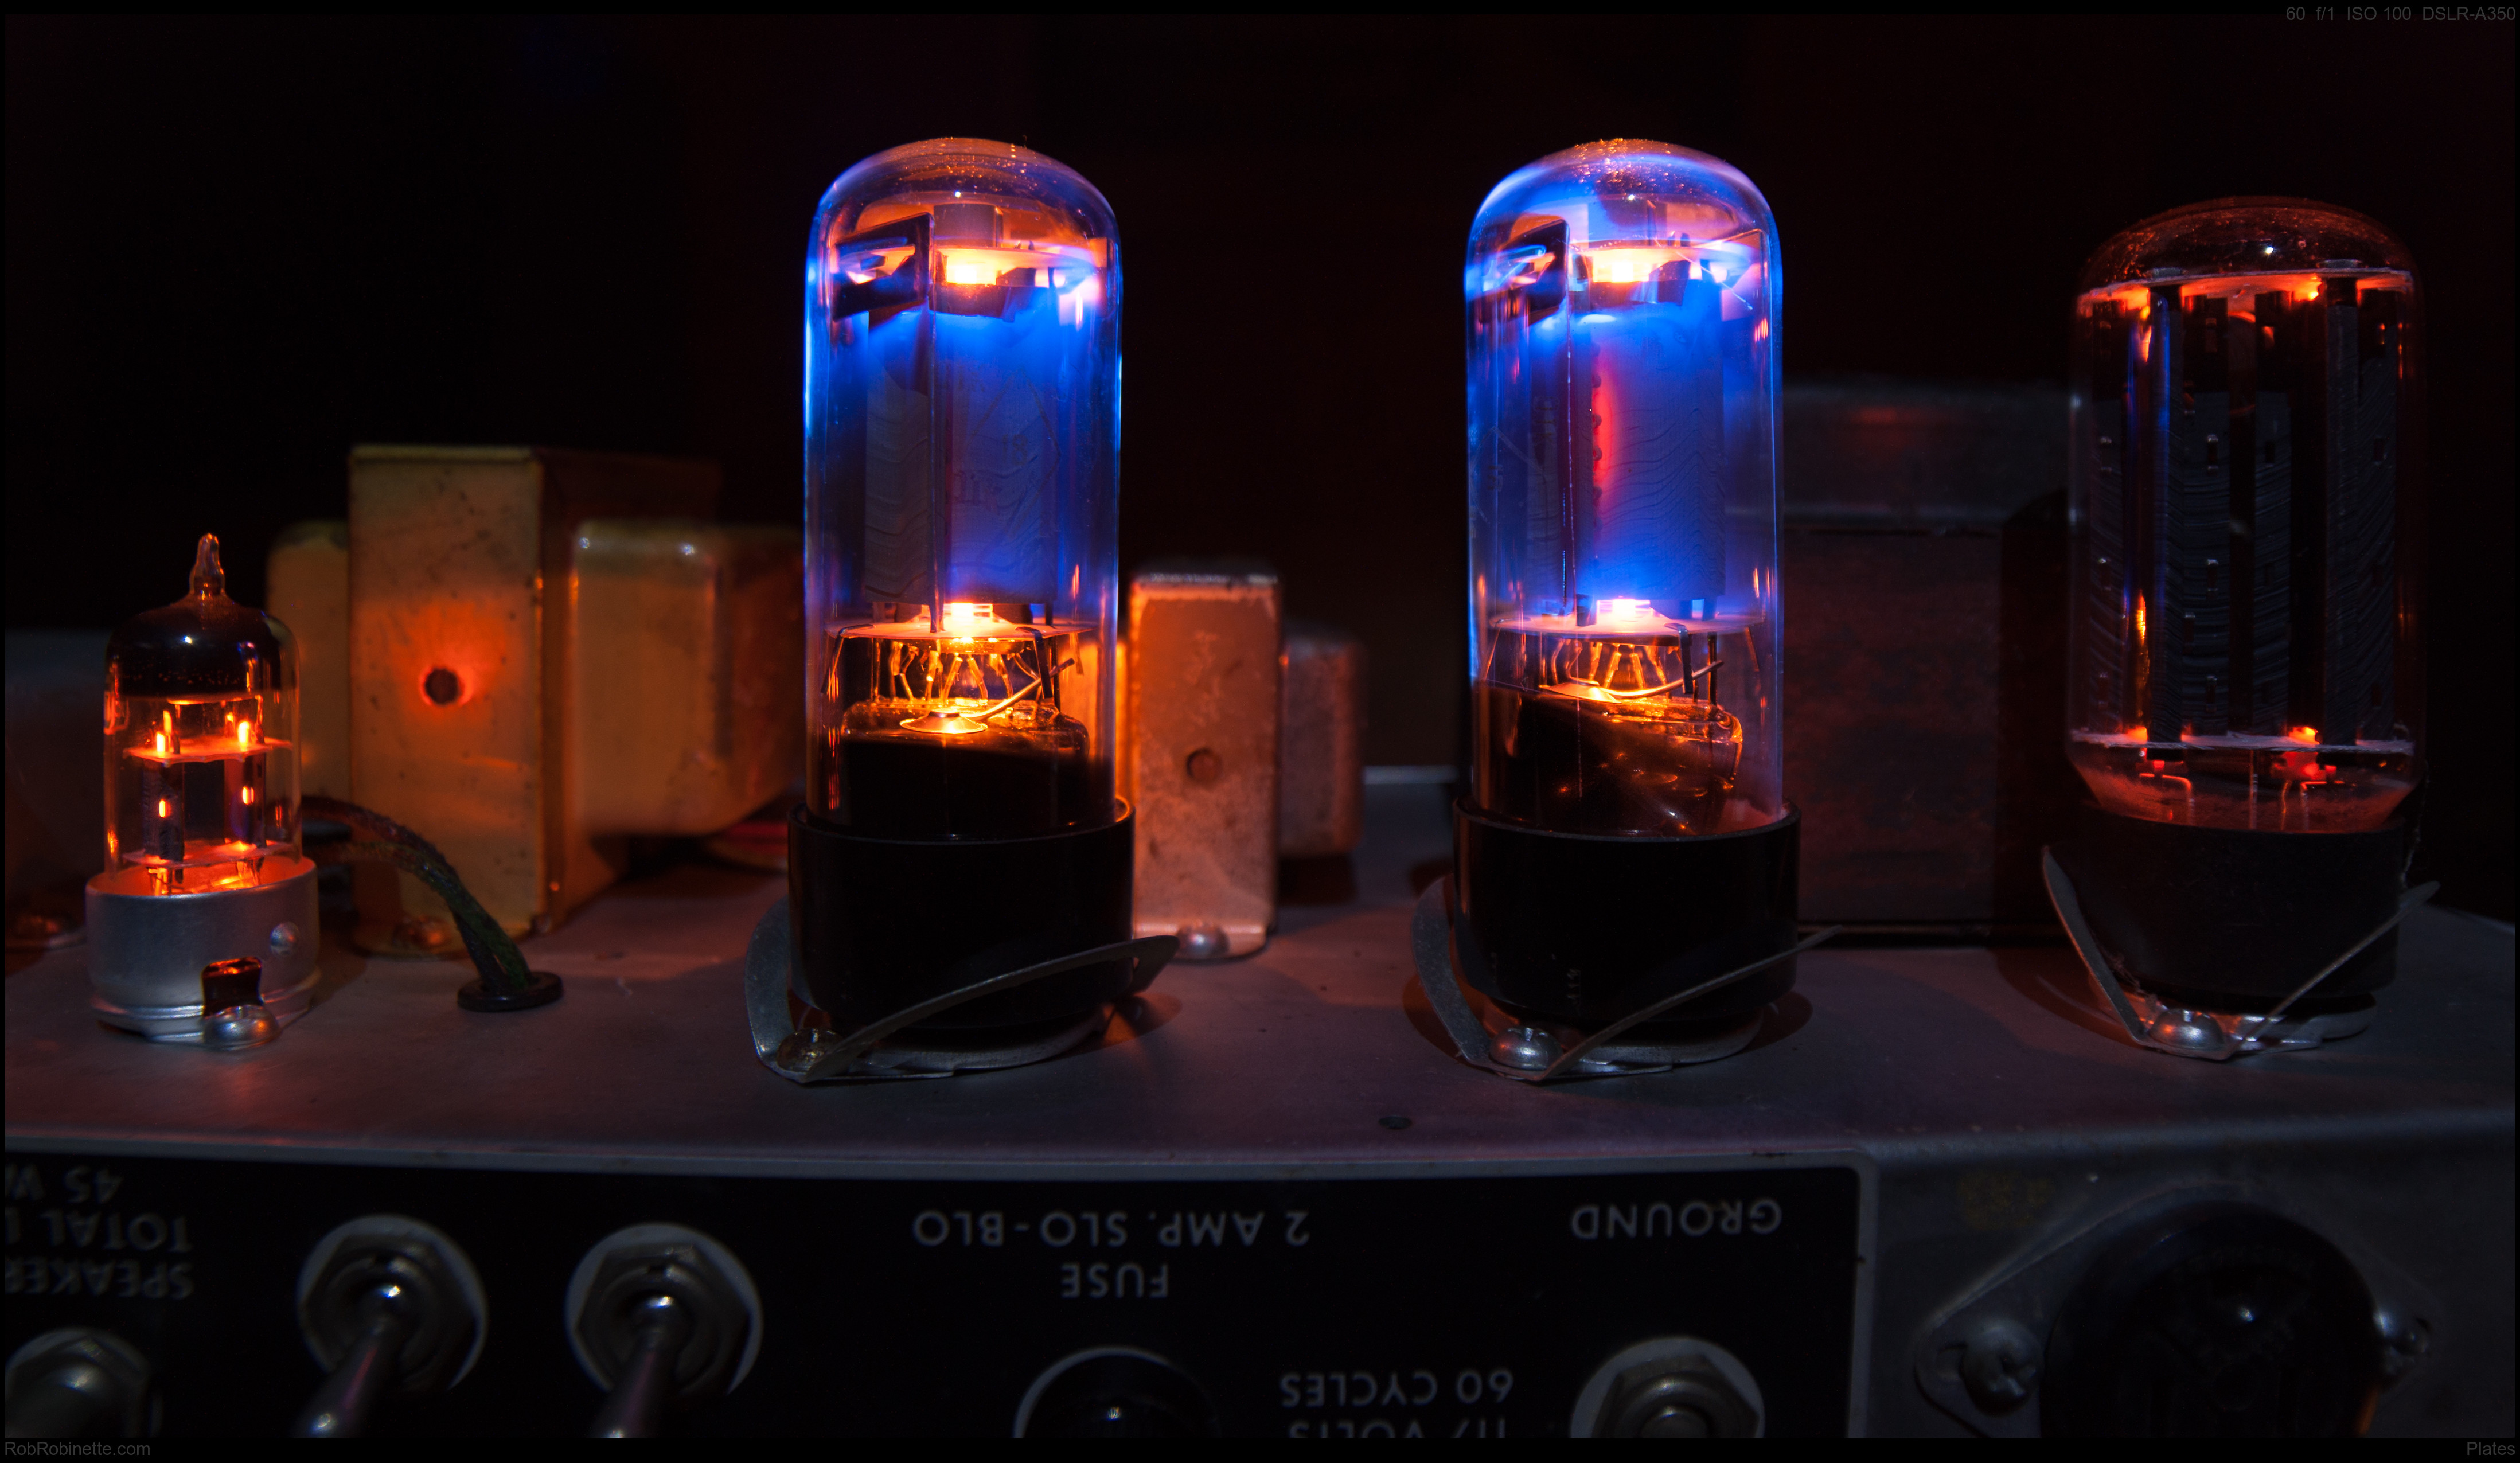
Look at the plate detail on the rectifier (far right) and power tubes. Notice the red plating on the right power tube. I have the power tubes biased too hot and the plate is taking a pounding from the excessive electron stream making the metal plate glow red hot. Taken with the Sony A350 and Rokinon 14mm f/2.8 lens set at f/16, 60 seconds and ISO 100. Focus was set by measuring the distance from the camera sensor to the center of the tubes and setting that distance on the focus ring. Click the image to see the full resolution photo.
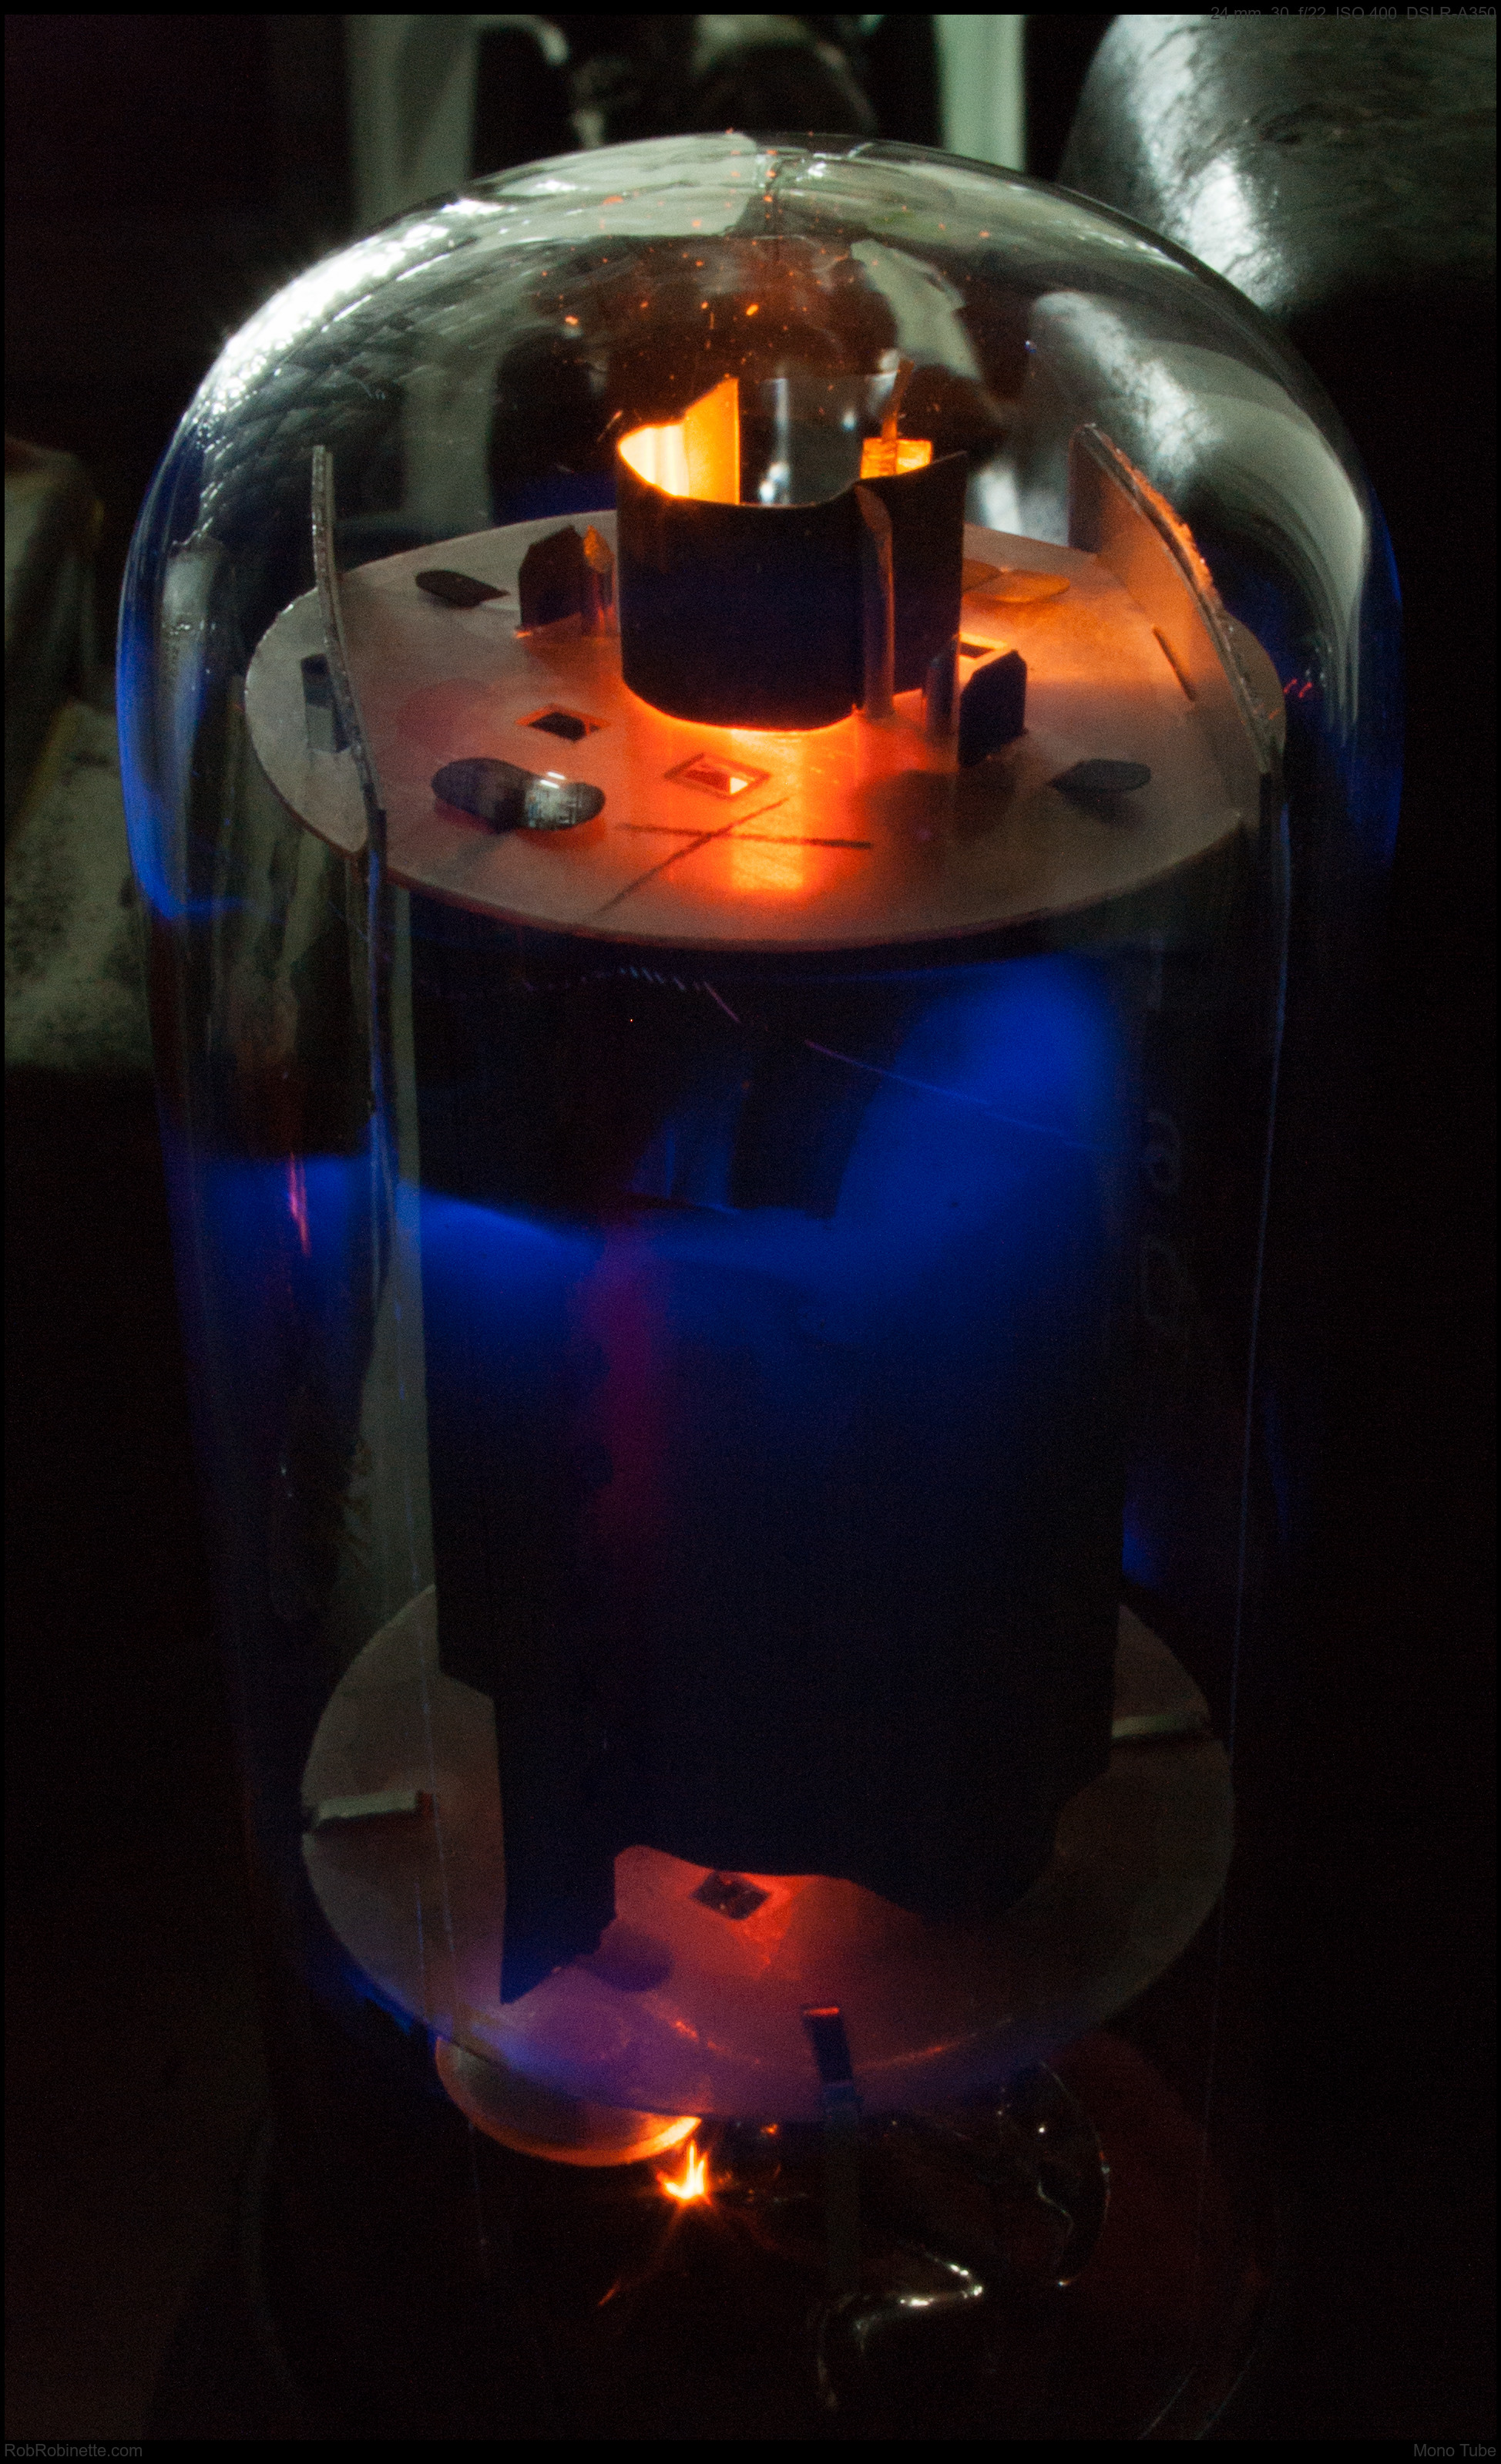
Wine Cellar
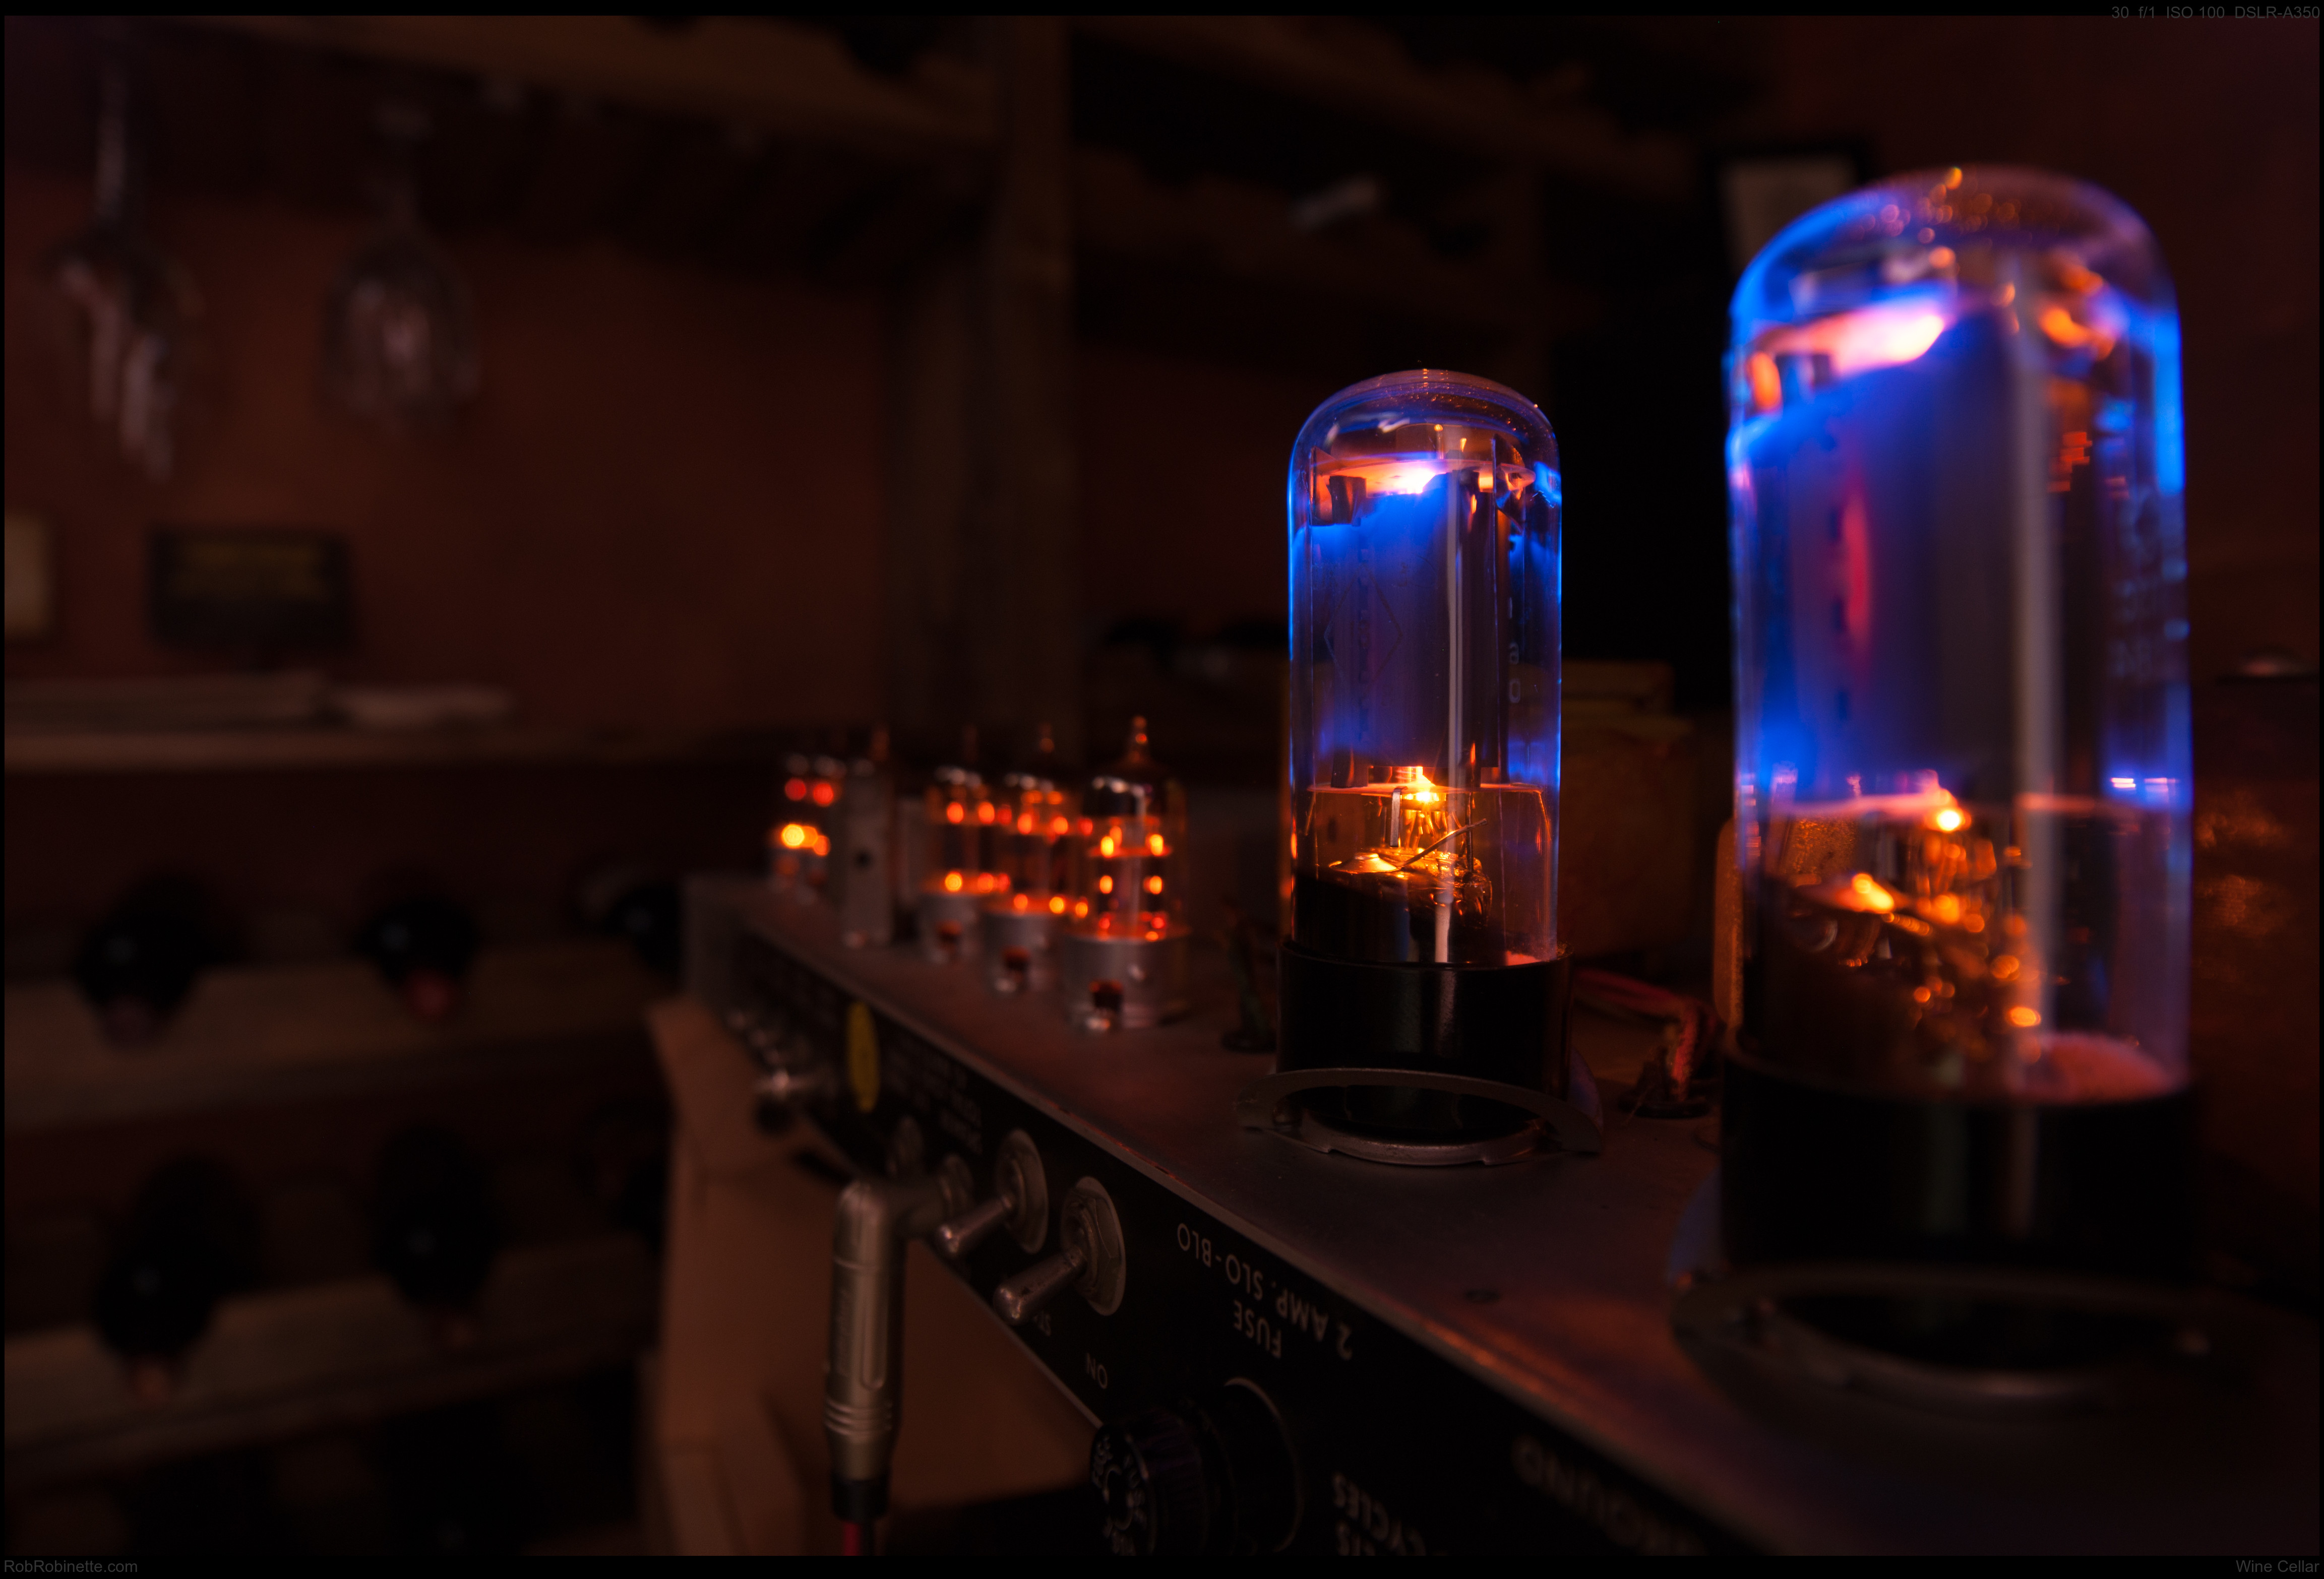
Taken with the Sony A350 with Rokinon 14mm f/2.8 lens set at f/4, 30 seconds and ISO 100. The wine cellar was black out dark but an LED flashlight was shined on the wall for about 5 seconds for soft ambient light. Click the image to see the full resolution photo.
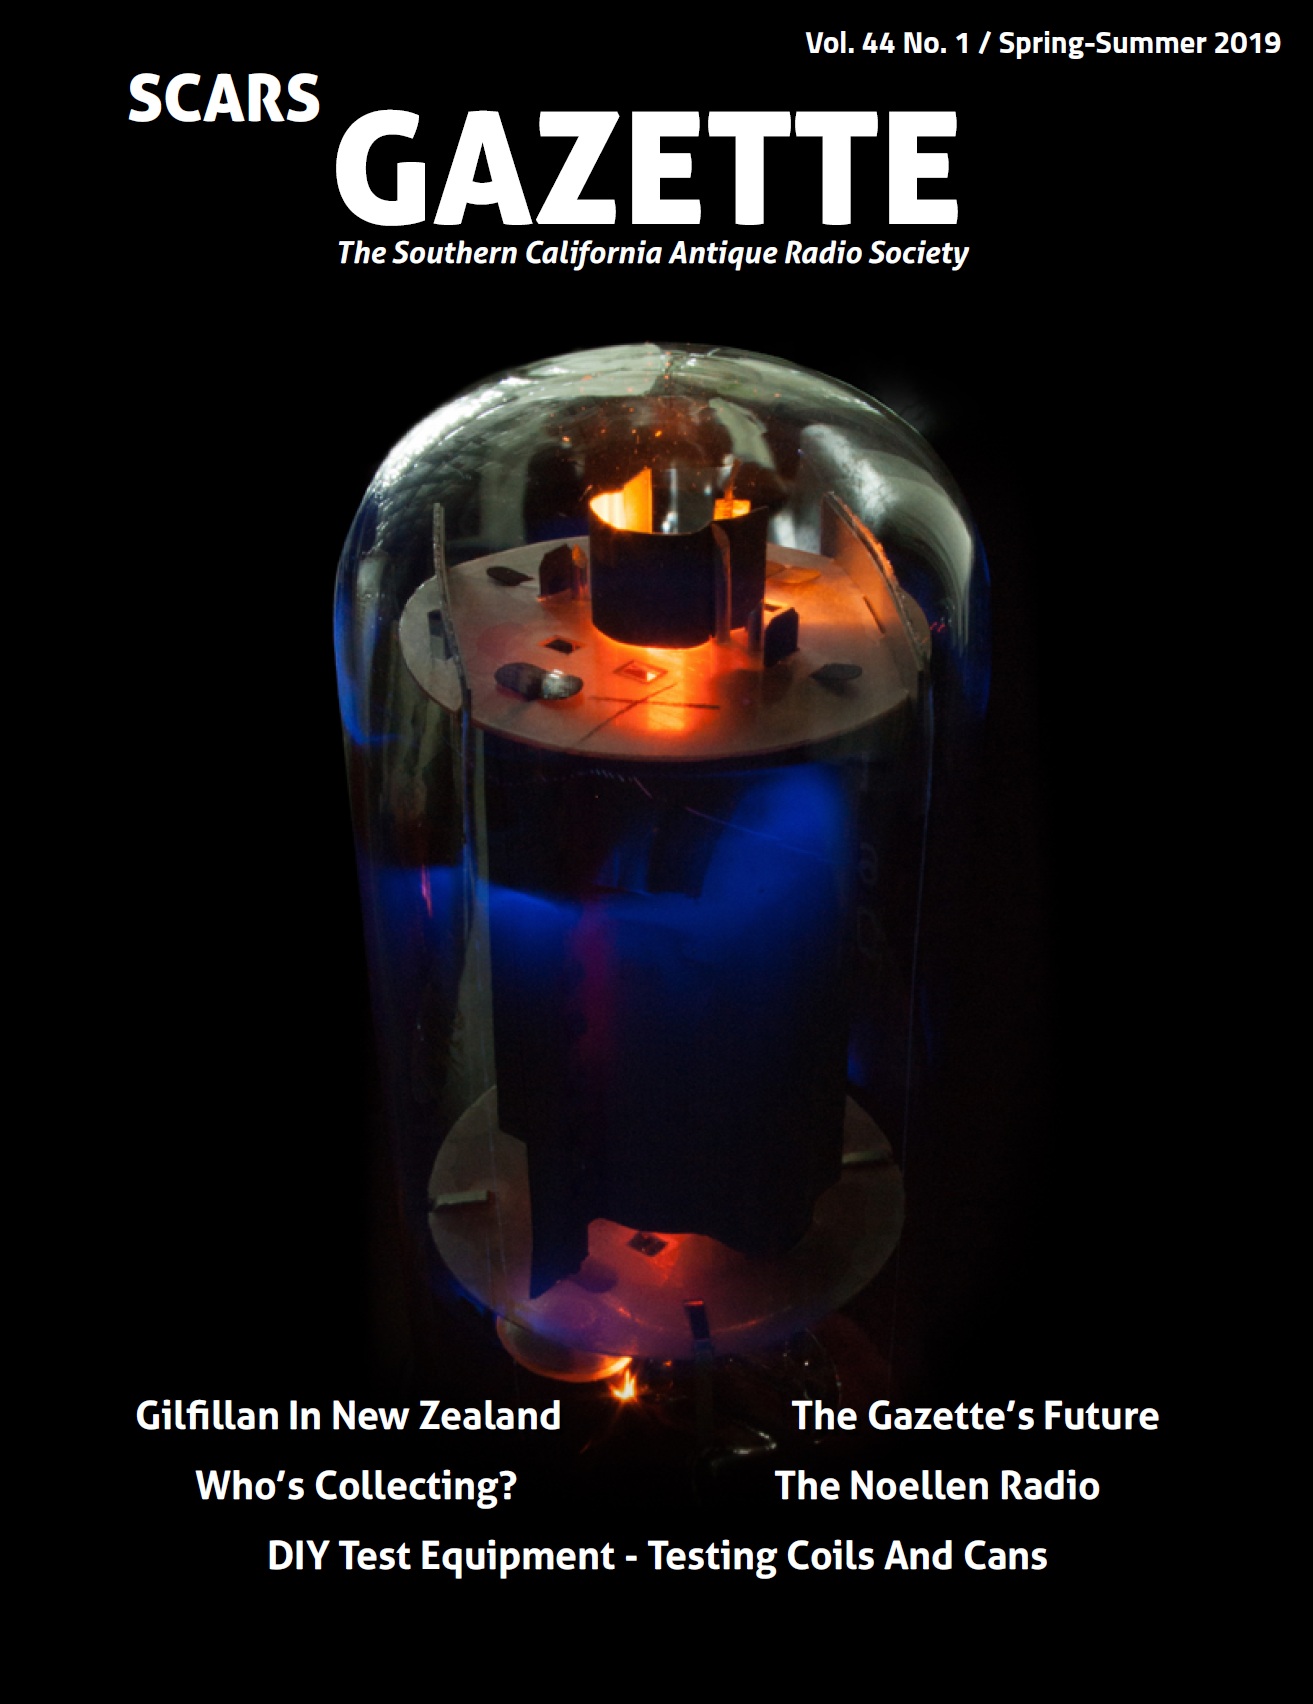
"Wind Cellar" Photo Used On Magazine Cover

Bandmaster Reverb Backside
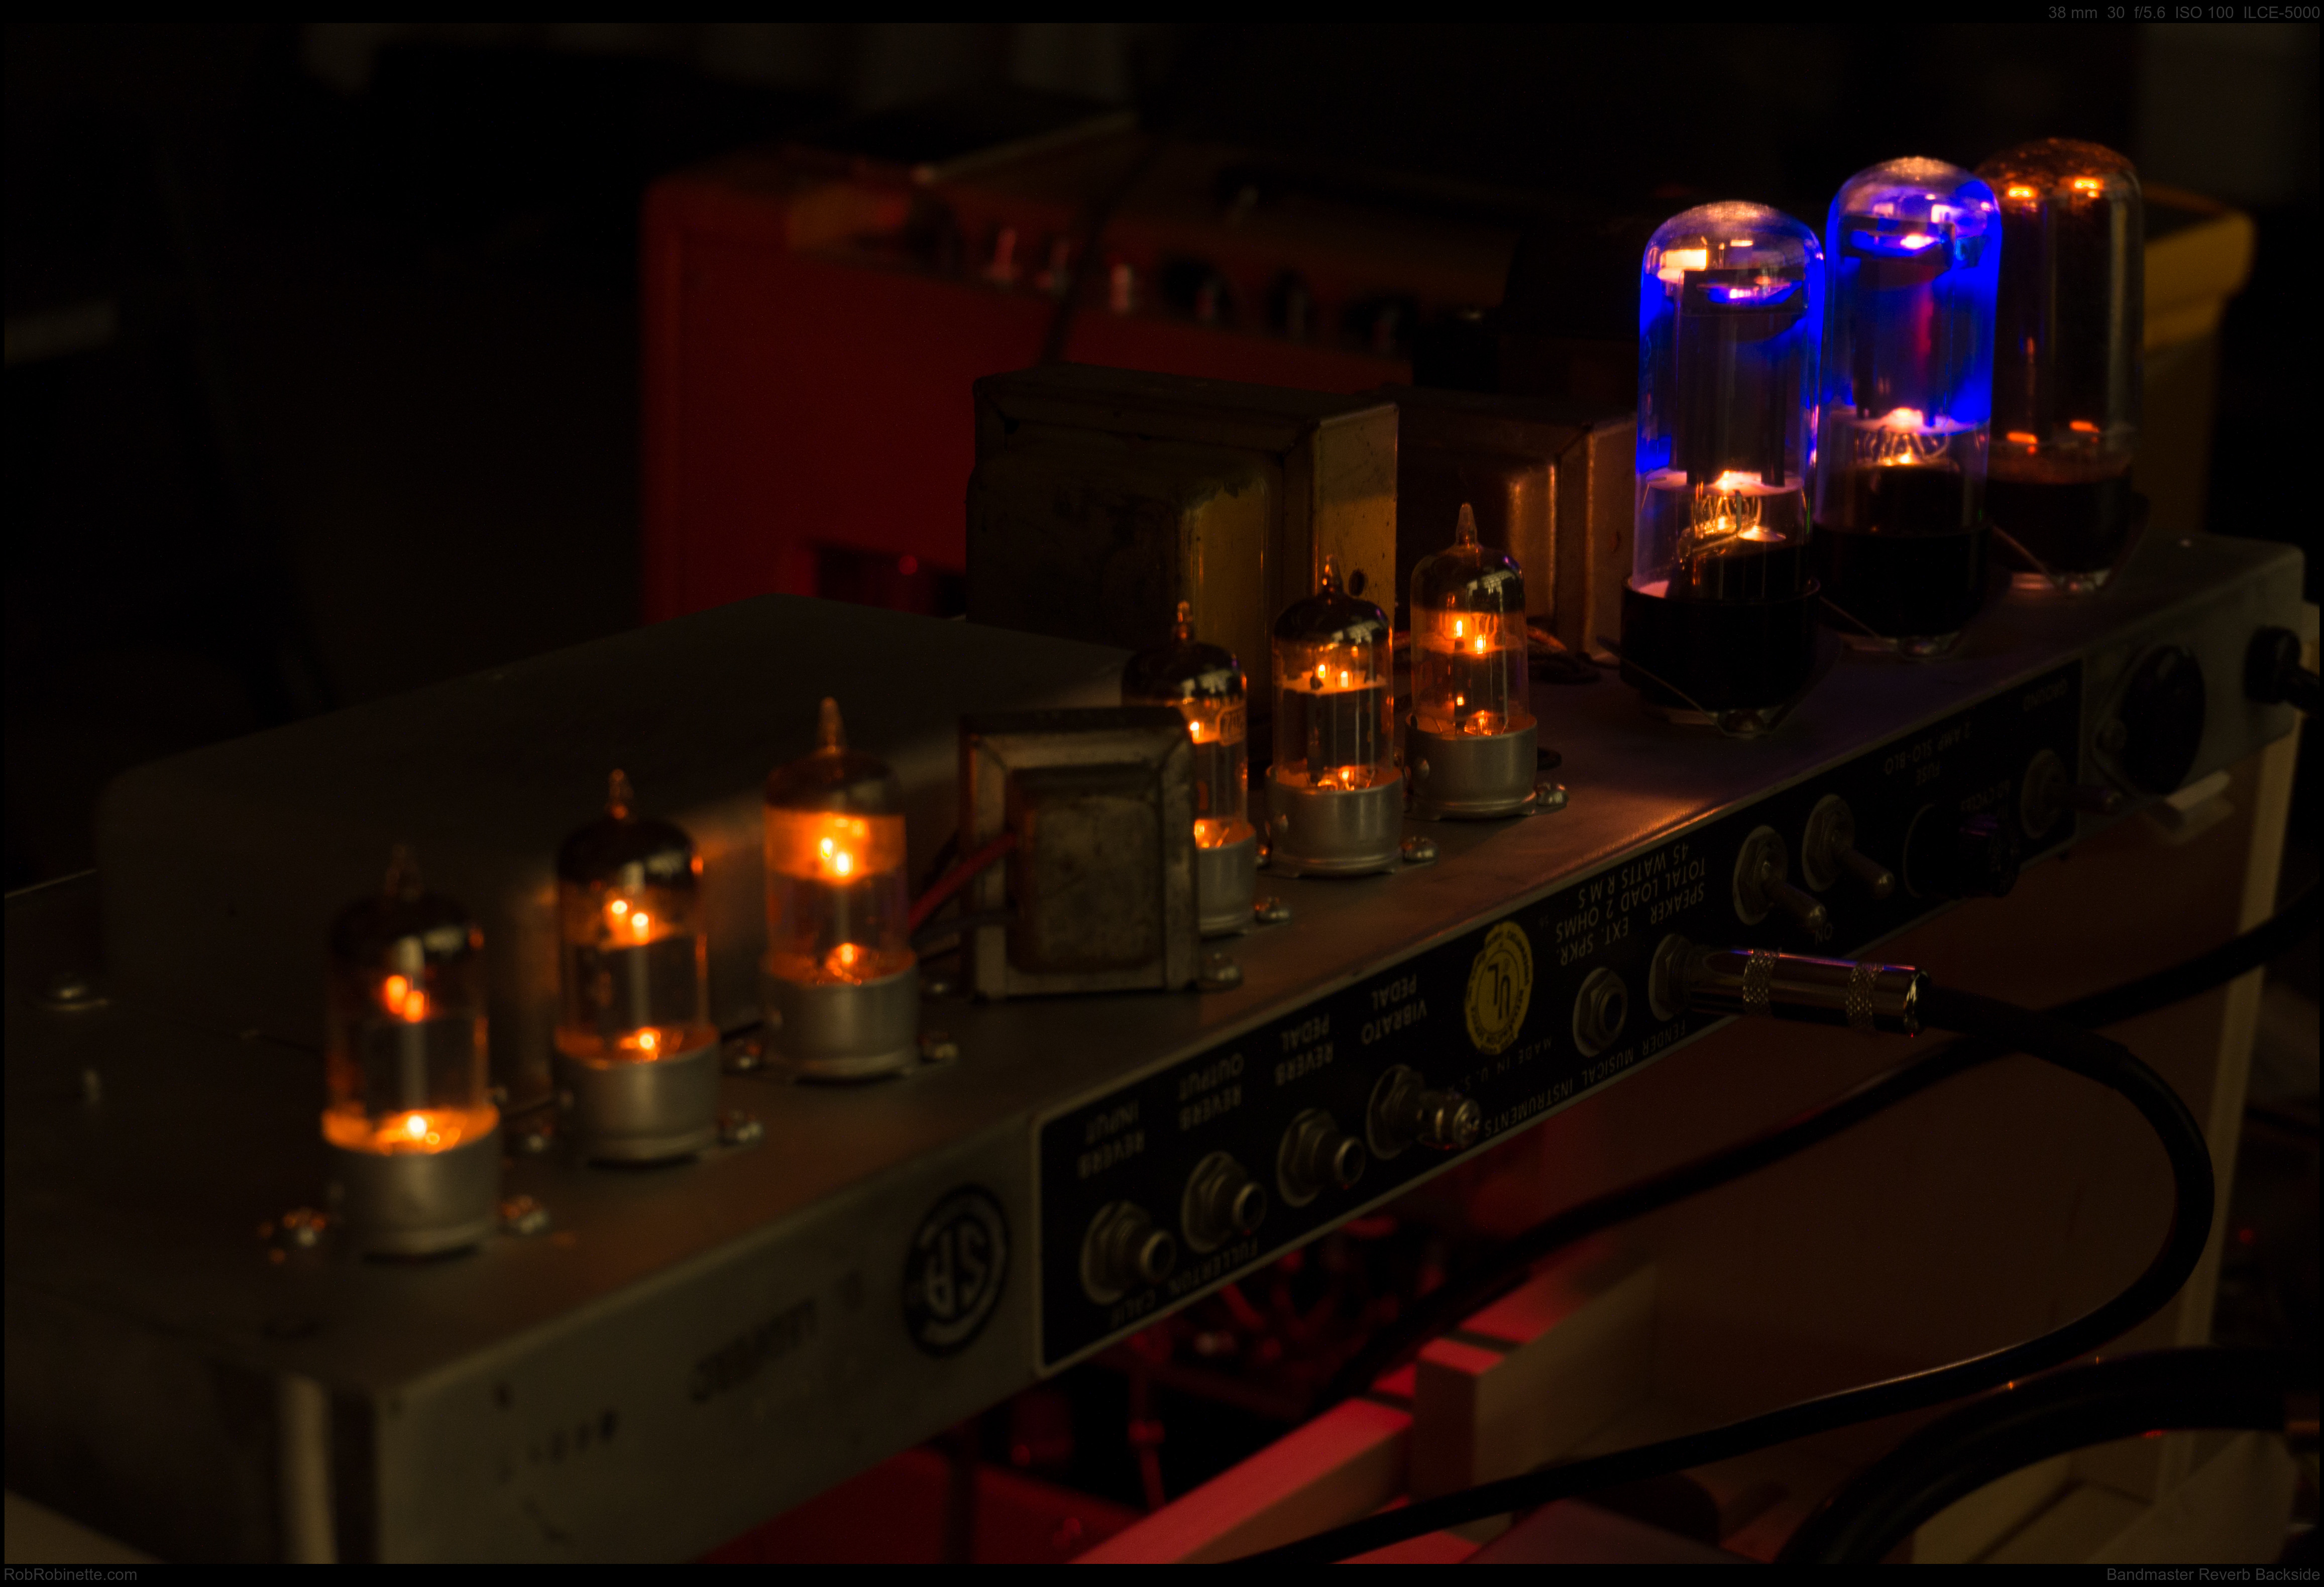
Taken with a Sony A5000 point-and-shoot camera with its standard lens zoomed to 38mm, f/5.6, 30 seconds and ISO 100. I focused on the first power tube. 4k version here.
Click the image to see the full resolution photo.
Tube in White
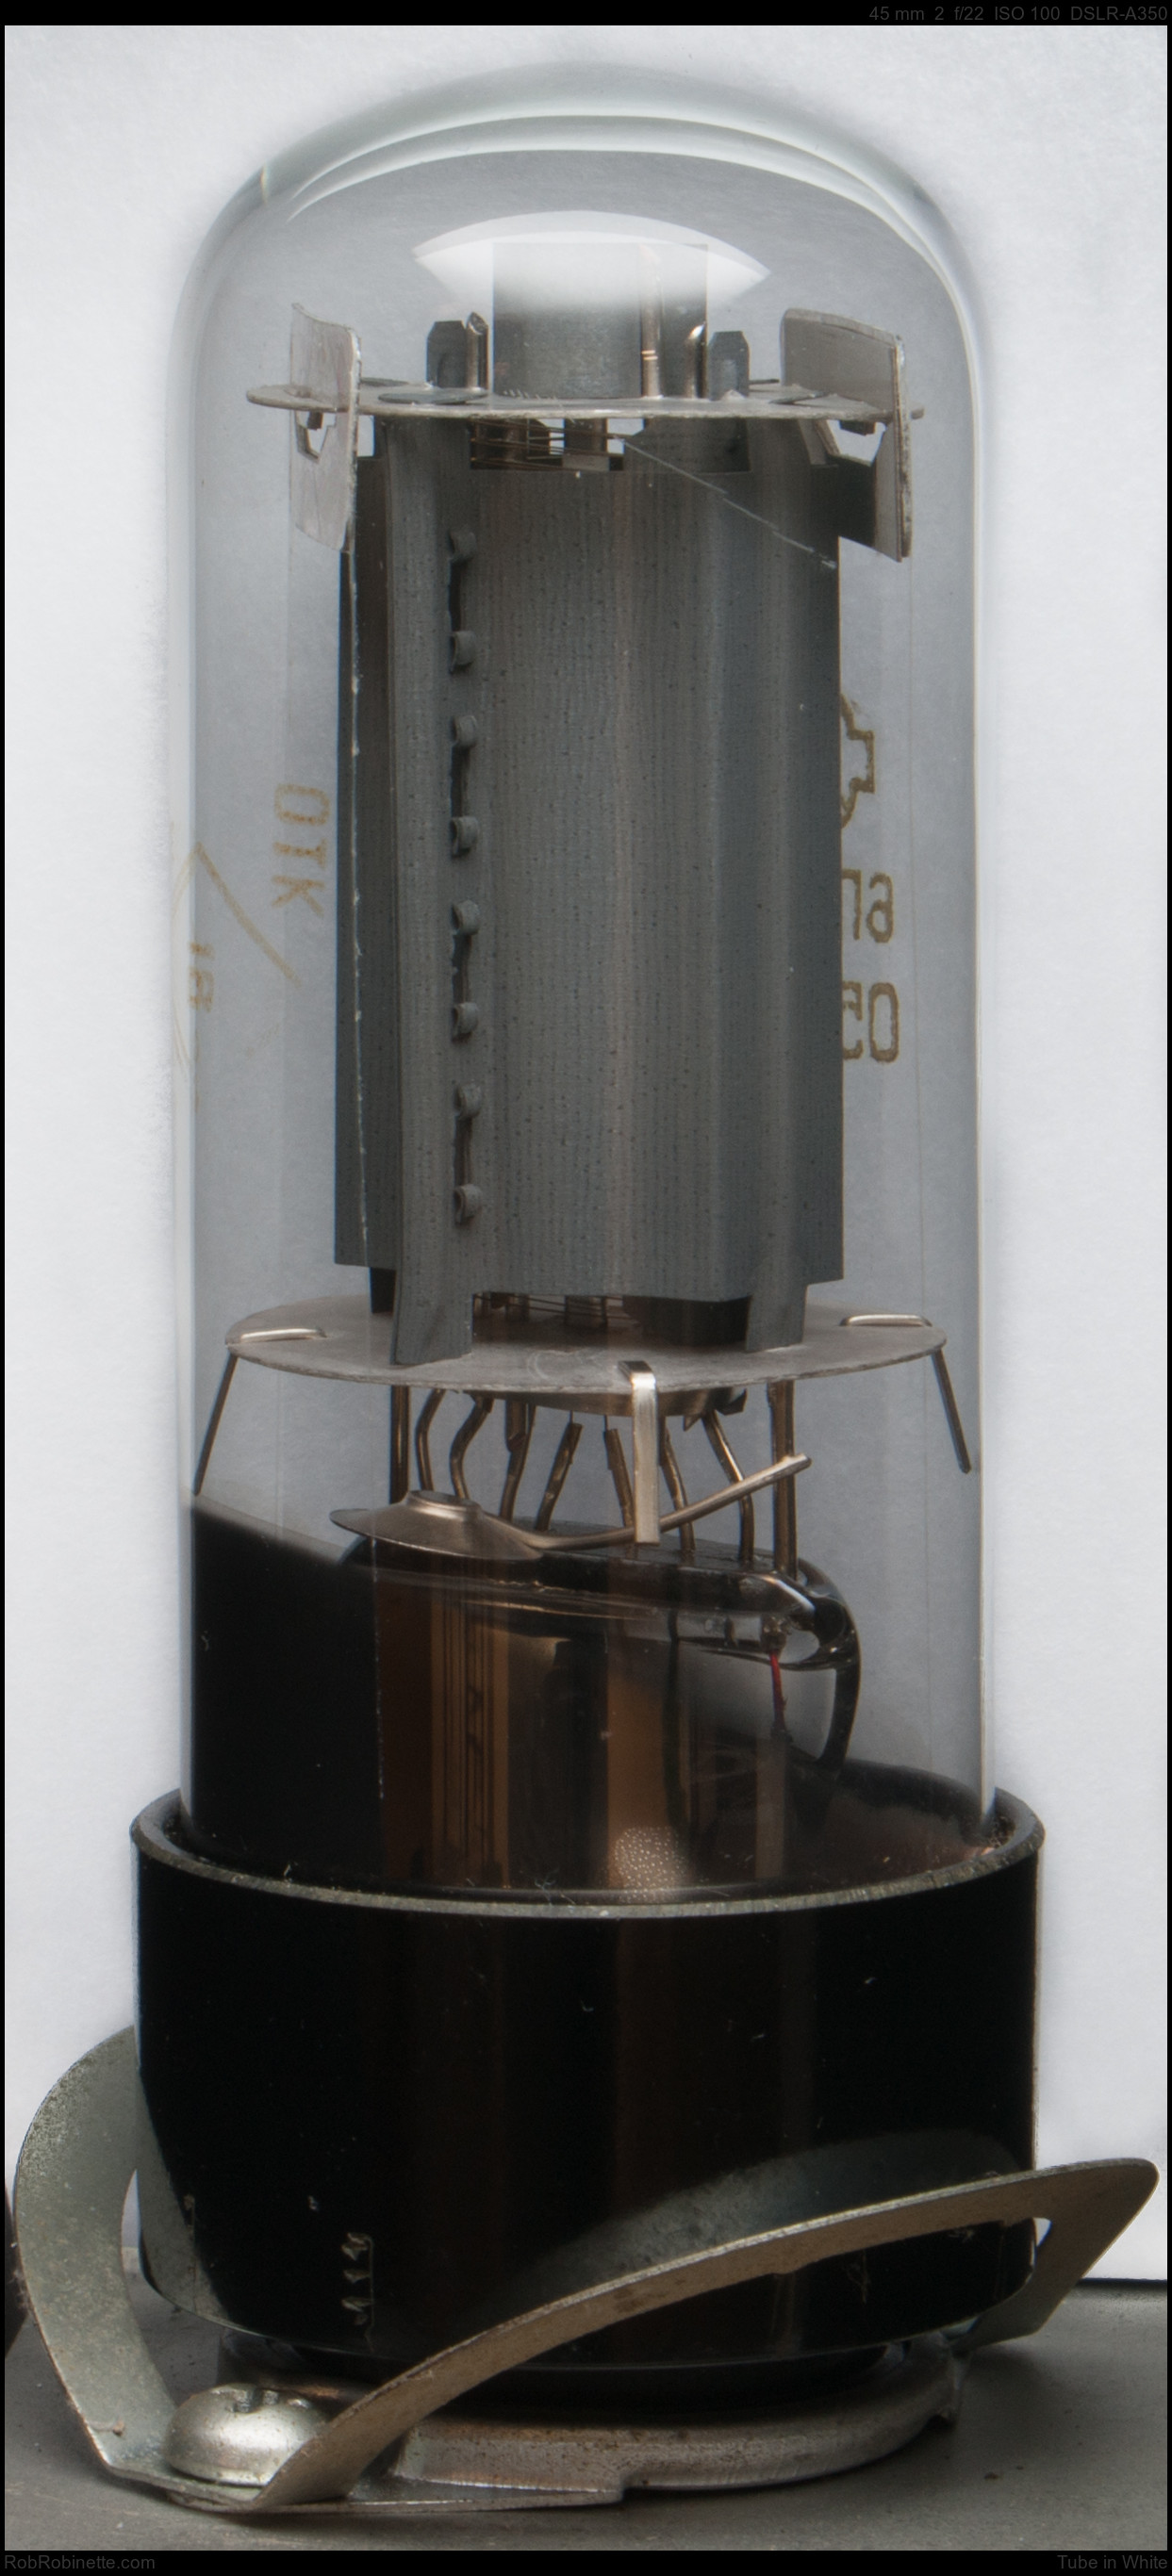
This photo was taken using a white piece of paper for the background and a black paper wrap around shroud was used to highlight the tube glass. Sony A350 with Sony 18-70mm f/3.5-5.6 zoom lens at 35mm, 1.5 macro lens, 2 sec exposure, f/22, ISO 100. Click the image to see the full resolution photo.
Upside Down Bandmaster Reverb In Black & White
The picture takes on a completely different vibe in black & white. I simply moved Lightroom's saturation slider full left to convert the image. The full size 4k image is here.
Tubes In a Row In Black & White
Shot in color and converted to grayscale for a sinister "50's Sci-Fi" look. I also did a "horizontal flip" in irfanview. Full 4k version here.
Plates in Black & White
Twin Towers in Black and White
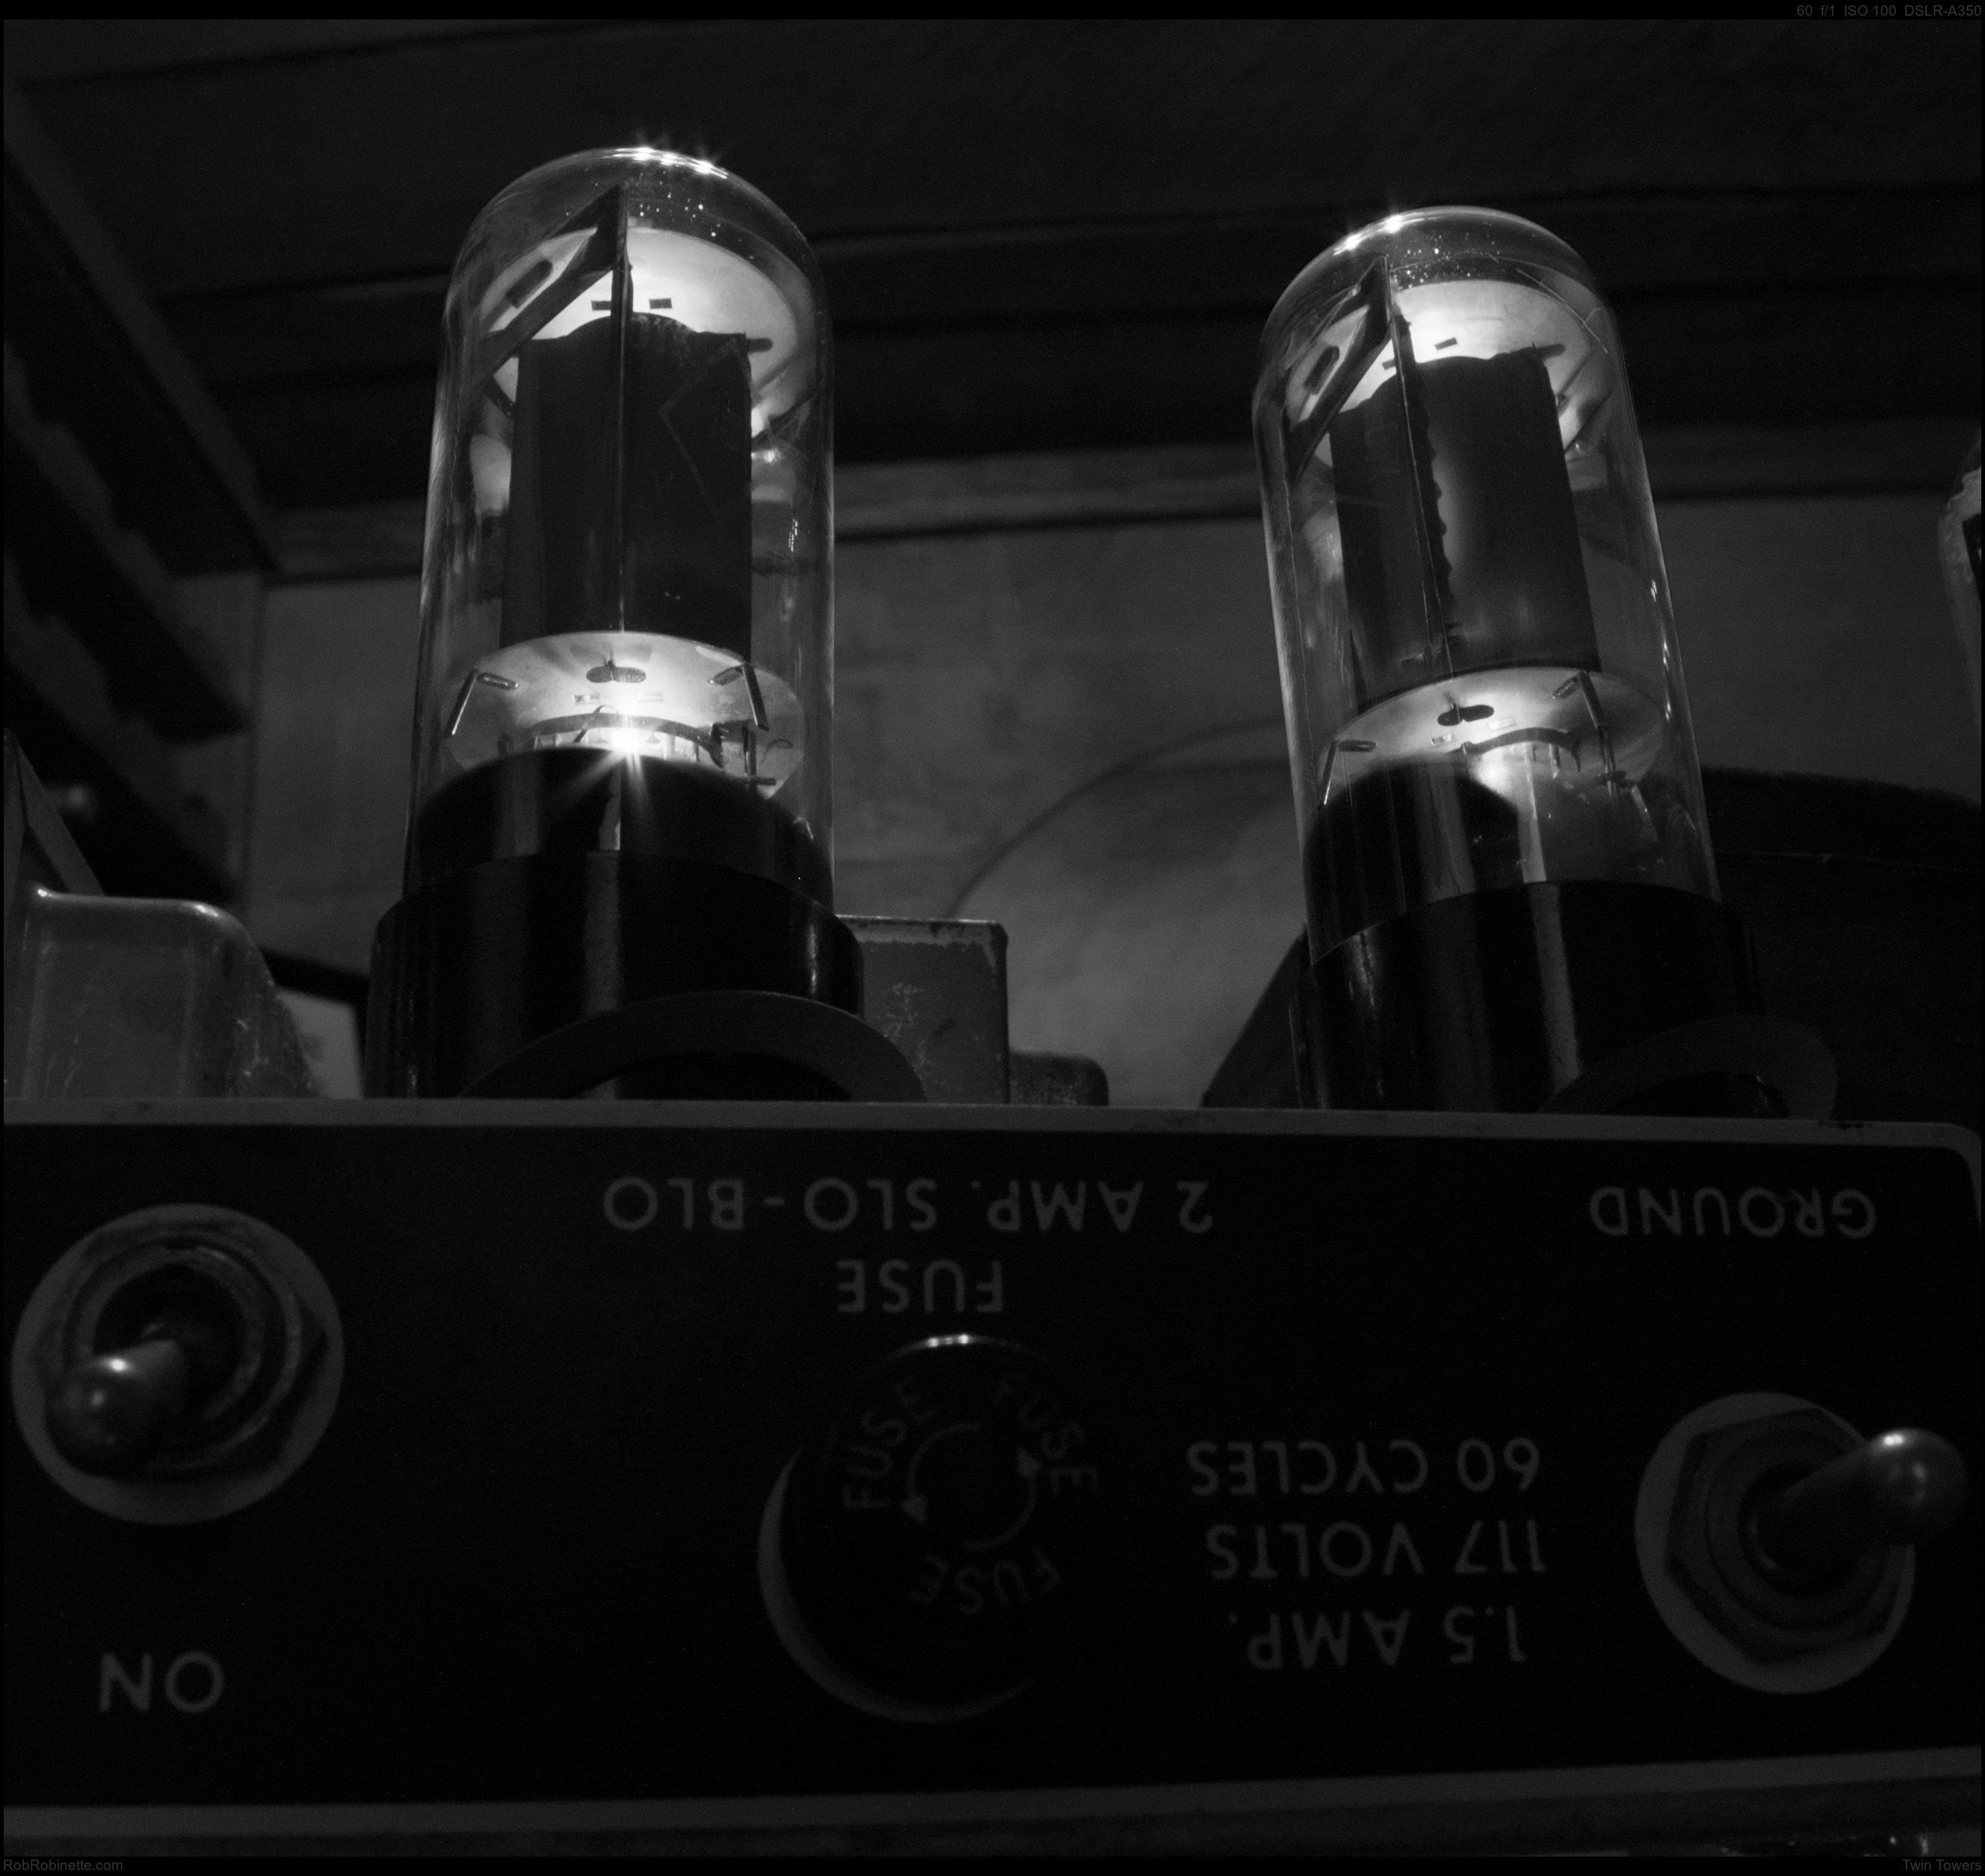
This picture of a GZ34 rectifier tube was taken with the room too dark so only the glowing parts of the tube are seen.
Too much background light washes out the AB763 blackface Bandmaster amplifier and tubes.
In this image you can clearly see the tube's plates and internal structure but the glass envelope is barely visible. A little more room light or a quick flash of a flashlight would give it a little glare to make the glass visible.
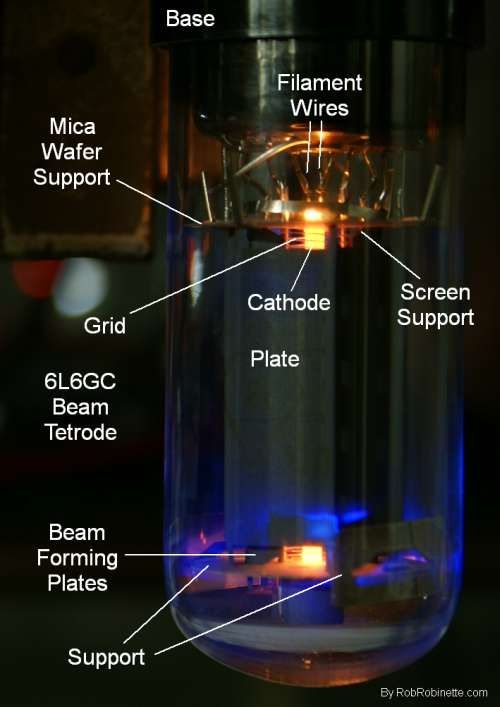
Annotations added using irfanview.
Point-and-Shoot Camera
This portrait of my Bandmaster Reverb's 6N3C power tubes was taken with a Sony A5000 point-and-shoot camera with its standard zoom lens at 30mm focal length, manual focus, manual mode, 30 second exposure f/10 ISO 100. You don't have to spend a lot of money on a camera to take good tube photographs.
How'd they get in there?
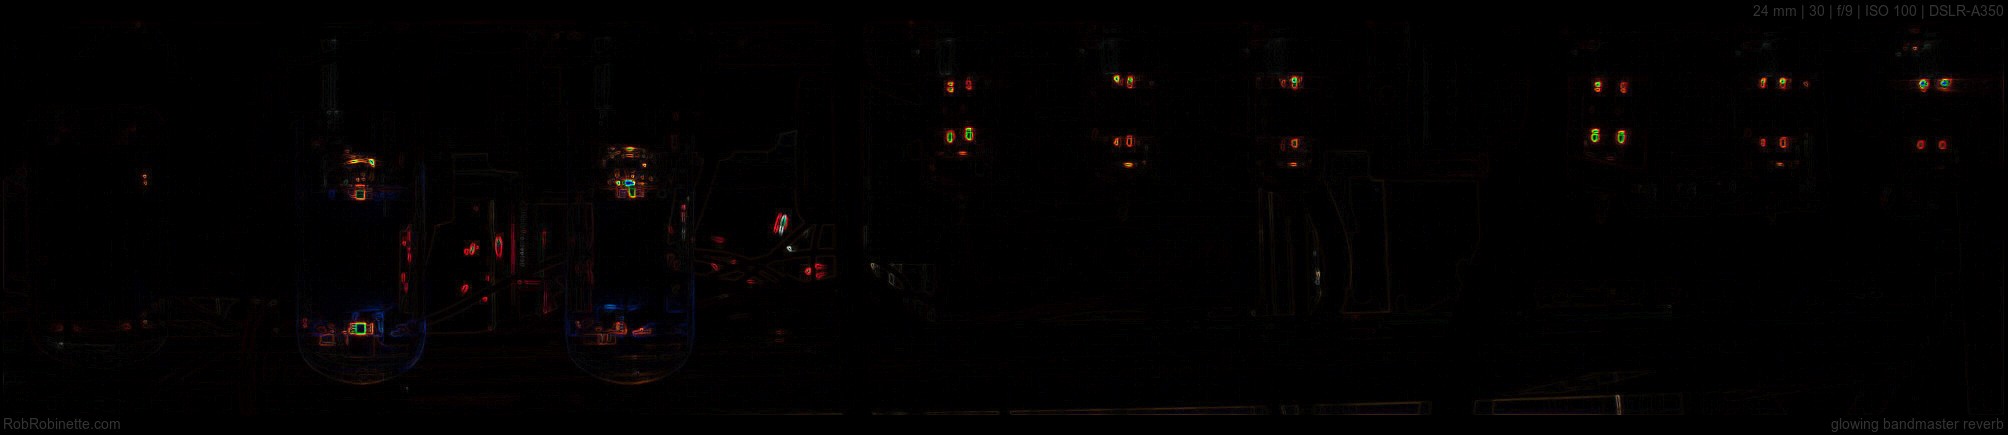
Irfanview "Edge Detection" effect applied.
Irfanview "Metalic Ice" effect.
Photo not by Rob Robinette
I'll repeat this because it's important, take lots of pictures and erase the ones you don't like. The more you take the more likely it is you'll capture a great one. Try different exposure times, f-stop, focus, lighting and subject framing and click away.
All photos and text by Rob Robinette.