S2000 Differential Replacement & Upgrade
& Megan Racing Two-Piece Driveshaft Spacers Install
By Rob Robinette
The S2000 comes with a nice Torsen (geared TORque SENsing) limited slip differential (LSD). The problem with Torsen type differentials is if a driven wheel comes off the ground it acts like an open differential and spins the raised wheel while delivering no torque to the wheel on the ground. Many S2000 racers and time trialers disconnect or remove their rear anti-sway bar to prevent the inside rear wheel from lifting off the track. I ran for over a year like that but was limited by under steer so mid-season 2010 I reconnected the rear sway bar and immediately went faster but also suffered with wheel lift and the resulting lack of drive out of corners, especially bumpy corners. Wheel lift is very hard on drive-line components and can destroy the differential, output shafts and axels. You can hear the engine bumping off the rev limiter during wheel lift in this youtube video of my personal best lap around Summit Point:
http://www.youtube.com/watch?v=5FkTlSR8dVA
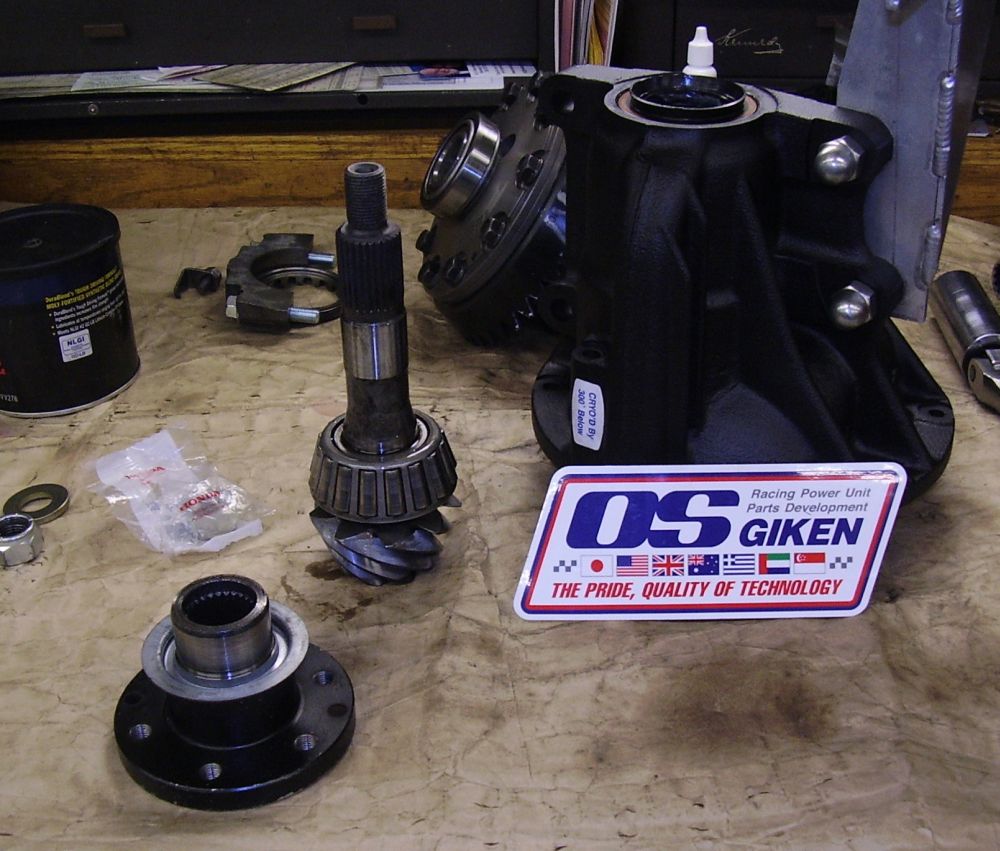
In March 2011 I took the plunge and purchased a used AP2 differential with an OS Giken clutch type limited slip differential. I shipped it and a set of lower 4.44 gears to Puddy Mod Racing and had the diff and LSD rebuilt. The OS Giken differential should keep the rear locked when the inside rear wheel unloads and allow for much better drive out of corners. The Giken unit requires no break in and once filled with OS Giken fluid it is good to go with no required fluid changes.
Here are some pics from Puddy Mod Racing showing the rebuild process.
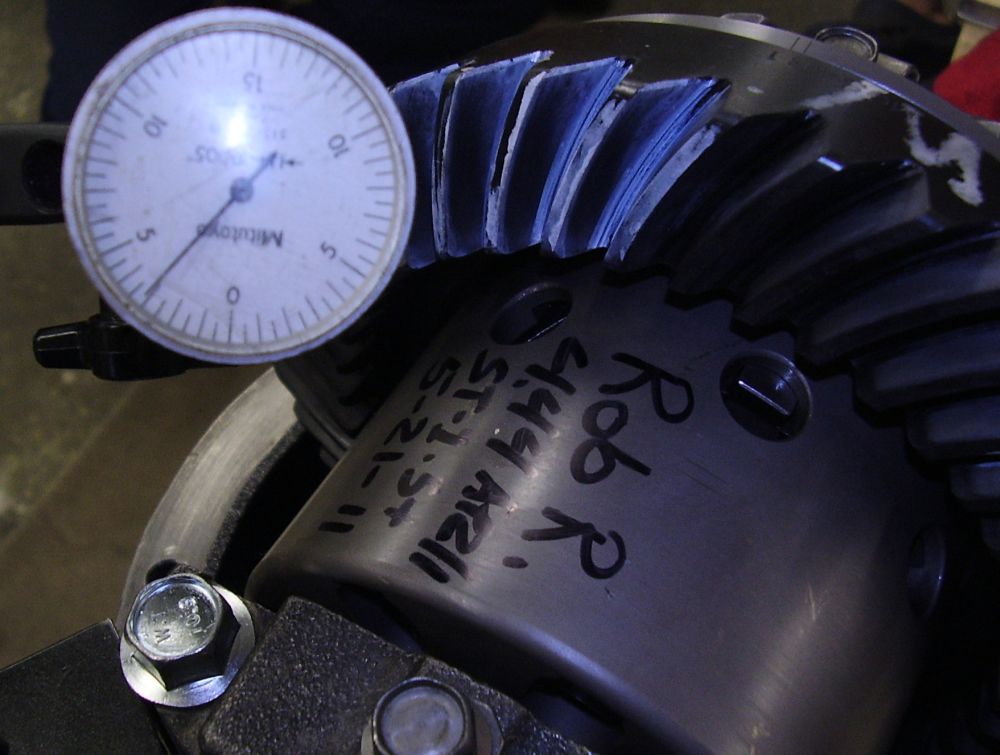
Backlash Set to 2.8 - 3.3 Thousandths and Perfect Gear-to-Gear Contact Pattern
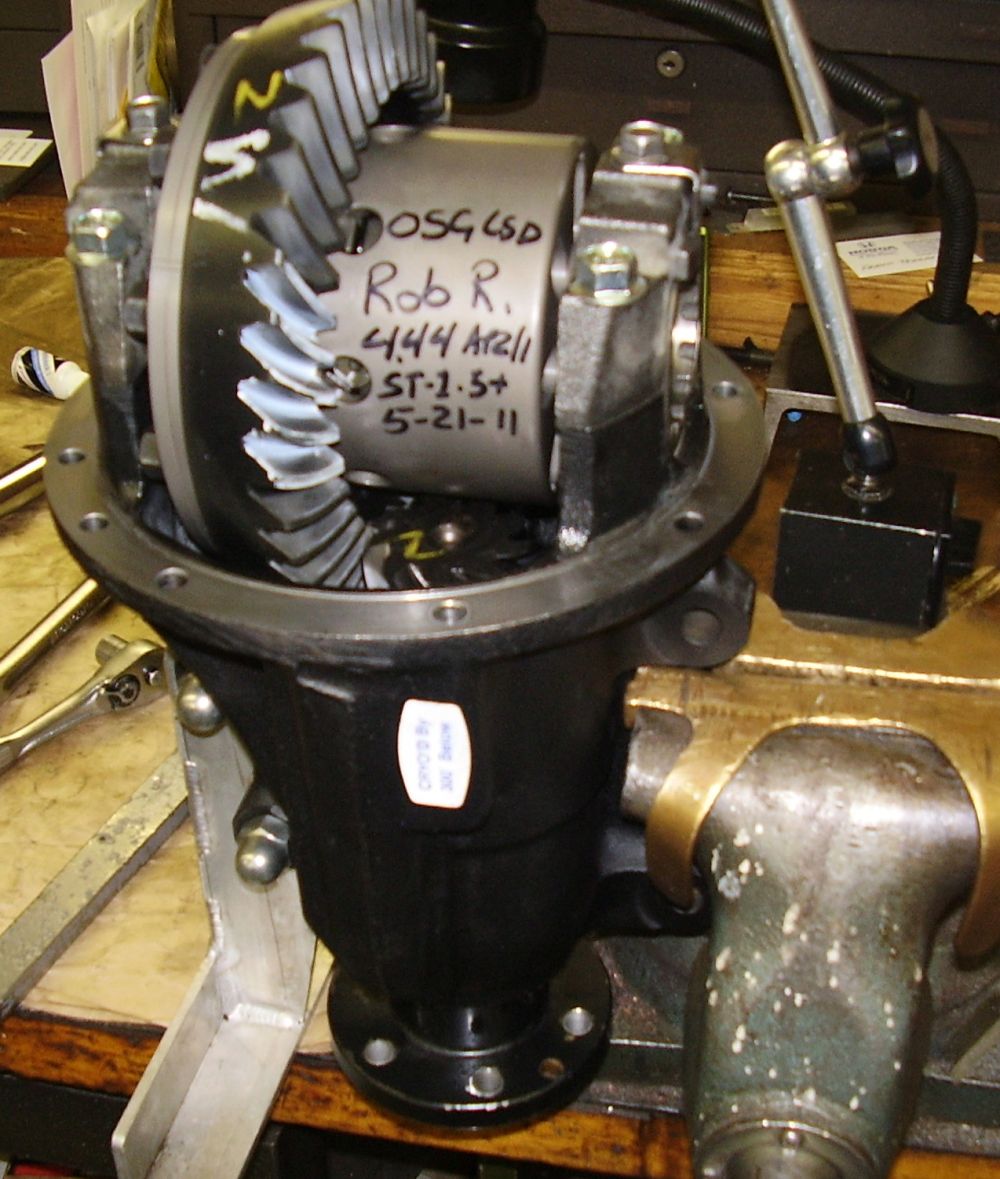
The Finished Build
How to Swap The Differential
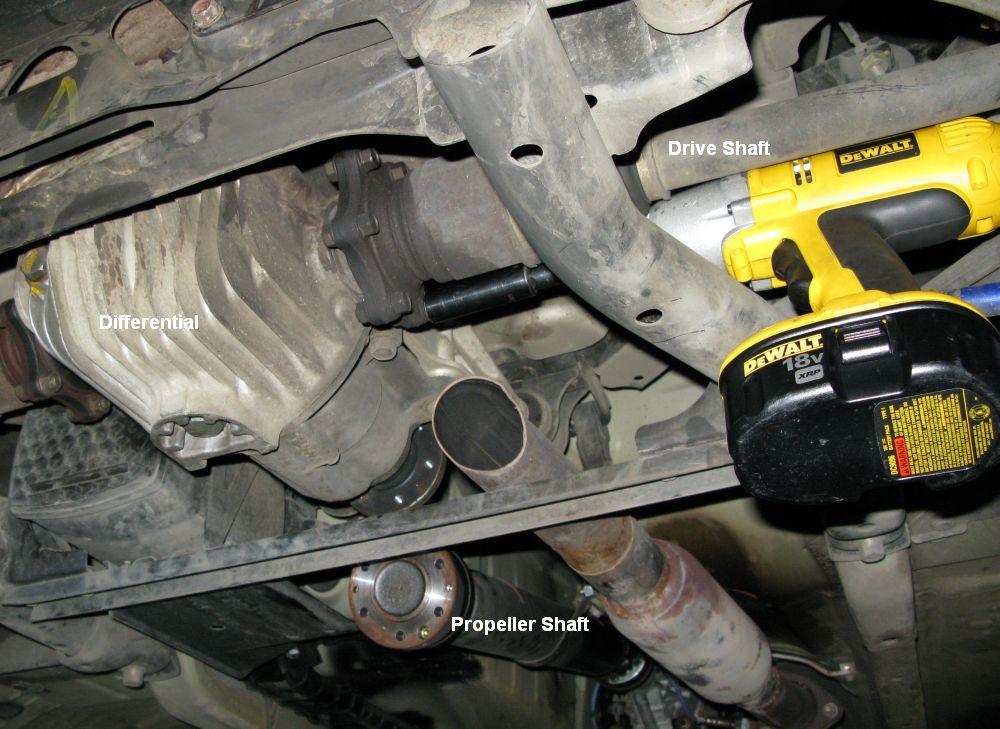
The AP1 & AP2 differentials have different prop shaft yokes (the part that bolts to the prop shaft). The prop shaft bolts are a different size. If you want to put an AP2 diff in an AP1 you'll have to swap the prop shaft yoke. Puddy Mod Racing did the swap for me.
The only special tool you'll need is a 6mm hex head socket. Pair it with an impact wrench & extension and removing the propeller shaft bolts is easy. A transmission cradle jack would be nice to cradle the differential but a normal floor jack with a good size lift pad will work too if you have an assistant that can operate the jack while you're under the car with the diff.
![]()
Northern Tool Transmission Jack
The propeller shaft bolts and the driveshaft nuts and bolts should be replaced every time they are removed so be sure and order them ahead of time.
Removing the Differential
Start by squirting some PB Blaster or other penetrant on the propeller shaft and driveshaft bolts and if possible let them sit overnight.
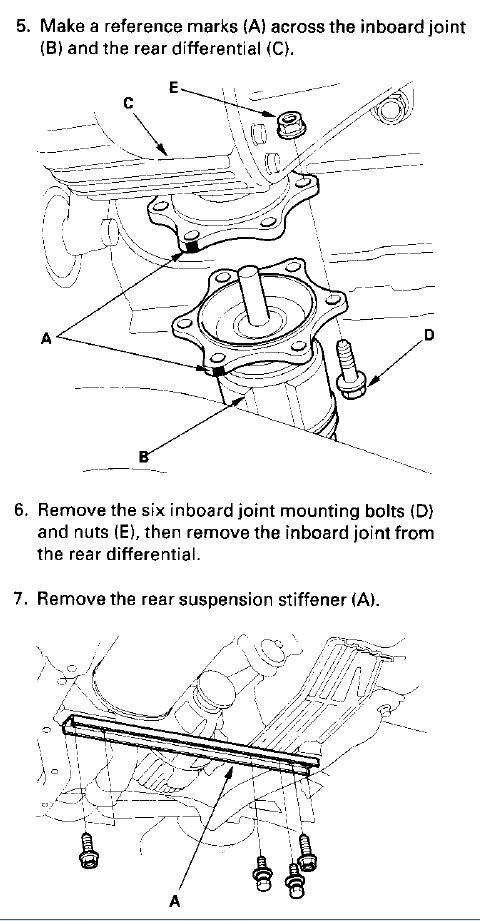
Loosening the Driveshaft Inboard Joint 14mm Bolts
Mark the junction of the propeller shaft and differential, and both driveshafts so you can reassemble them exactly as they were assembled at the factory. This will help keep the driveline balanced and vibration free. A little paint or even a scratch awl mark will do.
Use an impact wrench with an extension and a 6mm hex socket to easily remove the propeller shaft bolts. Make sure the hex key is inserted completely into the nut before you hit the trigger on the impact wrench.
An impact wrench also makes easy work of the inboard driveshaft's 12 each 14mm bolts--see photo above.
The Shop Manual says to remove the propeller shaft but you don't have to completely remove it, just unbolt the differential end and remove one of the prop shaft safety bracket screws to let it hang out of the way. The manual also says to pop a ball joint on one of the wheels but that is unnecessary too. You can move the diff sideways enough to release one driveshaft then move it the other way to release the other driveshaft.
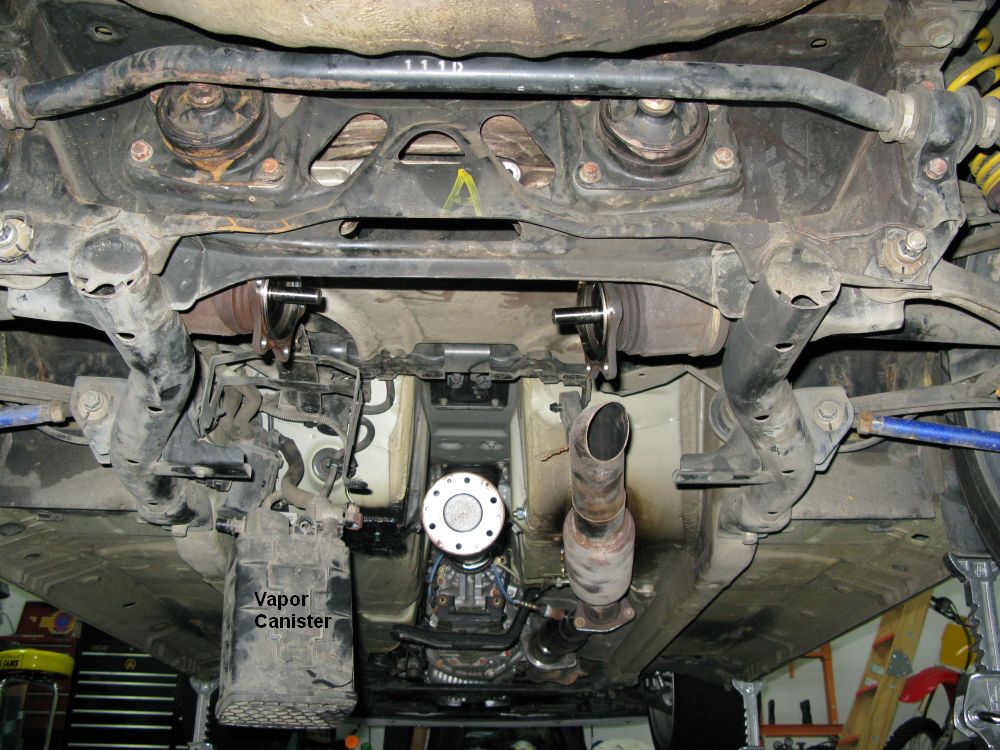
Remove the suspension stiffener that runs under the differential. It has 14mm bolts and the fuel vapor canister cover has two 10mm bolts on the stiffener too. The shop manual doesn't mention removing the fuel vapor canister but removing its one 12mm bolt and twisting it out of its bracket and letting it hang will make removal and installation of the differential much easier--especially if you don't completely remove the propeller shaft. You don't have to disconnect any of the vapor canister's wires or hoses.
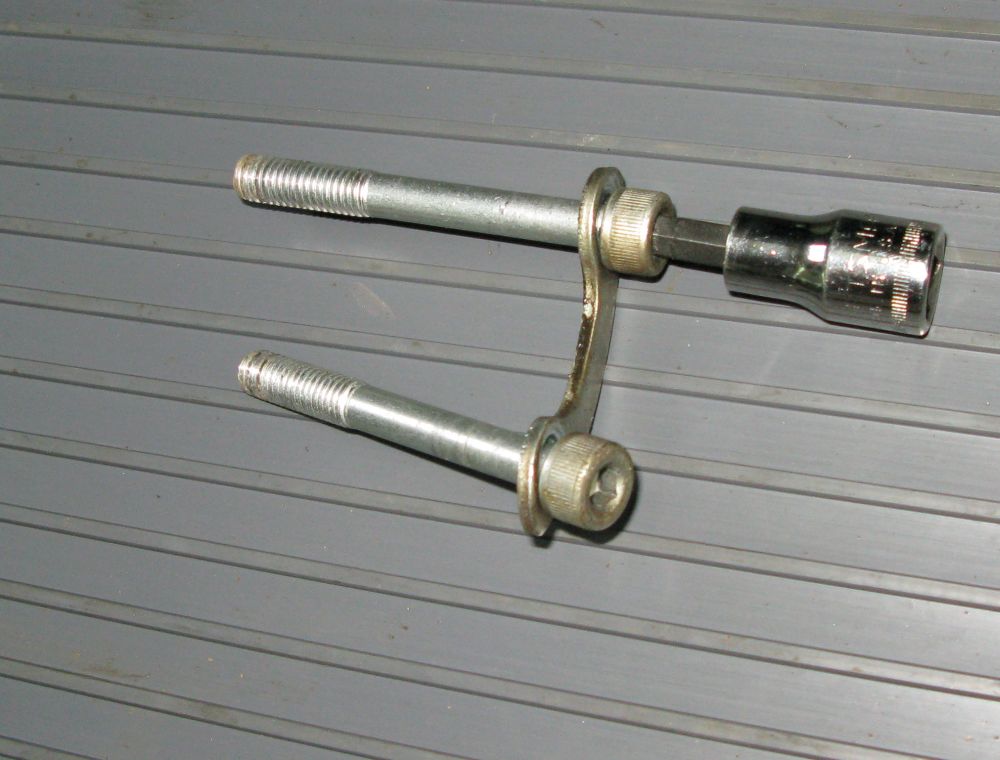
The Propeller Shaft Hex Head Bolts, Washer and 6mm Hex Socket
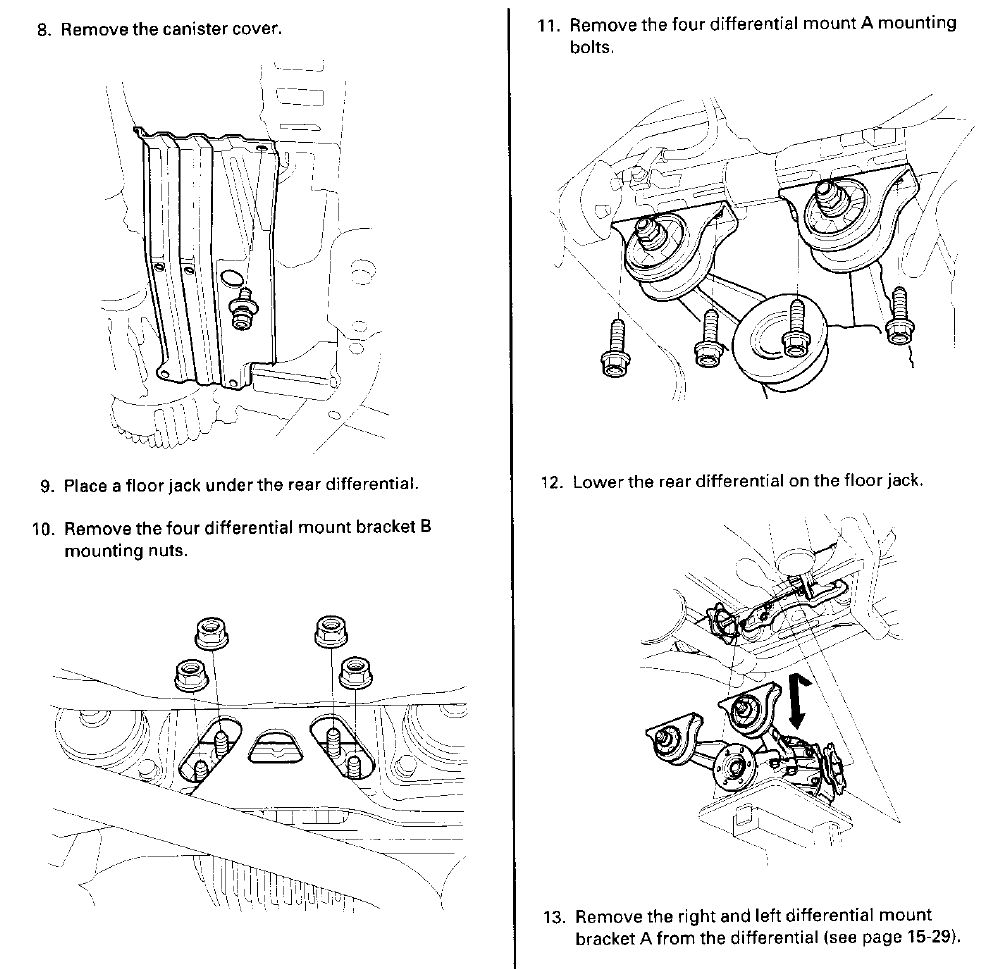
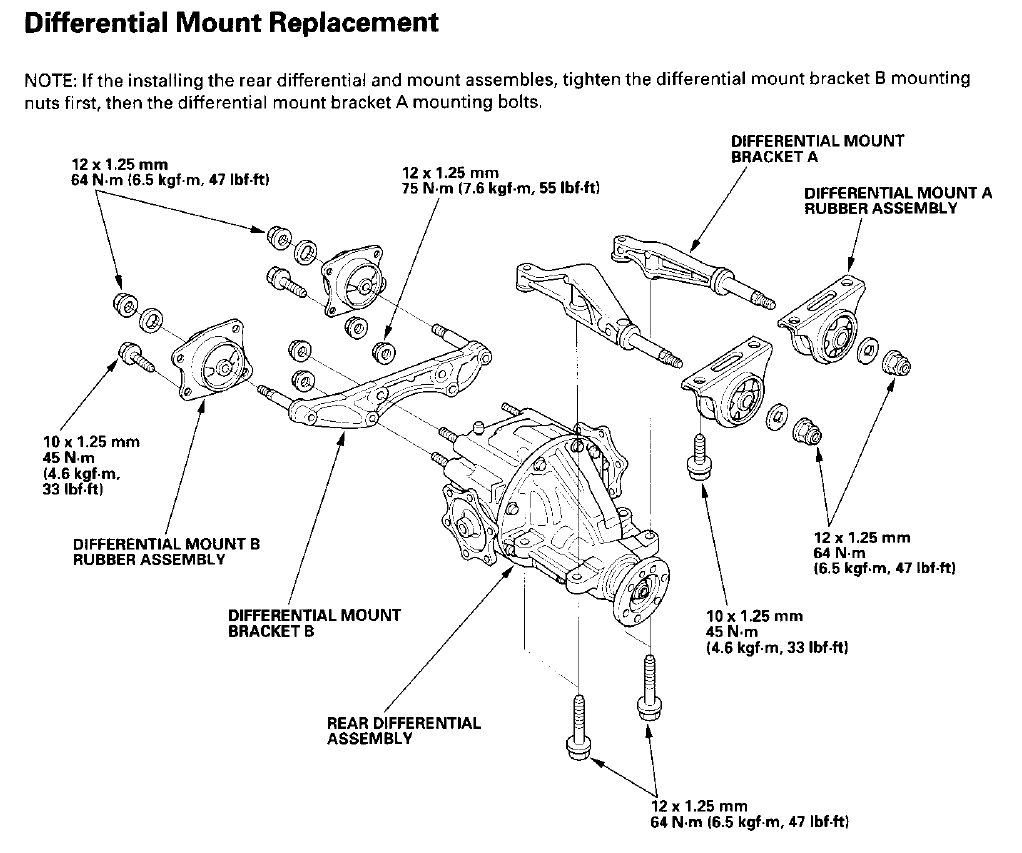
Remove the 4 17mm nuts that hold the rear of the differential (10 above), then remove the 4 14mm bolts at the front of the differential bracket (11 above). Slide the differential forward to clear the diff's rear studs then lower it with a floor jack.
Differential Removed
Notice the Fuel Vapor Canister out of its mount and hanging out of the way
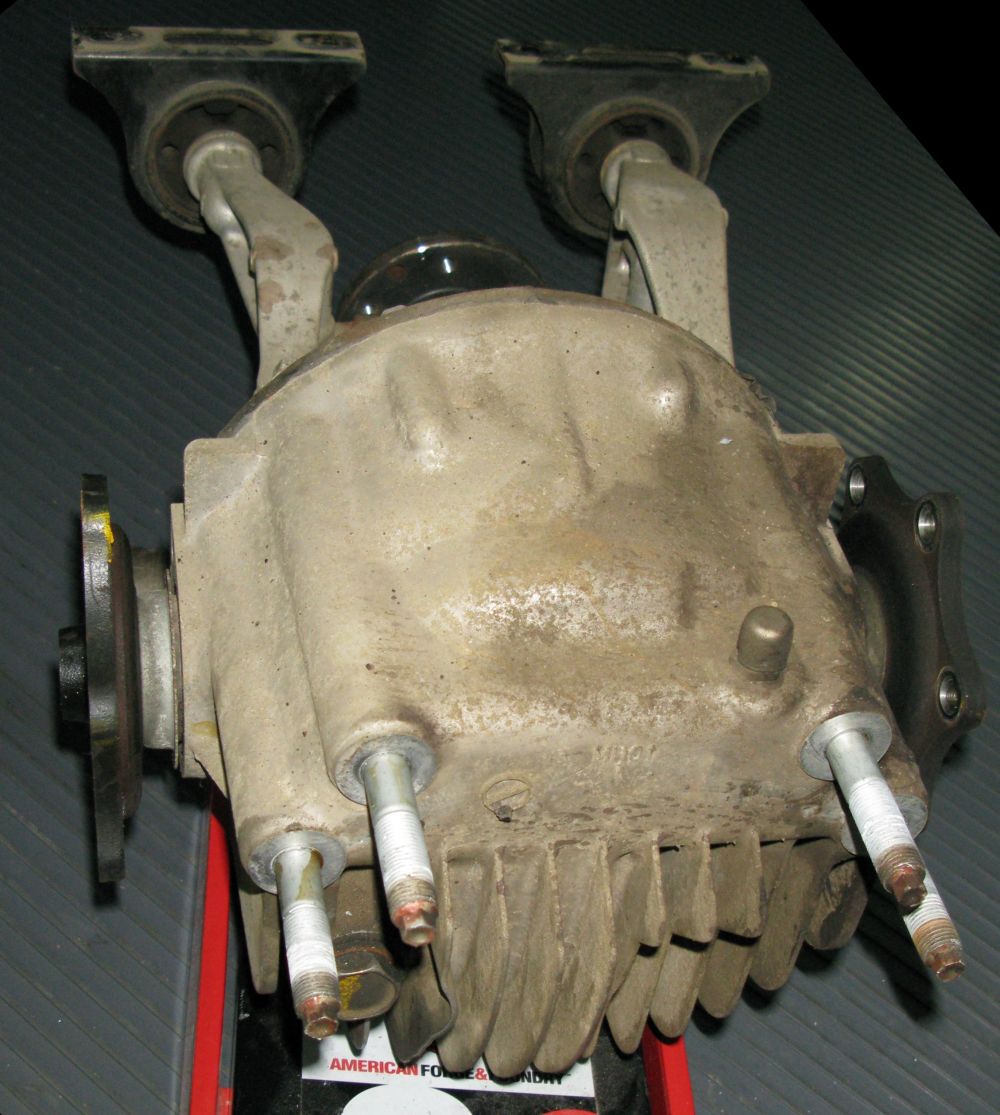
The Rear of the Differential (4 Studs are Removable Using 11/32 Socket)
If you're going to ship the differential remove the mounting brackets and the 4 studs at the rear of the diff. It will make for a smaller, lighter and more secure package. Shipping Tip from Puddy Mod Racing: Drain all fluid from the diff before shipping. If it leaks during shipping it will be considered a hazardous liquid spill and the diff could be tied up with the shipping company for a long time.
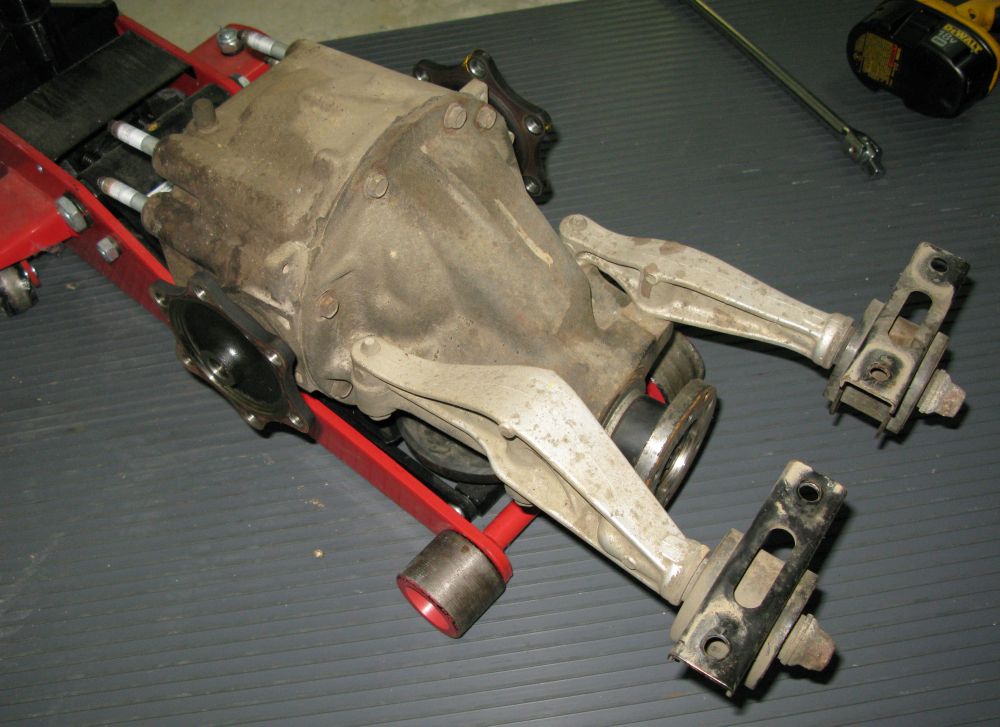
Front End of Diff with Mounting Brackets
Installing the Differential
Make sure your new diff has fluid in it before installation. To reinstall the diff lift it up into position using the floor jack. Keep the driveshafts and propeller shaft clear as you raise it. Move the diff to one side a couple of inches so you can compress one of the driveshaft joints and insert into the diff's output shaft. Slide the diff sideways to the other side to fully compress the joint you just inserted so you have room on the other side to insert the other driveshaft.
With the drive shafts inserted, move the diff rearward with the studs sliding into their mounting holes. The propeller shaft needs to hang low enough to be out of the diff's way. Move the diff to the rear until the front bracket mounting holes line up and insert the 14mm bolts and gently snug them down. Install the 4 17mm nuts onto the rear studs and torque to 55 lb-ft, then torque the 14mm front bolts to 33 lb-ft.
Line up your reference marks and install the propeller shaft bolts and funky washers. Make sure the washers are installed the same way they were before you removed them and put the car in gear and set the parking brake to hold the propeller shaft in place while you torque the 6 bolts to 24 lb-ft. These are special bolts and should be replaced every time they are removed.
Install the 12 14mm drive shaft bolts and nuts. The nuts go on the diff side. These are also special bolts and should be replaced every time they are removed. Torque them all to 61 lb-ft.

Remember to reinstall the vapor canister and cover, suspension stiffener and propeller shaft protector.
Installing Megan Racing 2 Piece Driveshaft Spacers
I installed Megan Racing Driveshaft Spacers to improve the longevity of the inboard driveshaft joints on my lowered car.
![]()
The Megan Racing Driveshaft Spacer Kit
![]()
Megan Racing Driveshaft Spacers In Place
These spacers are easy to install. You simply remove the driveshaft bolts, preferably with an impact wrench, pull the joint open by hand, insert the two halves of the spacers with the ridge facing the differential, install the provided longer bolts, lock washer and nut. The nuts have Locktite Blue pre-installed on their threads. Torque all 12 14mm bolts to 61 lb-ft.