How to Install Gauges
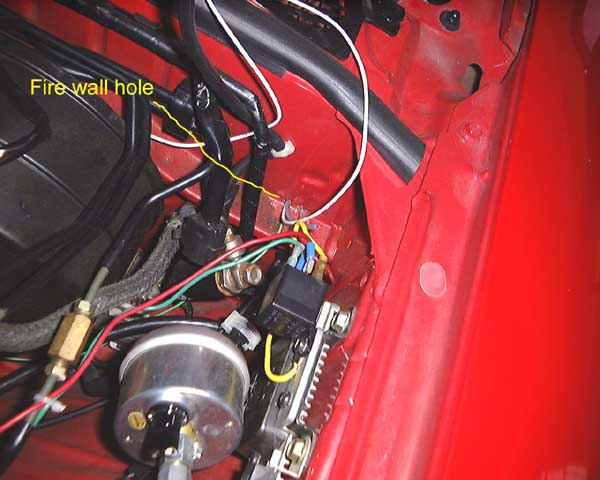
Where I went through the fire wall
You can also go through the same two holes in the driver side
fender well as a battery relocation cable. I used a small piece of 1/8 inch
tubing (same type as used by boost gauge) to fish the wires through. Just shove
the wire into the tube, put on a small piece of tape to hold the wire in, and
shove it through to the interior.
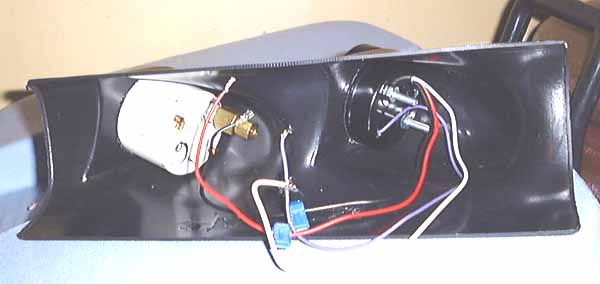
Back side of the AutoMeter A-pillar dual gauge pod
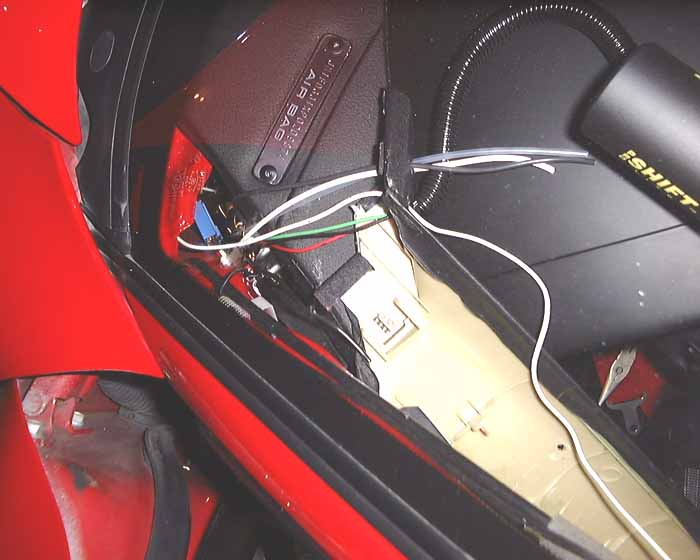
With A-pillar trim removed, hole in dash is exposed to run
wiring
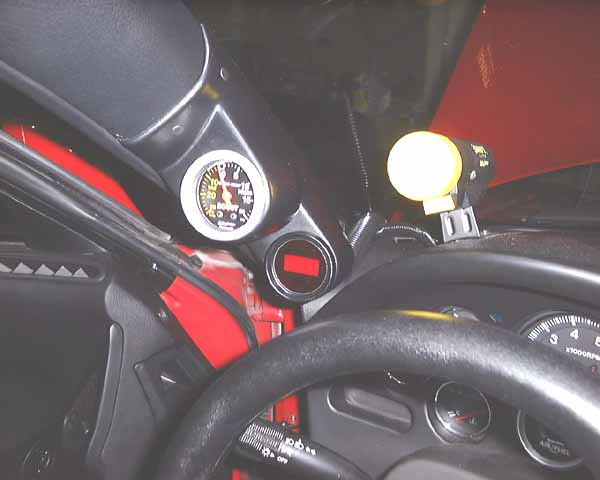
The installed pod, boost gauge and Cyberdyne digital water
temp gauge
The AutoMeter A-pillar pod's lower lip slides down into the
A-pillar trim slot, so you only have to secure the top. It comes with little
plastic buttons (see picture). Just drill two holes through the pod and A-pillar
trim piece and it's secure. AutoMeter also sells a single pod.

A 2 5/8 and 2 inch gauge (and mounting cup) mounted to
A-pillar
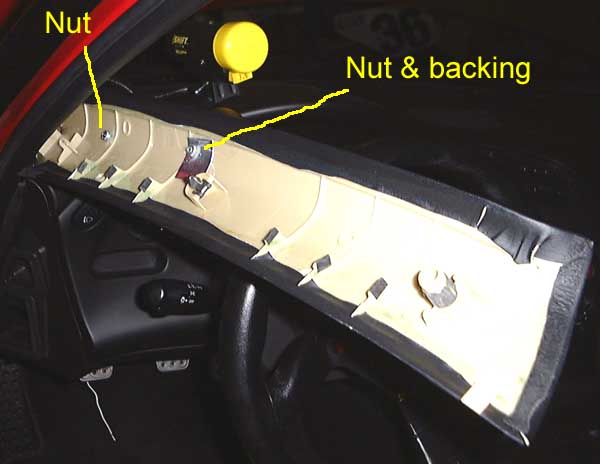
If you don't use a pod you can mount individual gauge cups to
the A-pillar, notice the aluminum sheet used to reinforce the plastic A-pillar
(used for large 2 5/8 inch gauge)
Just drill a small hole in the gauge mounting cup and the A-pillar trim
piece. I used a small (1/8 inch I think) flat head nut and bolt. If you don't
use a flat head the head will keep the gauge from fitting into the cup. The bolt
goes into the gauge cup then through a small rubber grommet (to reduce
vibration), then through the A-pillar trim, then a washer or backing plate then
a nut. Be sure to use a Nylock nut or Locktite to keep the nut tight.
You have to be careful how you mount the gauge. My large gauge would hit the
window on really big bumps.
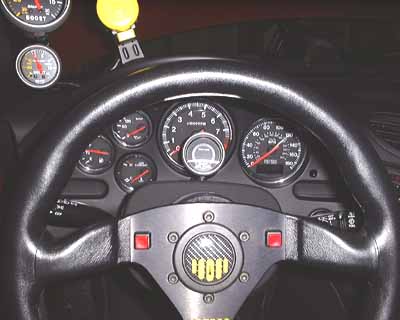
Steering column mounted AutoMeter air/fuel gauge
I like this mounting option. It doesn't block the tachometer
(but the steering wheel does). Just remove the bolts from the bottom of the
steering column cover then snap off the top. Follow the instructions above for
A-pillar mounting (same flathead nut and bolt and grommet).
Rob Robinette
|